Sewage in the house: how it is done
As a rule, the laying of all communications is designed simultaneously with the construction of the building, but sometimes the sewage system in the house on piles or on a strip foundation is installed much later, which causes a lot of inconvenience. Nevertheless, the provision of such convenience in a residential building is a necessary requirement of basic sanitary standards, so that, despite various obstacles, sewage pipes are needed anyway.
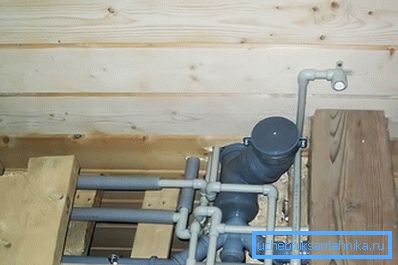
You can make such a pipeline yourself, and we'll talk about it below, as well as watch the video in this article.
Sewerage in a private house
Observe the slope
Note. When sewage is installed at home in the private sector, for this purpose mainly plastic pipes with a diameter of 50 mm and 100 mm are used, but besides this, a diameter of 32 mm for a dishwasher or washing machine, as well as 150 mm for the street, can be used.

- According to SNiP 2.04.01-85 *, sewage in residential buildings and adjacent areas should be installed with a certain pipe slope, which directly depends on their diameter. Thus, the optimum slope for sewage flow with a 50 mm pipeline section is 30 mm per linear meter, for 100 mm - 20 mm and for 150 mm - 8 mm, respectively. If we are talking about connecting a washing machine or dishwasher to the sewage system and water supply (32 mm pipe), then you can do without tilting for drainage, since the water here is forced.
- Increase of this parameter is allowed only on short sections (not more than a meter) - this allows you to limit the route as much as possible from the appearance of blockages. But the thing is that when the angle of the gasket decreases, the water moving by gravity will not be able to wash away the solid debris (food particles and feces), and as this angle increases, the liquid simply does not have time to do it.
- In addition, the instruction draws attention to corner fittings that have 32?, 45? and 90? for all diameters. So, turn 90? it is allowed only from the riser to the vertical plane or for 50-mm and 32-mm pipes in the room, as in the first case a good water pressure is created, and in the second case there is almost no solid debris in the liquid. If when laying the pipeline on the street it is necessary to make a turn of 90 ?, then for this they use two angles of 45? - A smooth turn is not so conducive to the formation of blockages.
Fittings and Reductions
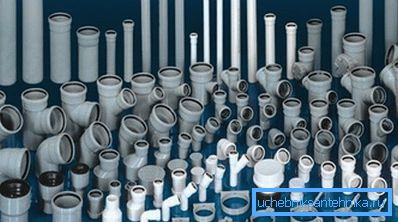
When installing, a sewage system for a house usually consists of pipes of different diameters, which never lie strictly in a straight line; moreover, the plane of the gasket may change and for this purpose there are many transitional fittings. Such adapters are used for tie-in, for turns, to change the plane of the gasket, as well as when changing the diameter.
The largest variety of such fittings are made for 100-mm pipes, but, nevertheless, you can also find a suitable adapter for other sections.
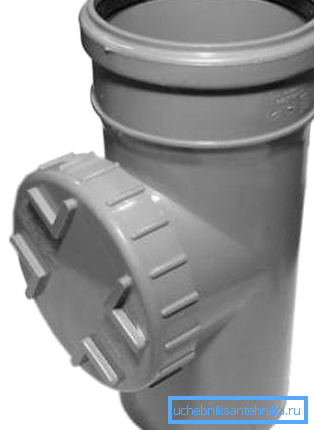
For sections of the pipeline more than 4 meters, as well as cornering revision audit, which is very similar to the tee, but the side opening is closed with a lid. This adapter is used to clean up blockages in remote areas.
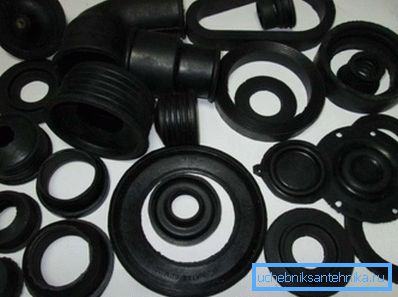
In addition, rubber reductions and seals are used for docking, which, in fact, can also be called reduction elements. Seals are used when docking pipes of the same diameter, when the end of one pipe is inserted into a slightly expanded glass of another (hence the reduction function) - the price of the seal is not even considered, as it is supplied.
But the reduction may be necessary when joining plastic with cast iron (one cannot do without it when replacing the riser in an apartment of a high-rise building). Or, for example, when switching from a 50-mm to 32-mm pipe (for washing machines and dishwashers) and, of course, when installing a siphon hose.

The pipeline (if it is not installed in the floor or wall) is fixed for immobility with the help of plastic or metal clamps of a certain diameter. Plastic, as a rule, is used for small diameters (32 mm), in other cases metal brackets are used.
Installation work in the house
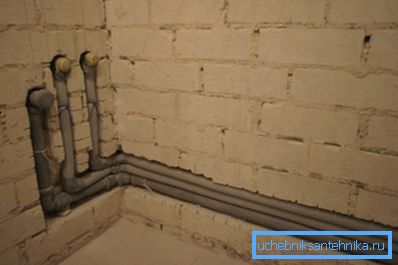
First of all, regardless of whether it will be a sewage system in a frame house or in a brick, block or wooden structure, you need to make a marking of the installation of sanitary facilities in relation to the exit of the pipe to the street. Therefore, first of all you need to determine where the sewage will go out into the street, as well as its deepening (we will tell about this a little later).
This marking will allow you to determine not only the footage and diameter of the material, but also the number and configuration of fittings required for different types of turns and junctions.
When the sewage system is being built in your house, then after marking the places for installation of sanitary facilities, you need to beat off the lines with the necessary slope, along which the entire route will be located, with a chokline (paint cord). Thanks to these benchmarks, you will be able to make pens in the right places or fix brackets (clamps) on this tag.
For the manufacture of grooves (grooves) used grinder with a diamond disc and a hammer drill with a chisel. The two rough lines of the diamond-coated disk make cuts, the depth and distance of each other depending on the circumstances. After that, a chisel (it is possible without a perforator) knock down the cut strip, adjusting its depth as necessary.
In order for the pipes to be kept in the trough, it needs to be fixed with something (before applying plaster or installing the box) and perforated metal band hangers that are used for metal frames for drywall are very suitable for this.
Recommendation. Ready wiring must be tested, pour water into it. If you notice a leak on any of the joints - do not rush to seal this place with silicone or sealant - in such cases, the joint must be disassembled, the seal should be adjusted and reassembled. In order for the rubber seal not to interfere with its friction butting, the end of the pipe is smeared with any liquid detergent for household needs.
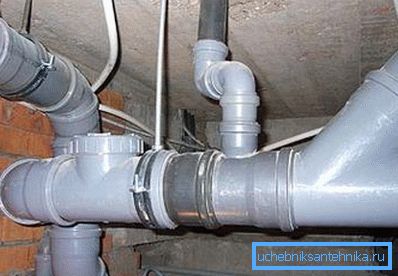
If the house has a technical floor or a basement, then you can avoid shaving the walls - just from each bathroom, make a drain through the floor to the main pipe, as shown in the photo above. In these cases, the horizontal pipe usually has a cross section of 100 mm and its slope, respectively, should be 2 cm per linear meter.
This method of wiring saves a lot of labor costs, as well as useful space in the room - you do not have to make a box in the room to hide the pipes.
Installation work outside

Now let's deal with the depth of the trench, which will mainly depend on two factors - the level of soil freezing in your area, as well as the distance from the house to the septic tank or cesspool.
For example, the maximum level of soil freezing in your area is one meter, and the distance to the septic tank is 20 m and at the same time you have to lay a 100-mm pipe. After installation, the critical freezing point should be at least 10 cm higher than the upper wall of the pipe.
This means that the house’s depth at the upper level will be 110 cm, and for a septic tank or cesspool, this figure will already be 110 + 20 * 2 = 150 cm. But this is just an indicator of the upper level, but not the base of the trench itself. but in order to determine the depth of digging you will need to add 10 cm of pipe thickness plus 5-10 cm for a sand cushion.
At the bottom of the trench pour a layer of sand with a height of 5-10 cm - so you can plan the ground so that it does not have sharp drops and, moreover, hard sharp objects (stones, wire, fittings, glass) - this can damage the plastic walls . After planning the sand should be compacted so that it does not later subside under the pressure of the soil.
It is more convenient to assemble straight pipe sections not in a trench, but on the surface, lowering the sewer line down with blocks of a certain length.
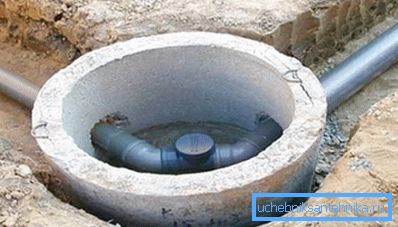
As we already mentioned above, with a pipe length of more than 4 meters or on turns, it is necessary to embed a revision fitting, and in order to provide access to it, wells are installed in such places.
The well itself can be made of concrete rings by punching inlets at the right places, but you can also lay out such a hole with ordinary bricks and plaster (which is better - you decide, since it is not a technological and technical relation to the quality of the sewer line).
After you have mounted the entire route and checked it for the density of the dock by draining the water, you can start casting the trench with soil. But the soil cannot be poured directly on the pipe - firstly, there may be hard cutting objects (metal, glass, stones) and, secondly, the soil in any case will give a drawdown, which can lead to deformation of the pipe.
To avoid such unpleasant consequences, sand is poured up to the ground, which should be at least 5 cm above the level of the upper wall.
But dry sand can also subside, but it cannot be tamped over a plastic pipe - plastic can be deformed. Therefore, in such situations it is very simple to do it - sand is plentifully moistened with water, and it sinks almost instantly as soon as the water reaches the base of the trench. After such a procedure of a plastic line, no subsidence of soil is terrible.
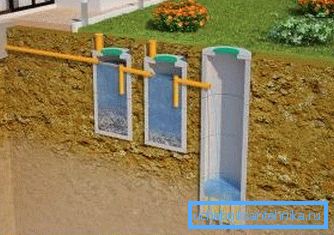
Sewage ends up with a cesspit or septic tank, which, by the way, you can do with your own hands, but this is a completely separate topic. In addition, a septic tank can be purchased at the store and its volume will depend on the number of juices in a given house, but its installation must be considered as a separate article.
Conclusion
As you understand, you can’t do a toilet in a house without sewage, therefore, despite all the inconveniences associated with the repair, you will have to do all the installation work on installing the sewage, step by step. It is a little easier to do this on the site, for example, you can get around valuable trees using corner fittings.