Shut-off valves for the toilet - types of structures and
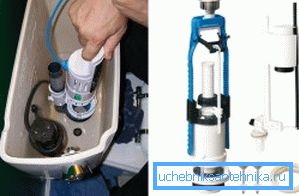
The main purpose of the valves in the toilet bowl is to fill the tank when it is empty to a certain level, after which the flow stops automatically. In this case, the configuration of the system may be different, and valves for a toilet bowl with a lower connection will differ from the version with the upper water inlet.
Consider what the system consists of, and what types it is.
Tank installation options
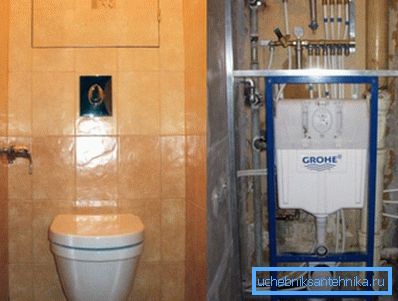
The choice of one or another variant of the system directly depends on how the cistern is located relative to the toilet bowl. Three main options can be found in houses and apartments:
| High capacity | This is what most of the Soviet-era sanitary facilities look like - a highly placed tank through a pipe discharges water. This design does not look very attractive, but it has two undeniable advantages: the simplicity of the system, which allows you to collect it with your own hands, and the high flow rate of water entering the toilet. But still in our time, this option is almost never used. |
| The location of the tank on the shelf toilet | This option is differently called compact and is the most popular today. The entire system is assembled together during installation, repairs and maintenance are also very simple, and you can cope with the work without special skills. This is the best solution in terms of price-quality ratio. |
| Recessed structures | Its feature is that the container is made of thick-walled polyethylene and is partially or completely hidden in the wall or niche. The most important thing in this version is to provide access to the tank in case of breakdowns, otherwise you will have to destroy part of the wall and re-do the finishing work. |
Design features
Shut-off valves for a toilet bowl can be made differently, it all depends on several factors, which we will consider below.
Filling method
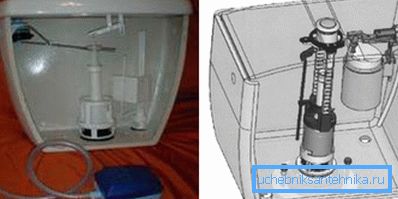
There are two options, each of which has its own advantages and disadvantages. The most common type is with the top, or, as it is also called, with a side feed hose (see here what needs to be done when the toilet is leaking).
Its advantages are as follows:
- Simplicity of design and availability of all items for inspection and replacement. It is enough to unscrew the button and remove the top cover. Instructions for assembling the system are so simple that, even seeing it for the first time, you can easily cope with the work, the main thing is to strictly comply with the scheme and carefully fix all connections and sealing elements.
- The second advantage is the low cost of such structures and a wide choice of options of different quality from different manufacturers.
Note! You should not save on quality - cheap plastic is very quickly deformed and loses its shape, which causes leaks and disruption of the entire mechanism.
- Another important factor is that the inlet is located above the water level, so there is no need for compaction, which further simplifies the workflow.. In addition, eyeliner can be done both on the right and on the left side, an unnecessary opening is closed by a plug that comes in the kit.
Among the disadvantages is the fact that due to the top location of the hose, the filling occurs with noise.
Note! Many manufacturers put inside the tank a soft outlet tube that goes to the bottom, thus filling with water is much quieter.
Bottom liner has its advantages:
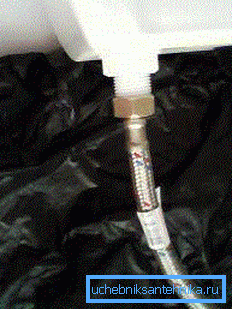
- Filling the tank is very quiet.
- There are no hoses in sight, which improves the appearance of the bathroom.
- The design is very simple, which ensures its durability.
The most important thing is to carefully fasten the liner through the sealing rings so that there will be no leaks in the future.
Drain mechanism
It's all quite simple, there are three main options:
- Rod or exhaust, when to drain the water you need to pull the system up.
- Push with single-mode drain.
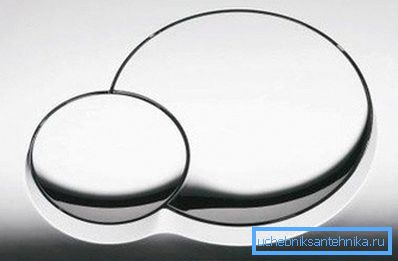
- Press with a dual-mode drain, when the narrow part of the button drains half the volume of the liquid, and large - the entire volume.
Installation
Installation of valves for the toilet bowl is performed in parallel with the assembly of the entire structure.
The works are fairly simple, but it is important to do everything carefully and follow a certain sequence to achieve the best result:
- The base of the drain system is installed first, it must be additionally sealed with a rubber ring and carefully fixed.
- If the variant with the lower liner is used, then the next step will be to fix the valves. It is fixed by means of two clamping nuts, between which the sealing rings are additionally installed. The mount itself must be well tightened to prevent leakage.
- Next, the tank is installed on the shelf of the toilet and secured with two bolts with rubber gaskets cone-shaped. A special rubber sealing washer is placed on the inlet, when the bolts are tightened, it is pressed tightly against the tile, preventing its damage and ensuring the necessary tightness.
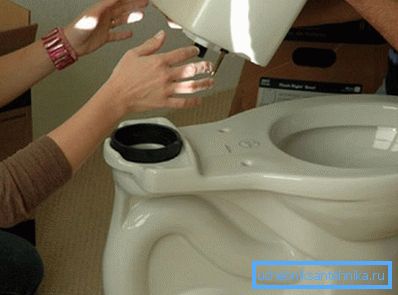
- Then the flexible connection is connected, the water outlet must be with a tap so that in case of need it can be shut off and the system can be serviced and repaired.
- The next stage is to set the float at the required level; in the case of the upper supply, the water should stand 10 cm below the inlet, from the lower - 15 cm below the upper edge of the tank. The float moves either by a special toothed bar or by adjusting the angle between the two bars on which it is installed.
- At last, the lid is closed, and the water drain mechanism is fixed, if the fittings were bundled with the product, then all elements will be fitted, if a universal option was used, the stem is simply cut off at the right level, and a button or handle is put on it.
Conclusion
In fact, the assembly is much simpler than it seems at first glance, all elements are fitted to a specific mount and cannot be confused (read also the article Cover for a toilet with a microlift - features and a device).
The video in this article will vividly show some important points of the workflow.