Siphon for a shower cabin: knee, bottle models, ladders
When all the repair work in the bathroom came to an end, it is unlikely that anyone would want to check everything and reinstall it again, all parts and assemblies must completely cope with their tasks. Moreover, the cost of equipment were rather big.
One of the basic conditions for effective and reliable operation is the correct connection of water supply and competent discharge of sewage into the sewage system. Today we will examine in detail how a siphon is installed for a shower cabin with a low or high sump.
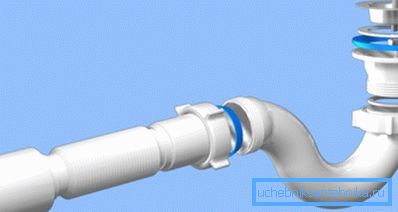
We hope that after reading the article you will not make common mistakes during installation. But, first of all, you should find out what types of data of sanitary devices the industry offers and what features they have in order to understand how to remove the siphon from a shower cabin of a certain construction.
What is the drain siphon for?
With this device you can solve two problems:
- quickly drain water from the pan;
- prevent unpleasant odors from entering the sewer system.
The main element for the latter case is a curved pipe segment, which must be required. So it is given to create a kind of water seal, thanks to the liquid remaining in it.
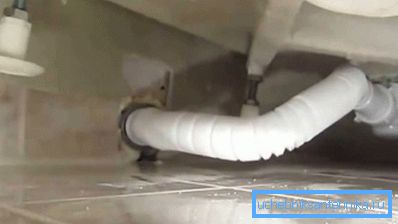
Tip: the product configuration should be selected on the basis of its installation.
Knee siphon for shower
It is made from a pipe in the form of a letter S or U, which does not allow water to completely leave the section of the pipe when it is drained and due to which a water seal is formed. Since the curved part is actually the lowest point in the flat's drainage system, debris settles here most often, which leads to blockages. Therefore, usually in such places there are special holes for cleaning. The price of such devices may be small, it all depends on the material.
Tip: the most convenient pipe siphon models are corrugated, which can be installed anywhere.
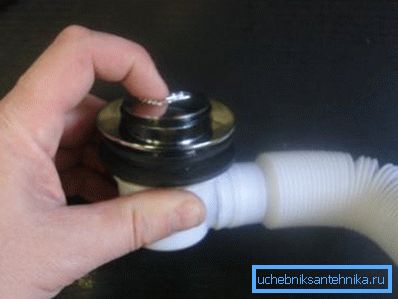
Of the additional features of the latter, their flexibility should be noted, which makes it possible to make any configuration for the manufacture of a hydraulic seal. After bending, you only need to fix the resulting position with the clamp.
Another positive moment of the devices is only one connecting node, which is located at the point of contact with the drain. This reduces the likelihood of leaks when using them.
Tip: before you replace the siphon under the shower, we recommend that you turn off the water.
Of the disadvantages:
- instability to influence and temperature drops;
- in the folds of the corrugations accumulate solid precipitation and debris, which often leads to blockages of the system.
Bottle drain
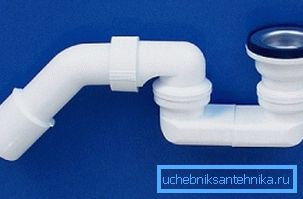
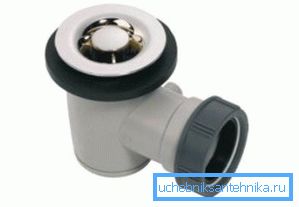
The design of these products is rigid, in contrast to the previous version. She reminds the bottle, which is why this name of the siphon went.
The standard device is a cylinder that has an upper and a side pipe:
- the first is connected to the drain hole of the pallet;
- the second drains into the sewer.
Note that the side exit must always be located above the lowest point of the cylinder so that a trap is created in the remaining part. The advantage of this drain unit is the speed and ease of its installation and maintenance, which you can do with your own hands, even without having the skills of a plumber.
Ladder drain
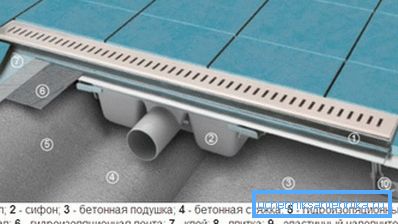
This system is mounted directly into the hole in the shower stall, through which water enters the sewer system. Usually their height does not exceed 80-200 mm, although the effectiveness depends on this - the lower the drain is installed, the better its work will be.
How is the installation of drain shower
Installing a siphon in general does not differ from other types of work - you must adhere to the rules and consistently perform the necessary operations. In fact, only this will determine the performance of the system. Below is a process instruction:
| Stage I - installation of the frame and setting the angle of flow |
|
| Stage II - drain connection |
|
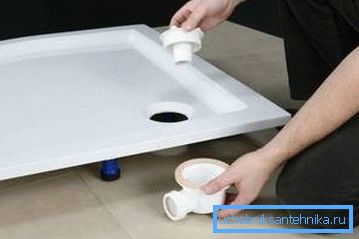
Test run water and check connections for leakage. Also determine if a water seal has formed in the pipe.
Tip: if you have a shower with a high tray, you may need a overflow system. In this case, connect the overflow to the siphon using a tee.
Conclusion
Installing a siphon for different types of shower tray trays is easy. Having only a few compounds minimizes work. The main thing in this case is strict observance of the manufacturer’s instructions and installation of gaskets. The video in this article will provide an opportunity to find additional information on the above topic.