Storm sewage system
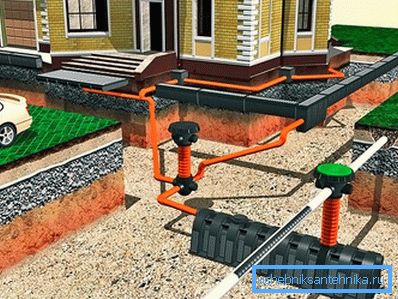
The stormwater drainage system is arranged with the aim of observing favorable living conditions and functioning of households. It provides engineering protection of the territory from flooding by surface runoff waters, and is also a precautionary measure against flooding by groundwater. The storm sewage system is a network of storm water inlets, trays, pipes, wells in which rain and melt water is collected and transported. Installation of storm water is expensive. This is a time-consuming process, but the collected storm sewage with your own hands will help to significantly save costs.
Types of surface drainage
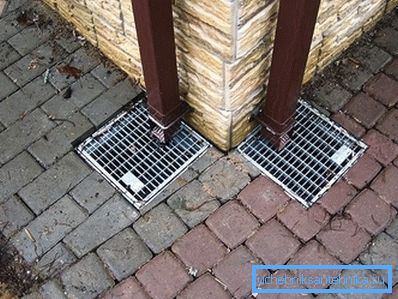
Currently, two types of storm sewage systems are used, which complement each other:
- Linear drainage - used to collect melt and rainwater from a large area.
- Point drainage - used for local collection of surface water.
Linear drainage trays collect and transport water from large surfaces, point-like - perform the function of local water collection (in case the vertical layout of the object does not allow water to be diverted by trays) or an inspection well. Also chiseled drainage is often used to collect rainwater from drain pipes.
Storm sewage systems are made of plastic, concrete, polymer concrete and fiber-reinforced concrete. Each type of tray is designed for a specific load class. In private construction there are three classes of loads:
- A15 pedestrian areas, bike paths, courtyards.
- B125 garages and parking for cars.
- S250 sidewalks, garages.
Calculation and design

Before you do the stormwater, you need to make all the hydraulic calculations, build plans and profiles. Hydraulic calculation of the surface drainage system is carried out on the basis of SNiP requirements, taking into account the geoclimatic and geometric characteristics of the catchment area, the results of which determine the required cross section of the drainage tray, the number of discharge points and the diameter of the drainage pipe.
In order to make hydraulic calculations, we need the following initial data:
- precipitation intensity at the location of the stormwater installation;
- type of surface (lawn, paving, etc.) and its area;
- terrain slope;
- roof area of the house and economic structures.
With this data, you can calculate the amount of water that you want to take, using a simplified formula:
Q = q20* F * Z, - where
- q20 - rain intensity, l / s per 1 ha, lasting 20 minutes, is taken according to the SNiP;
- F is the area from which surface waters are collected, ha;
- Z is the average value of the coverage ratio.
For private construction, it is enough to operate with several Z values:
- lawns, ground cover - 0.35;
- macadam without binder - 0.4;
- concrete coating - 0.85;
- asphalt concrete pavement - 0.95;
- roof of the house - 1.
The amount of water is calculated for each section served by a single inlet, separately. The capacity of the drainage trays depends on the angle of inclination, the type and size of the tray - these data are provided by the manufacturer.
On the plan indicate the locations of trays, point inlets, inspection wells and discharge points. A mandatory element of the plans, if the profile is not built, is the presence of marks indicating the slopes in the sections and, accordingly, the movement of water. In the case of a complex drainage system, you need to build a profile with an indication of the marks of the lower boundaries of the chutes, wells, and discharge pipes.
Installation Features
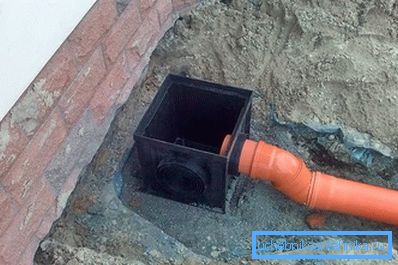
In accordance with the plan, trenches are prepared for installing trays and laying pipelines. To install a storm sewer, you will need the following tools:
- level;
- hammer for tiles;
- cord;
- shovel;
- roulette;
- Bulgarian.
Cord mark the line-level, under which the line of trays will be exposed. The trench width is equal to the width of the tray plus 10 cm of tolerance on each side of the tray, and the depth is equal to the height of the tray plus 10 cm. The cord is lowered just below the finish coat. Installation of drainage start from the point of discharge. The trays are installed in a trench on a concrete pad with the obligatory cementing. If necessary, the tray is leveled with a hammer for the tile, lightly tapping the edges with level control. The thickness of the walls of the concrete cage depends on what class of load is assumed. For loads of classes A15 and B125, the thickness of the concrete base must be 15 cm, the thickness of the concrete around the walls is 10 cm, for the load class C250 the thickness of the walls of the concrete casing is 15 cm.
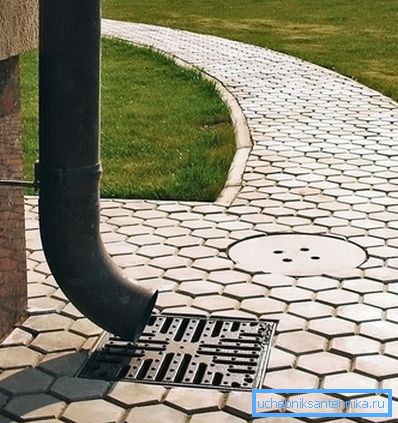
When installing plastic trays, concrete can deform its walls. To prevent this from happening, trays are installed along with grills. In order for the grids not to get dirty with the solution, they can be wrapped with plastic wrap.
In order for water to freely enter the system, and the wheels of the car did not destroy the walls of the tray, the grille should be installed 3–5 mm below the surface level.
The trays are connected to the joint using the "thorn-groove" system. To increase the service life of the shower, all the joints in the trays are sealed, and a plug is installed on the last tray. In the case of connecting the trays at an angle, they must be cut and joined at an angle of 45 °, and the same should be done with the grids. As a rule, the grinder can be cut, but a diamond wheel is used for polymer-sand and concrete trays. When sawing, you should try to grab both sides of the tray.
When mounting trays, it is imperative to provide a thermowell between the grill and the surface on both sides, which is filled with sealant.
Trays are connected to the storm sewage system through a sand trap using PVC outlets with a diameter of 110–150 mm. For this it is better to use bends at an angle of 45 ?. The trash can not install, if there is no danger of debris in stormwater. In this case, for connection to the system, trays with a vertical branch down or end cap with a hole for connecting the pipeline are used.
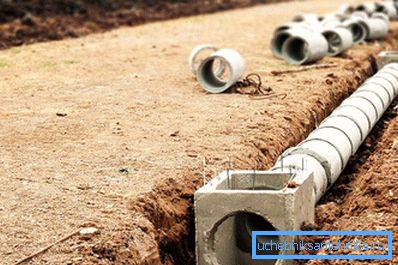
It is better to deepen the discharge pipe from the tray or sand trap below the soil freezing mark, then the warm air from the system will not allow the water in the sand trap to freeze, which will allow the system to work properly for many years.
The speed of movement of storm water should be from 0.4 to 0.6 m / s with a minimum slope on the bottom. Thanks to this, the drainage system will not be silted. In the absence of natural slope of the surface, you need to use a cascade of trays or trays with a slope that will create a height difference and provide the necessary flow rate.
The minimum diameter of the pipelines for storm water is 110 mm, the slope of the pipelines must be at least 0.01 or 1 cm / m, for a 150 mm pipe the minimum slope is 0.008.
Connection of point inlets or sand traps to the transporting collector should be done through oblique tees or inspection wells.
During operation, the trays should be periodically cleaned of debris, while removing the grating, as well as carrying out the excavation and cleaning of the filter from the sand trap and point drain.
Maybe you will be interested to know:
- How to choose the right geotextile for drainage?
- Maintenance of the drainage system
- How to strengthen the drainage ditch?
Video
You can learn more about the storm sewage system in a private house with your own hands, by watching the video footage: