Tile shower - manufacturing features
To decorate the bathroom with beautiful and original sanitary ware, it is not necessary to purchase designer products for big money. Many designs can be made independently. As an example, consider how the shower is done from the tile with his own hands.
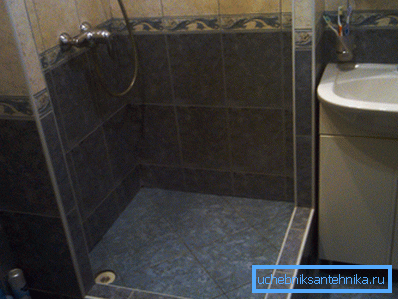
General information
First of all, it should be said that the base of the shower is a pallet, which is a concrete structure, decorated with ceramic tiles. Accordingly, the structure has a rather large weight.
Therefore, it is not necessary to construct such a booth in a room with a wooden floor. But in modern apartments and houses where the bathroom has a screed, such a tray is an excellent option. Moreover, its advantages are not only in attractive appearance, but also in strength.
In addition, the tray of tiles for the shower is quite practical, as it does not require complex maintenance. In addition, if you wish, you can replace the tile, with the result that the design will look like new.
As for the walls of the booth, they can be done in different ways, which we will see below.
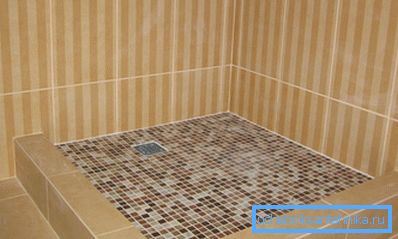
Design
Pallet
First of all we will consider the device of a shower cabin from a tile. A sidewall is made along the contour of the foundation, which prevents water from entering the room.
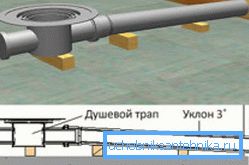
A compulsory element of the pallet is the ladder drain that provides drainage to the sewer. So that the water does not linger on the floor of the shower, the coupler must be performed with a slight slope to the ladder.
Walls
Since the pallet is made in the corner, the booth is obtained with two ready-made walls, which can only be trimmed with tiles. In order to completely protect it from the common space, it is easiest to install an L-shaped eaves and hang up special curtains.
More difficult, but at the same time more attractive option - the implementation of the glass door. Below is a detailed look at how the walls are made of glass.
Production of shower stall
Waterproofing
It is necessary to begin work with arrangement of waterproofing. This is especially true for apartment dwellers, as water seepage in this case is simply unacceptable.
In addition, it is necessary to prevent the penetration of moisture into the walls. Therefore, they should also be waterproofed to a height of at least 2 meters.
Work on the preparation of the base is performed in this order:
- First you need to remove the old screed.
- Then on the floor it is necessary to lay several layers of roofing material.
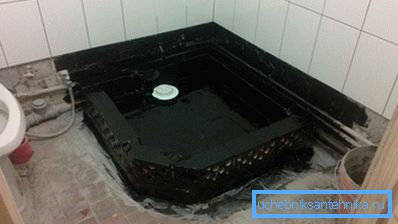
- After that, the walls should be covered with bitumen mastic.
At this preparatory phase of work is completed.
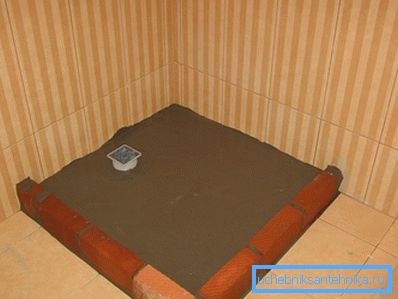
Arrangement of the pallet
Instructions for the manufacture of the pallet looks like this:
- To begin work it is necessary with a site marking. Outlines the future design can be chalk.
- Then you need to perform a drain, which should be connected to the sewer under a small slope.
- Next is the brick formwork. In the future, the brick will serve as a side of the pallet. If necessary, the brick can be laid in two rows.
- After this, the bricks and the floor need to be covered with bitumen mastic again.
- When the mastic hardens, you can start pouring formwork. It should be borne in mind that the floor should have a small slope in the direction of the drain.
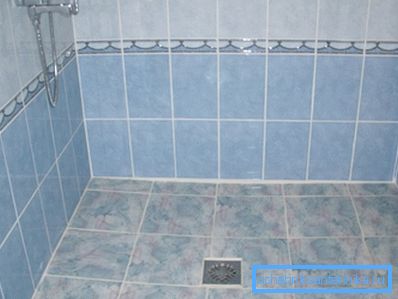
Finish
After the arrangement of the pallet, you can lay out the shower from the tile. It is necessary to begin with plaster walls with cement mortar with the addition of liquid glass.
In order to ensure the adhesion of the plaster to the mastic, the wall should be covered with a primer, as well as filled with plaster mesh. On our portal you can find detailed information on how to plaster the walls in the bathroom.
Note! Before proceeding to the wall decoration, it is necessary to draw hot and cold water. In order to properly arrange the pipes, you need to decide in advance which fittings will be used.
After preparing the walls, you can proceed to the finishing, however, you will first have to decide on the type of tile.
Of course, when choosing, first of all, you should focus on the interior design of the bathroom and your own preferences, however, in addition to this, some other points should be taken into account:
- Shower tiles should be non-slip.
- The coating, especially that used on the floor, must be strong enough.
As for the process of laying tiles, it does not differ in any particular features. The only thing you should use is a special glue that tolerates high humidity. In addition, it is advisable to grout with a silicone sealant to ensure that the surface is completely sealed.
Fittings installation
The fittings include a watering can and a mixer. It should be noted that in the case of using a mixer with a stand that is mounted on the wall, its installation is carried out after finishing the booth. If you plan to install a multifunctional shower panel, then its installation should be dealt with before finishing, since the device is built into the wall.
Installation should be carried out strictly according to the scheme that is attached to the equipment. As a rule, this work is nothing complicated.
Wall and door installation
The glass wall with the glass door is in harmony with the ceramic cabin best of all. To make such a construction is quite simple.
First of all, you need to purchase Sekla of suitable size with a thickness of at least 6 mm. The price of these products, depending on the workshop, may be different, so it is advisable to contact several companies at once.
Begin installation by installing the wall:
- To install the glass, you will need a special profile of suitable thickness, which is mounted on the side of the pallet and on the wall.
- On top of the glass is fixed fasteners spacers. Find them in stores is not easy, so you can order in a metal workshop.
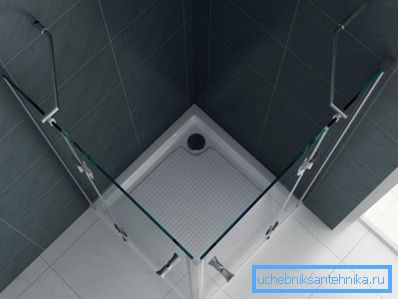
- Then the glass must be covered with a tinting film.
- After installing the wall, from the second glass you need to make a door. For its installation should use special hinges that are installed without drilling.
- At the end of the work, a handle should be glued to the door, which can also be purchased at a specialty store.
Tip! Hinges for the door can be chosen for the stall accessories, for example, yellow or chrome.
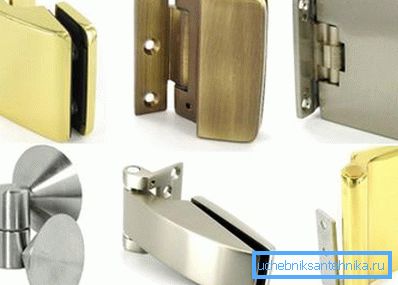
In this process, the manufacture of shower stall completed.
Conclusion
It is much easier to make your own ceramic tile shower stall than it might seem at first glance. You only need to be able to perform basic construction operations and to comply with the above sequence of actions.
From the video in this article can be found with some additional information on this topic.