Toilet bowl drain: design, repair, replacement
The drainage mechanism for the toilet bowl is a multi-component design that is located inside the tank. The functioning of this node directly determines how comfortable we will use the device, and how well the flush will be carried out.
Modern mechanisms are usually made with an adequate margin of safety, but still sometimes they need repair and replacement. And so that we can accomplish this task with our own hands at the proper level of quality, it is worthwhile to first understand the general principles of the functioning of the system.
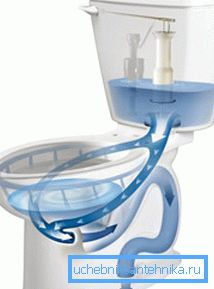
Drain design
Principle of operation
The drain tank in a modern toilet bowl is a container inside which there is an uncomplicated mechanism.
This node is responsible for the metered flow of water, and works in automatic mode:
- Water from the pipeline through the hose enters the tank through the filling valve.
- Gradually filling the tank, the fluid acts on the control devices (we will talk about their design below), which, upon reaching a certain level, leads to blocking of the filling valve.
- When you press the button on the lid of the tank, the second valve opens - the drain. Water leaves the tank and the filling valve opens again.
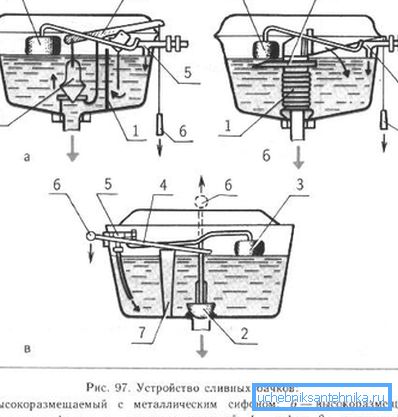
Such alternate action of valves is very convenient: we do not need to ensure that the tank is constantly filled, or that the liquid does not overflow. Naturally, to ensure smooth operation, all parts of the system must function correctly.
Main elements
The mechanism for a toilet cistern can have a very different configuration, but in almost any case it includes three elements:
- Valve to fill the tank.
- Float to adjust the water level.
- Overflow system (drain valve).
Note! The instructions for the flush mechanism for a toilet bowl usually contain a drawing of the valves with an indication of the size and configuration of these elements and auxiliary parts. This document will provide us with invaluable assistance in carrying out repairs.
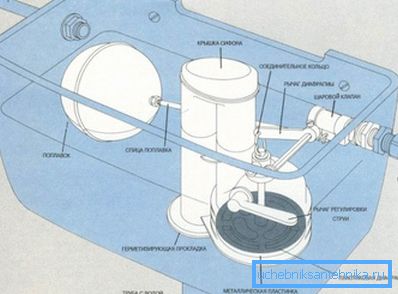
These parts interact as follows:
- The filling valve is a nozzle, built into the bottom or side wall of the drain tank. Outside, a thread is cut into the branch pipe, to which a pipe with cold water is fastened with a fixing nut or other fitting.
- On the inner side of the valve is located the locking mechanism connected to the rocker arm.. The float is attached to the other end of the rocker arm - a plastic tank that rises as the water level rises.
- When the float is lowered, the inlet valve opens. When the float is raised, the rocker gradually shifts, and upon reaching a certain level, blocks the locking mechanism that interrupts the flow of water.
- Separately, there is a drain mechanism, which by pressing a button opens a hole in the bottom of the tank. Water, entering the toilet bowl at high speed, flushes its contents into the sewer.
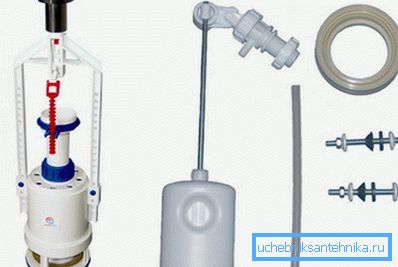
Note! Modern models are equipped with a double drain system: by pressing one button, we release all the water, by pressing the other - only a part of it.
- The drain valve is usually equipped with a so-called overflow.. This node insures us against overflowing the tank: if the locking mechanism for one reason or another does not work, the water does not pour out, but simply enters the sewer through the slightly open bottom flap.
Despite the seeming complexity, the repair of the toilet drainage mechanism can even be carried out by a beginner. To do this, it is necessary to understand the features of the structure installed at your site and purchase the appropriate part for replacement. Well, so that you do not get lost in typical situations, below we present some useful recommendations.
Repair and service
Trouble-shooting
In this section we will explain how to repair the flush mechanism in the toilet. As a rule, the repair does not cause any particular difficulties, however, in some cases it is necessary to perform a complete replacement of the drain fittings.
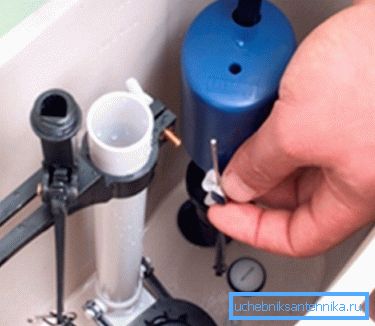
If the problem is local, then you need to act according to a simple scheme:
| Malfunction description | Algorithm of repair work |
| Filling the float with water |
|
| Leakage in the exhaust valve |
|
| Problems with the drain button |
|
| No water enters tank |
|
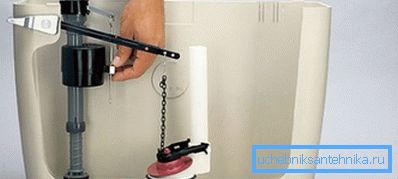
Replacement mechanism
If the drain mechanism is broken in the toilet (ie, the methods described do not help anymore), then it can always be replaced.
We do it like this:
- We acquire drain fittings of the same model, as established at you. Here, an exact match is very important, since even the smallest differences in dimensions may lead to the inoperability of the mechanism.
- Before replacing the drain mechanism in the toilet, turn off the water and empty the tank.
- Remove the cover from the tank, after unscrewing the drain button.
- Then disconnect all hoses and dismantle the inside of the valve.
- Bottom unscrew the bolts that secure the tank to the base.
- Remove the tank, and then remove from it the lower part of the drain mechanism.
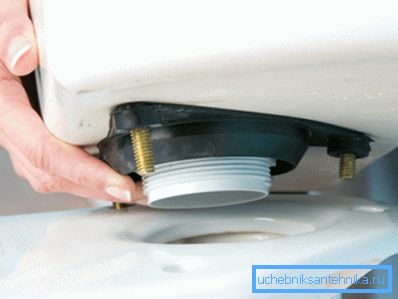
Note! You can take the opportunity to clean the internal surfaces of the toilet bowl, which is very difficult to access when assembled.
- Next, in the vacated hole install new parts.
- We return the tank in place, fixing it with the help of the same bolts. If the fastener during operation has rusted, it should be replaced.
- We continue the assembly of the mechanism, and after its completion - we attach the supply cranes.
Next, serve water, ensuring that there are no leaks. The first discharge is carried out with the cover removed to check the operation of the system.
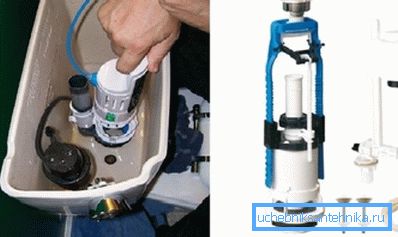
If everything is in order, we return the cover to its place and fix it with the button.
Conclusion
Complete replacement of the drain mechanism in the toilet cistern is required relatively infrequently: in most cases, performance can be restored by correcting one or more parts. But even if the system is completely out of order, an inexperienced plumber can also fix it.
The video in this article contains more detailed recommendations on this subject, so newbies are definitely worth exploring.