Toilet with cistern: features of the device and installation
No matter what volume of toilet cistern - more or less, what material it is made of or where it is located, this device is its integral part. So we will consider these two components depending on each other.
All modern cisterns are very similar in their methods of attachment, and this is not of particular interest, but the wasteful conclusion of a toilet bowl can play a crucial role in its selection. Below we will talk in more detail about the various nuances, as well as show you the video in this article.

Tanks and toilets
Tanks
Note. It should be noted that there is no such thing as a toilet with an upper cistern at all, since in any case the reservoir for draining can be located only above the level of the toilet.
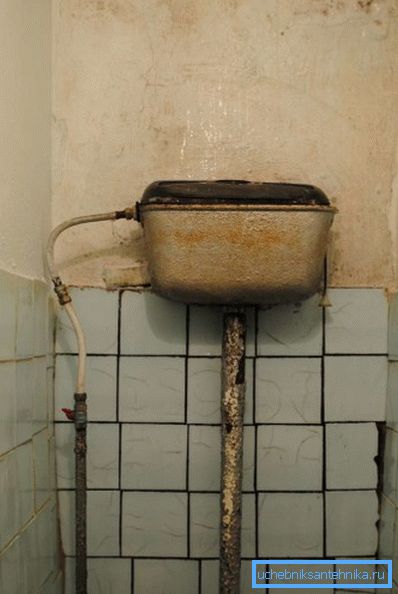
At present, it is quite difficult to find such a capacity in the toilet, which you see in the top photo, but, nevertheless, it is possible, because the structure of this type of toilet cistern is very simple, and therefore reliable, which allowed them to remain until now. .
Such tanks were made of cast iron and had a side lever for opening the stop valve to the toilet bowl. In addition, all the nodes of such a mechanism were as separate parts that can be changed and repaired, which allowed these rare books to be preserved until our time.

The locking mechanism itself was very similar in shape to a plunger with a rubber or plastic head, however, the principle of operation of this valve has not changed in our days. The water entering the side of the upper part of the tank got inside, and there was a float connected by a lever to the shut-off valve of the water supply opening.
The higher the fluid level rose, the higher the float rose, dragging the valve with the lever and pressing it against the hole until it finally blocked it. When pressure was applied to the drain lever (it was pulled down), he lifted the plunger and the water was discharged, and the entire filling cycle was repeated anew.

At present, a toilet is being made with a low cistern, that is, the tank is located directly on the cupboard in the back of the appliance, although the principle of water collection and discharge for sewage flushing has not changed at all, but significant changes have occurred in the device of the drainage mechanism.
Now water is discharged by pressing a button that actuates the valve stem, lifting it with the help of reverse thrust (in earlier versions, the stem simply went up with a ball screwed to it over the top of the lid)
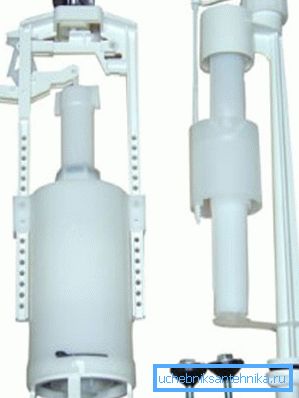
The main difference here is not in the principle of operation, but in the design of valves, as modern mechanisms are made in the form of two modules - one to adjust the water supply to the tank, and the other to adjust its discharge.
So, if any component of the mechanism fails, then it simply does not make sense to repair it:
- first, there everything from plastic and rubber and spare parts, as such, to the modules does not exist;
- and, secondly, it is much easier to replace such a mechanism from two modules entirely - good, reasonable price allows you to do it.
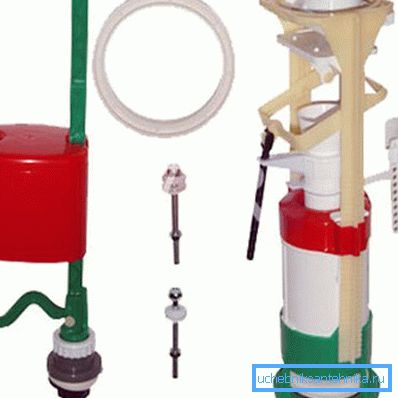
A double sink, whether it is a toilet with a flat cistern or with a convex one, can be adjustable, or it can be a default, which is extremely unprofitable for private use. For example, if the capacity of the cistern of the toilet bowl is on average 8 liters, then a small drain will dump 4 liters without options.
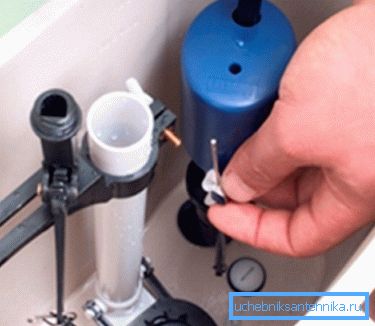
So, how many liters in a toilet cistern and how much water it will dump can depend on you, that is, you can simply adjust this level using the float's movement capabilities. The float is fixed on the toothed vertical bar and it can be raised higher or lowered lower - the higher you lift it, the more water will be collected in the tank and, of course, discharged for flushing.
Toilet bowls

Any toilet with a built-in cistern can differ in the slope of the nozzle and this is its main distinguishing feature that you should pay attention to when buying and installing.
The thing is that this outlet may have a different slope, that is, be straight at 90 ?, inclined at 45? or strictly vertical to the floor. The choice of model will depend on the location and inclination of the socket of the sewer drain.
Consider this example: you take a toilet with a direct outlet and want to install it in a small bathroom, where the door opens inwards and the slope of the socket of the fan tee has 45 ?.
In practice, this means that you have to move the toilet to the riser as close as possible so that the door does not hit it, and you can’t put a hard plastic adapter for the connection, as there is not enough space. It remains only one thing - to insert a corrugation, but in the socket it will sit tight, but the cuff will slide from the pipe from the tension, forming a gap at the top of the pipe.
Note. A similar situation will also be observed with another combination, when a toilet with a built-in cistern has an inclined nozzle, and the socket of the fan tee comes out of the wall at an angle of 90 ?. The same thing will happen, only the cuff will crawl to the bottom.
Installation

- So, let us imagine that we have chosen the toilet we need with the correct inclination of the nozzle and the tank (single, double) suitable in terms of volume and method of discharge. The next step is to mark the floor under the sole, as in the photo above, and for this you have to connect the device to the fan tee and choose the most suitable position for it. After that, outline the perimeter of the sole with a pencil or a marker, as well as put marks through the holes for the bolts to fix.

- Then, temporarily remove the plumbing fixture to the side and in the place marked for fixing, drill holes. If the floor is covered with ceramic tiles, then the tiles should be made with a drill or a perforator, but in the drilling mode without impact, as required by the instructions, in order not to break the tile. Perimeter in the line inside go with silicone sealant - this will cancel the possible crackle and remove irregularities.

- Now - the most crucial moment - to install the toilet on the marked place and connect it to the fan tee, and this will need to be done simultaneously, without smearing the silicone on the floor. If a corrugated hose is used as an adapter, then, due to its flexibility, this process will take place somewhat easier, with a rigid adapter - somewhat more difficult, but in any case at this point it is best to work with an assistant. Anchor bolts with dowels are inserted into the holes and clamped, but be careful not to over tighten the bolt and not to inflate the ceramic sole of the toilet bowl.
- At the final stage, all you have to do is to install the tank on the dish shelf, fasten it and connect it to the water supply. In some cases, when installing the tank, silicone is used - this is necessary when the gaskets resemble foam rubber - they are likely to skip and grease them with sealant.
Conclusion
If you have a water supply system in your house (apartment) and there is a sewage system, then installing a toilet with your own hands is not that difficult - the main thing is to follow the recommendations given above and given by the manufacturer. When assembling the tank, you can simply look at the drawing in the manual, although it is not always necessary to install two modules.