We choose and correctly install the siphon under the sink
Our goal is to tell you about what a siphon under the sink is for and what it is in general, or what the purpose of this node is and whether it is possible to do without it. Such structures may differ from each other, although in any case they perform the same function - they filter waste water according to the principle of solid sediment discharge.
Our story will be supported by the video in this article, which will more fully cover this topic.
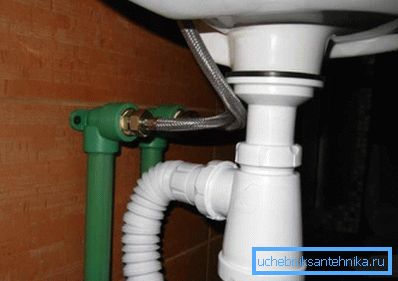
Bottle Siphon
Acquaintance and choice
Note. The choice of one or another siphon is regulated not by the instruction, but by the need for a certain number of connections of those or other nodes. In addition, you can choose a node for its cost, which, as a rule, corresponds to quality.
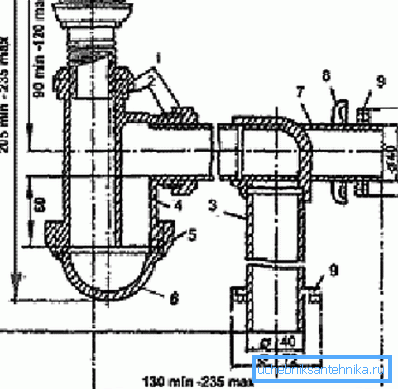
- Cap nut;
- Gasket;
- Discharge into the sewer;
- Housing;
- Gasket;
- Sump;
- Horizontal output;
- Facing washer for hidden sewage;
- Sealing washer;
- Output sink in the siphon.
In the drawing, which is shown above, you see a node where you can connect two plumbing fixtures - this type can be siphons for sinks under the washing machine or dishwasher.
Devices of this type are also used for the bath when a washing machine is installed nearby and for the latter a point is needed to drain the water. Such designs greatly simplify plumbing work on the sewage pipework, that is, in such cases, installation is reduced by one drain point.
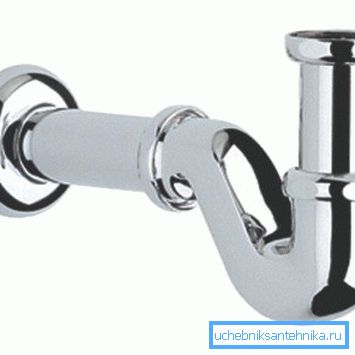
Let's first talk about the metal device, as in the photo above - this design is quite beautiful, made of stainless steel and, of course, is not just designed to drain water, but also serves decorative purposes.
From this to conclude that the installation of such nodes is appropriate in cases where all this remains in the zone of available viewing and turns out to be something like an additional touch in the interior of the room. But if this element is hidden, then there is no point in spending more money - in quality it does not exceed the performance of a similar plastic product.
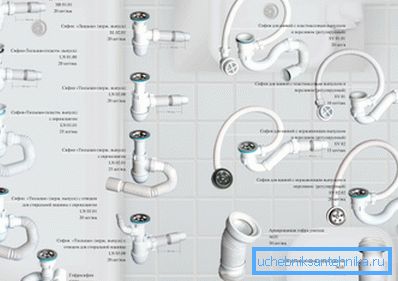
And now about plastic devices that you can buy in almost any store related to the plumbing trade, especially since their price is several orders of magnitude lower than that of similar stainless steel products.
In the upper picture you can see almost all types of plastic siphons, which are used for sinks, sinks, bathtubs, shower cubicles / boxes, and even for toilet bowls.
Of course, a manufacturer can make a non-typical unit and supply it with a plumbing fixture, for example, with a shower stall or box, but its device does not change in principle and such a structural part can always be replaced with typical equipment.
Pay attention to some of the siphons, which have two entry points for draining - one of the points is equipped with a special adapter designed for the hose of an automatic washing machine (they have a special intermittent surface to prevent the hose from slipping).
But in cases where such a connection is not required, you can simply remove this adapter and close the opening with a plug in the form of a cap with internal thread. You can also use this input without using a discontinuous adapter for a corrugated hose of a different diameter.
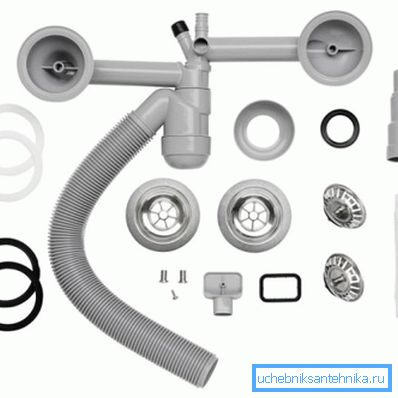
A very important point in the operation of the drain siphons is their assembly before mounting on a particular sanitary fixture, despite the fact that in most cases such products are sold already assembled.
The thing is that every detail connects to another through a rubber or rubberized gasket, which must fall exactly on its seat, otherwise it is threatened with biting and during operation you will notice that a siphon flows under the sink, this is extremely unpleasant.
So, before you connect the device to the sanitary device, you will certainly need to disassemble it completely, and then re-assemble it, taking into account the position of all gaskets.
Note. As a rule, the weakest point in the sense of biting gaskets is the place where the settling tank meets the bottle - there is a very narrow sealing ring and it often slides to the side when the sump is tightened.
In order for the assembly to be of the highest quality, it is important that all the parts are dry, since the whole process must take place in manual mode, without the use of any adjustable or gas keys.
In addition, you can not overtighten the screw connections, as this may affect the integrity of the seal, that is, you simply clamp the gasket, causing it to become unusable.
Assembly work
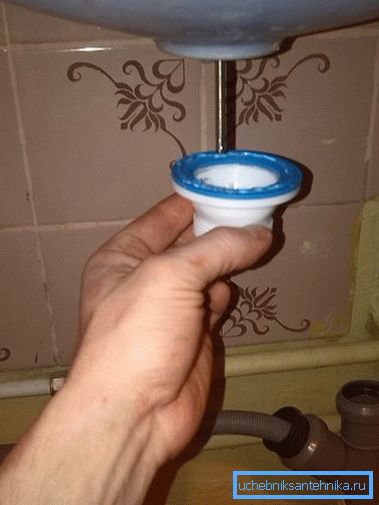
- Regardless of whether it is a complete installation of the sanitary device or the replacement of a siphon under the sink, as shown in the top photo, the device is fixed to the bowl drain not in its entirety, but in parts.
- So, first of all, the drain grille should be screwed to the sink, which consists of two parts - the top and bottom, under each of which (between the part and the sink) a rubber sealing ring is placed, and these parts are bolted together with a long bolt. In order not to change the pads in places (they are different), pay attention to how they stand in the factory assembly, that is, when buying before disassembly.
- Lay the grid over the drain carefully on the sealing ring., evenly distributing the perimeter (for metal sinks there is a special groove for the gasket and the grill for this).
- Then insert the bolt into the hole and fit it. (under the sink) the lower part with the gasket, only here you need to be extremely careful - the nut under this bolt is not always tightly fixed in the lower element, therefore, it is best to hold it with your finger.
- Now you need to make your own bolt on the nut, fix the seal and the grill again from above, and then tighten this joint with a screwdriver or a screwdriver, if available.
- Some try to grease the silicone sealant under the gaskets, but this should not be done, since in the case of a clear distribution of parts and seal the flow is simply impossible.
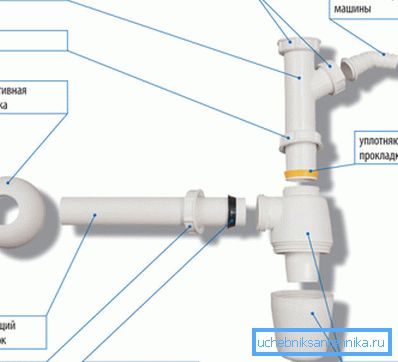
- Now look at the top picture to understand the assembly sequence and the next step will be screwing the nozzle to the bottom element already fixed on the sink., bolted to the grille. The fixing is done with the help of a nut on this nozzle and at the same time you will need to deploy an additional tap (if any) in the right (convenient) direction.
- Now fasten the siphon tank, which you need to collect before - you fix it too with a nut, which is shown in the image and turn the drain in the right direction.
Attention! All gaskets under the nuts should be turned thick part to the nut!
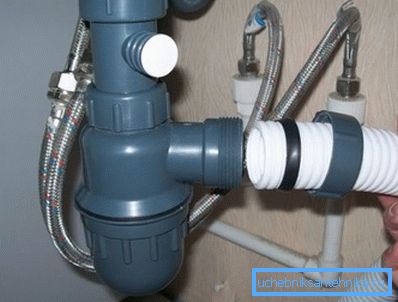
- Now you just have to fix the corrugated hose to the siphon and insert it into the sewer - if everything is done correctly, then such a problem as a siphon flowing under the sink will never disturb you.
Conclusion
When choosing a siphon, regardless of how much this device costs, pay attention to the bolt length. So, for ceramic sinks, the bolt is made longer, and for metal - shorter, and if a long bolt is suitable in both cases, then a short one - only for a metal bowl.