We use sealant for shower cabins
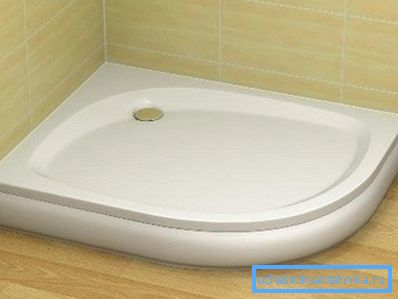
A shower stall (not a box) is a glass or plastic enclosure adjoining a wall, usually lined with ceramic tiles, and it is quite reasonable that there may be a question about which sealant for the shower stall is better? The fact is that installing such a device creates a lot of places adjoining the wall, where water seeps very easily, and no installation can save you from this problem - it is simply inevitable.
Below we will look at the installation methods and rules for the use of sealant, and also show you the video in this article.

Sealant in installation
Species

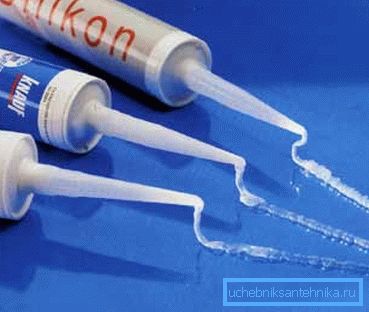
- TYTAN sanitary - This is an acidic silicone, which can be used in repair and construction work, as it has excellent adhesion to all hard construction materials - brick, plaster, glass, metal, wood, and so on. It is mainly used for sealing joints and joints - these can be bathrooms or any building compounds where there is no dust and moisture on the surface to be treated. It can be noted that such a material is used when sealing joints, where vibrational changes are possible, as well as shifts ± 20 relative to the base.

- TYTAN glass - It is an acidic silicone, which can be used in repair and construction work, as it has excellent adhesion to all rigid smooth materials - that is, not only glass, but also tiled or ceramic tiles, as well as plastic. It is mainly used for sealing joints and joints - these can be bathrooms, glazing of houses and balconies, or any building joints where there is no dust and moisture on the treated surface. It is noteworthy that such a material is used when sealing joints, where vibrational changes are possible, as well as shifts ± 20 relative to the base.
Attention! It should be noted that some are looking for antifungal sealant for the shower and such a tube, in fact, can be sold in stores and even with the appropriate inscription - do not believe this! In this case, the fungus and mold start from standing water, which starts in the hollows (usually, this is the junction of the pan and the wall lined with ceramic tiles).
You can only help the antibacterial composition, but only if you wipe these seams, so that they do not linger water.
Assembly work

Let's start with the pallet, which in any case is installed in the first place - it is the assembly of the entire structure that begins, that is, the rails are raised relative to the corners of the pallet, and then the door frame is assembled and fixed and movable panels are hung (read also the article - an original and practical solution for your home).
It may be noted that the assembly of a shower cabin without a sealant is possible, but in any case you will have leaks, since there is an adjunction of the structural elements to the wall. Whatever it was, but we will just need to attach the pallet to the corner and put its legs on the level - the bias is not needed here, since the design of the tank itself implies it in its configuration.

Further, after you have placed the pallet, without fixing it with silicone to the wall, you need to mark and drill holes for the guide profiles - this is best done with a drill, since the perforator can break ceramic tiles.
In order not to be mistaken, it is better for you to put an arc on the pallet from the door frame and follow it to produce a layout of the risers - so the whole structure will be assembled more accurately, without any distortions. This, of course, is not an instruction, but advice from the author of this article, who carried out such installations more than once.
So, during the installation of the guide rails, and this can be, both the side of the door frame of metal profiles and the individual strips (where this box is inserted) silicone is applied on the rack and applied to the ceramic tile over the previously drilled holes.
Profile is pressed with screws. That sealant, which under it will serve as an excellent barrier to waterproofing. Keep in mind that even a perfectly flat ceramic tile will not provide the desired density when a metal rack is adjoined - in any case there will be gaps.
In the future, silicone sealant for the shower is not needed until you go to fixing the tray, that is, it is the assembly of the door frame and hanging movable and fixed (straight or semi-circular) panels.
But, again, it can be used to overlay the lower arched profile of the door frame on the pallet - so you can create another hydro-barrier, because in any case water splashes will fall under the doors, which will leak under the profile, although this is not necessary.

After installing all the parts, the sealant for the assembly of the shower cabin will be needed for the pallet and here the craftsmen can do it differently, some stick the acrylic tray directly on the tile, applying a layer of silicone to the side, and some consider it unnecessary.
The author of this article sticks to the first option, that is, when the pallet is glued with silicone to the wall - this is how the installation's monumentality is created, because there are no other fasteners to the base at the bottom.
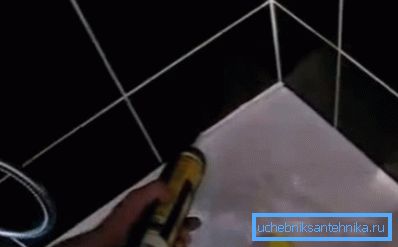
But, in addition, the sealant is pumped on the upper line of the junction, as shown in the photo above — a strip of silicone is squeezed out first, and then a finger is carried along the junction in order to ennoble it — the excess is simply collected on the toilet paper.
Consider that when sealing the pallet a small hollow is obtained there - this is quite normal and aesthetic - and this is where the mold occurs (silicone turns black with time).
No formulations (antibacterial and anti-fungal) will not be able to resist this process - if you are trying to sell such goods in a store, then you are simply deceived, since the mold is formed from dried soapy water and an antimer for this is only a constant wiping of the joint.
In view of this situation, the question may arise: How to remove the old sealant from the shower ?, because on it (at the junction of the pan with the tiles), in any case, mold will gather over time - the seam will turn black.
For such dismantling, you will need an ordinary kitchen knife with a sharp (not rounded) end - after passing it along the junction, you can get the old contents, but in no case do not use solvent or White spirit in this case - you can spoil the plastic and acrylic.
Note. Silicone sealant can be different, and not always the price of this product determines the quality of the composition. You can only say that it is best to choose white, and not transparent silicone.
Conclusion
Installing a shower stall with your own hands, in any case, you will use a sealant for sealing joints. But at the same time, try to immediately remove the excess, so that the tile does not leave its thin layer, which is very similar to lime or soap scurf (see also the article Shower switch with spout - types of device and features of choice).