What should be the height of the toilet from the floor
Installation in the home bathroom hanging toilet few people today will be surprised. It perfectly saves space, and its appearance makes the room more attractive. Below we will describe how to properly assemble it, what height of the toilet bowl with a cistern from the floor should be, how to install the installation system. So, if you decide to change the appearance of your bathroom, free up space in it and make it comfortable, read the article further.
Preparing for installation work
First you need to choose a place to install the suspension device and installation. The best is considered to be a niche in which water and sewage risers pass.
If it is not, the instruction allows you to make a separate box of drywall. It takes from the area of the bathroom 100-150 mm. The price of the works will not be significant if you do everything yourself.
Tip: any toilet is best to install as close as possible to the drain sewer.
Installing the installation
At the first stage it is necessary to fix the installation, and then bring the engineering systems - the water supply system and the drain pipe.
Below we consider how to install the installation frame correctly:
- Usually, the kit immediately includes a built-in drain tank. So, at this stage of the work, it will be necessary to securely and evenly secure the installation system, make the pipes and fix them.
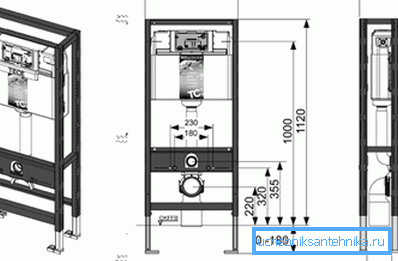
- Now we find out at what height to hang the toilet. There are certain standard rules that define the parameters and dimensions, which should correspond to the following figures:
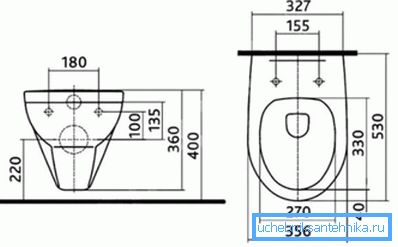
- The standard height standard from the floor is 400–420 mm, although they may vary based on the user's characteristics. A reasonable maximum is 450 mm. If you decide to install above, a person of short stature cannot simply reach the floor with his feet. It should also be noted that the height of the suspended toilet from the floor should be planned, taking into account the thickness of the ceramic tile and tile flooring glue. For example, if you forget this and measure 400 mm from the screed, it will be very inconvenient to descend from need;
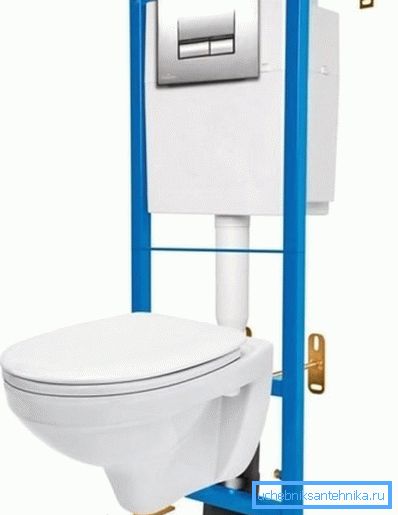
- the toilet flush button is placed at a height of 980-1000 mm;
- the distance between the floor and the sewer pipe should be within - 220-230 mm;
- between the wall and the cistern after installation of the frame should remain approximately 10-20 mm.
- It is necessary to fix the installation in 2 places to the wall and in 2 places to the floor. Before this, it is necessary to carry out preliminary thorough measurements and set the system at a level.
Tip: make a mark under the holes of the frame fastener, attaching the structure to the place of future deployment.
Make frame mounts in the floor, adjust it in height, check once again possible deviations using the level, and finally fix the structure.
We bring and fix the sewer and water supply to the supporting frame
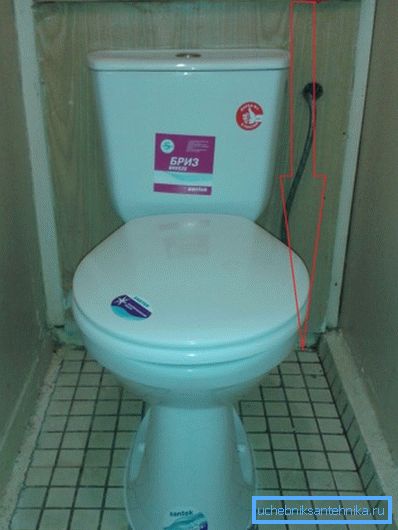
When the installation of the installation with the drain tank is completed, start the connection to the last water pipe. We recommend using a full-fledged plastic pipe, as flexible hoses should not be used for internal installation. They may at any time become unusable, which is unacceptable in this case.
Attached to the kit installation instructions for the system provides the ability to supply the pipeline to the top or side opening in the tank. They are usually already present on every such capacity used in installation systems. Choose the one that is most convenient in a particular case.
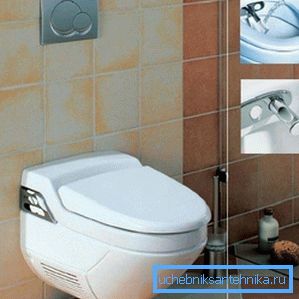
Typically, the drain tanks in such systems are plastic and with a working volume of approximately 9-10l. Manufacturers provide their protection from condensate, trimming them with a layer of insulation.
Access to the tank during operation of the sanitary equipment is provided through the outer panel with a button that allows water to drain. Most often, it is purchased separately, as well as the toilet bowl.
Installation of the suspended sanitary equipment is made after connecting to the general drain of the discharge outlet. It is very rarely possible to precisely fit it to the neck of the riser, but this is not necessary, there is a good connecting device - a corrugated sleeve, which is often used in such situations.
Tip: before closing the installation with a false panel, test all joints for tightness and reliability so that you do not dismantle everything again. And the neighbors below are unlikely to be happy if there is a defect.
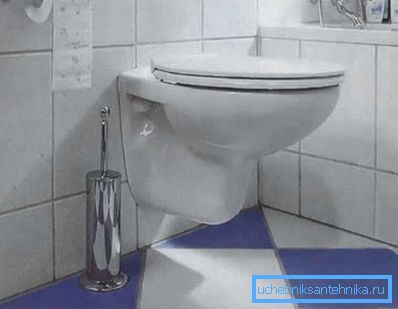
We close the installation with a false panel and make the lining
Installation of a suspended toilet bowl should be made on the installation system closed by furnish.
The device false panels when doing this according to the following rules:
- Make of moisture resistant plasterboard and screw to a specially made profile frame. At the last stage, it can be painted or veneered with ceramic tiles.
- Screw special pins for hanging the toilet bowl into the installation frame before mounting the metal frame in the installation frame.
- Close the outlet drain pipe with plugs, which are usually included in the support frame, then construction debris and dust will not fall into them.
Tip: when collecting metal frame, it is imperative to withstand its compliance with the horizontal and vertical levels.
- Cut out the drywall before its final fastening of the hole for the panel with the drain button and the pipe, using the prepared template, which is usually found on the installation system box or in the manual.
- Lay the tile on the drywall surface so that the holes are open. Now installation of the device and its operation will not cause cracks in the ceramic tile.
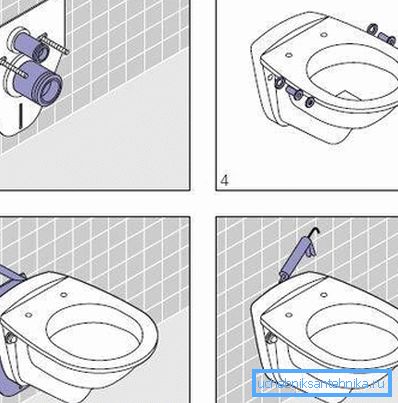
Installing a toilet bowl
The main and the last stage begins, in which the sanitary fixture and the drain button must be properly fixed on the wall:
| Fasten the toilet bowl | You install the devices with your own hands on the pins, left in the installation, over a flat tiled surface.
First, the gasket is put on the pipes, the connections of the communications dock with the holes in the toilet, and then the device is firmly pressed against the wall. After tightening the fasteners of the device, check its stability as well as the reliability of fasteners. |
| Mount the drain button | The final stage is the installation of a drain button. Install it in the hole of the false panel, according to the drawings and instructions attached to it. Before you install it, open the water supply valve and insert the cables placed in the tank into the corresponding openings of the button. Test the device for performance. |
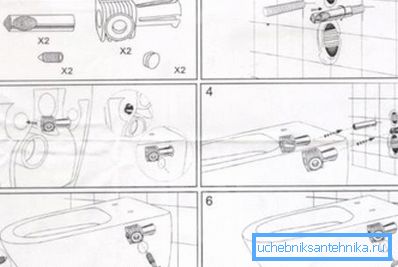
Tip: when tightening the nuts, be careful not to damage the ceramic toilet.
Conclusion
In this article, you learned the norms of the height of the toilet from the floor, how it is installed, as well as recommendations for this work. Although there are a large number of hanging toilet bowls with their own characteristics in the design and installation, in this case we considered the standard version of its installation.
It can be considered a guide for such work. You just have to follow our recommendations and do not rush during work. The video in this article will provide an opportunity to find additional information on the above topic.