How to install a ventilation box in the kitchen: the nuances
By and large, a kitchen design with a ventilation box does not represent something unusual - it’s just a plasterboard geometric shape that needs to be given a certain color or some drawing is applied to it. The size and location of this design itself is directly dependent on the area and shape of the exhaust hood, as well as on the location of the cooking plate in relation to the ventilation channel window.
Now we will find out what materials we will need for installation and how to implement it, and the video in this article will help with the topic.

Decorative box
Note. I would like to immediately note that we are considering here how to decorate the air duct, the entrance window of the ventilation duct and partially the exhaust umbrella itself. This design has absolutely nothing to do with the intensity of air intake.
Materials

To install or restore the ventilation box in the kitchen, you will first of all need certain materials, these are:
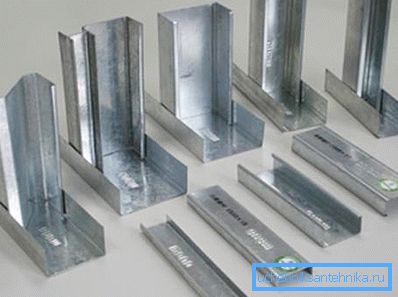
- metal profiles for the frame;
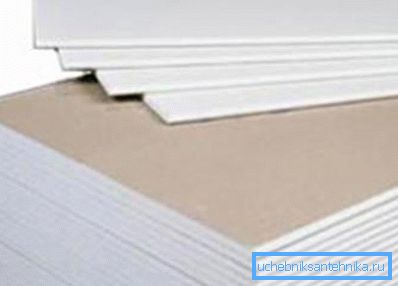
- sheet of wall or ceiling plasterboard;
- hardware (small screws for splicing profiles (flea));
- metal screws for gypsum boards (25 mm);
- plastic dowels and screws for them from 50-75 mm (depending on the wall density));
- putty.
It is best to make such a frame of the 50-millimeter profiles CW and UW, which you see above in the photo in the upper right corner. The construction you get is very easy and the large width of the guides is useless here, and they will take more space.
It should be noted that the flea used for joining the CW and UW can have either a pointed or gouge finish - you better stop on the pointed screws. It is easier to work with them, and their price is the same.
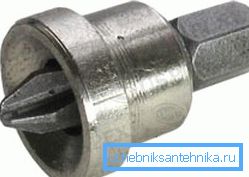
In addition, such fittings are quite small and often there are defective batches, where the cross-shaped slot is not made sufficiently qualitatively. Therefore, when buying, ask (take with you) the attachment number 2 and put a screw on it with your own hands. Should he hold onto the tip, even if it is tilted by 45? flea down. Try this 3-4 pieces from the party, if everything is in order, the probability of the quality of further work will increase significantly.
To mount the frame to the wall or ceiling, you will need plastic dowels 6 mm in diameter and screws. If the wall is lime-sand plaster, then the length of the screw can reach 75-90 mm, so that the dowel can be in brick or concrete.
In cases where the wall is finished with cement-sand or cement-lime plaster, as well as any of the putties, the instruction allows the use of a length of 50 mm. It will be quite enough in view of the small mass of the ventilation duct and the sufficient density of the wall.

Given that the creation, increase or decrease of the ventilation box in the kitchen is made from the same materials, it’s better to stop your choice between wall and ceiling gypsum plasterboard at the last. Unless you have left wall plasterboard from the previous repair.
The fact is that the GKLP has enough strength for such a design, since it is only necessary to remove the ventilation channel from the field of view, but it is much cheaper, and it is easier to work with it because of its low weight.

Recommendation. Since you can hide the screw head only by tightening the screw deeper than the sheet plane (otherwise it will interfere with the splicing work - the spatula clings), the head often breaks through the top layer of paper. Even experienced craftsmen are not insured against this, therefore, in such cases it is better to use a special nozzle for mounting the gypsum board.
The nuances of installation work

- First of all, you will need a markup, and here some network users are interested in planning the kitchen with a ventilation duct in the corner, but it should be said that a kitchen with a ventilation duct in the corner can be only when there is a hob in that very corner. In any other case, the structure will rise vertically along the wall to the ventilation channel. And if it is to the side, then reaching the ceiling, the box is turned to the channel window at an angle of 90? right on the ceiling.
- If you have any problems, how to beat any pipe with an exhaust duct, then you will have to increase the depth of the frame, since you can only hide the contour without spoiling the design.. Do not be afraid of increasing the depth of the box, because this will in no way affect the usable floor space - the extensions will be above the exhaust hood or on the ceiling - both will not affect your work space.

- Do not try to repeat the path of the duct, unless it is part of the design idea - this is sometimes done in combination with curved suspended ceilings or arches. But this is possible either on special or old building projects, or in mansions, where the ceiling height is higher than usual (maybe from 3m to 3.5m), and in all other cases the box will have a vertical, or L-shaped, or T-shaped form. The T-shaped design is necessary in those cases when the heating lounger passes parallel to the duct, as you have to decorate them together.
- Before pasting the construction with wallpaper, putty, or during it, a metal perforated corner is attached to the corners of the box - so the structure acquires clear geometric forms.
Conclusion
In conclusion, we can say that the demolition of the ventilation duct in the kitchen, regardless of its design, is done very easily and quickly, because this is just drywall, which can be cut with a knife. After dismantling the gypsum board, you just need to unscrew the fastening screws - fleas from the frame and the screws and the wall mount profile. Successes!