Natural wall ventilation with intake valves and external
Sometimes it is required to create in the dwelling or country house a simple air exchange system capable of functioning in normal conditions. The simplest option is to ventilate through the wall by means of special valves working in one direction and an external pipe. This method is allowed to be used only for rooms with normal operation.

Advantages and disadvantages of the method
To decide on the creation of such an air exchange system, it is necessary to consider all the pros and cons, then the choice will be made the easiest. However, conclusions should be made on the basis of the existing conditions, because in fact this is an alternative version of a conventional network in a simpler version.
Enumeration of merits
The most important advantage of the organization of such air exchange is a relatively low price. All the necessary elements are quite cheap, so you can avoid high costs.
Other positive qualities of ventilation of this type are listed below:
- The main elements of the system are small, therefore, the aesthetic characteristics of the premises are not violated.
- During installation, there is no need to reduce the tightness of the roofing, because when installing the pipe, cutouts in the roof are not made.
- Ability to do the installation work with your own hands is a great way to save financial resources.
- Due to the absence of complex elements, the installation time is reduced to a significant extent..

Negative points
- The dependence of the operation on weather conditions and other factors somewhat reduces the efficiency, but this is solved by installing a fan.
- The need to drill in several places in some way complicates the work.
- In case of poor-quality installation, there may be problems with waterproofing.
Note! When ventilation through a wall in a private house is arranged with the help of inlet ventilation valves and an external pipe, the set of tools will depend on the material used for the construction of the building.
Produced calculations
Even such a simple ventilation system must be carefully calculated, because to provide rooms with fresh air, it is necessary to know the number of elements used for the inflow of the working environment and the throughput capacity of the exhaust.
Next, we consider how to carry out preliminary calculations on the area by the example of a residential structure of 69 m with a ceiling height of 250 cm.
- The first step is to determine the approximate volume of the entire dwelling. To do this, multiply the length, width and height. The result should be: 6x9x2.5 = 135 cu. m
- Based on the data obtained, you can calculate the number of inlet valves. For example, if the bandwidth of elements is 40 cubic meters. m / hour, then goes: 135/40 = 3,375? 4 pieces.

Answer! For a qualitative update of the air in the presented object, you will need to install only 4 valves. Based on the above calculations, the diameter of the exhaust pipe is determined.
Inlet appliances
In connection with the advent of modern materials, the structures began to be more hermetic, which led to the emergence of another problem associated with a decrease in the intake of air inside.
If earlier houses and apartments could be ventilated without additional influx, now the situation has changed. It is especially difficult to breathe in a dwelling if plastic is used as a base material.
About functionality
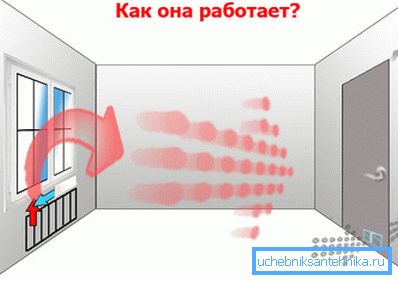
Finished products for air intake from the street can completely prevent the penetration of dust, insects and all sorts of sounds. After installation in the premises does not occur drafts. The intake device resembles the principle of the air reducer, which slows down the flow rate.

It is extremely simple to control the inlet valve, since it is equipped with a convenient handle and for closing the channel. Its visible part fits perfectly into the interior of the room. Being from the outside, it does not spoil the impression of the facade of the building. During the operation does not have to spend financial resources.
Details about the device products
The element with the capacity of air is a small plastic tube, the diameter of which can vary widely. Inside is insulation, preventing the penetration of sounds.
Below you are invited to get acquainted with the structure of products of this type.
- The plastic channel is a basic component, since it is through it that air enters the room.
- The adjustment knob is located on the inside. With its help, you can block the channel.
- The filter element allows the purification of incoming streams from dust particles.
- The internal fragment of the tip, equipped with a ventilation flap, is the main limiter.
- O-ring is designed to improve sealing between the elements of the product.
- Insulating material provides the ability to protect the interior from sound and other effects.
- The external grille helps to protect the structure from precipitation.
- The mosquito net inside it allows you to completely prevent the entry of insects.

Attention! The length of the plastic sleeve can vary between 40-100 cm in 10 cm increments. Therefore, when choosing, the wall thickness should be rounded to these values. The excess part is simply trimmed.
Installation work
First of all, a suitable place is chosen for the installation of an element on a side plane bordering the street. A functional head should have direct access, otherwise it will be problematic to exercise control. The best option is to install near the radiator so that the incoming air has time to warm up.

After the selection of an acceptable place, proceed directly to making holes. If the walls are wooden, then use the usual drill and drill. In other cases, diamond drilling is carried out with a special tool. When opening the device, it is recommended to make a small bias towards the street for condensate drain.

A plastic sleeve of the required size is inserted into the finished hole. A ventilation grille is installed on the outside, and a functional tip is inserted from the inside. In the process of fixing the elements, small bolts are used with which the structure gains rigidity.
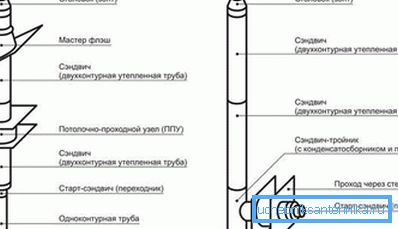
Installation of exhaust pipe
When exhaust ventilation through the wall to the street is arranged, it is possible to reduce the laboriousness of the work, as there is no need to touch the ceiling and the roof. In addition, the length of the pipe can be reduced by moving away from the ridge portion.
The process of assembling the system is presented below.
- A preliminary marking is applied to the surface of the wall to make it easier to cut a hole. It is recommended to place the opening in close proximity to the ceiling in order to maximize traction.
- With the help of a special tool is neat cut. After that the corner element is inserted into it. On the inside, a check valve is installed to protect against external influences.
- From the street to the established corner the following fragment is attached - a straight pipe. It is fixed with special clamps. A deflector is installed on top, which prevents precipitation from entering inside.

Note! When assembling the exhaust duct, it is recommended to perform sealing at the joints; otherwise, it will not be possible to achieve the most efficient discharge of exhaust air.
About internal circulation
For the passage of streams from one room to another, special gratings are used. Installing them on the door or embedding in the wall, you can achieve free movement of air masses. This is necessary in cases where you want to skip the supply air to the hood.
To insert an element into a door or wall, you should make a cut corresponding to the dimensions of the working part. After removing an unnecessary fragment, you need to insert the main frame directly into the opening. Fixation is carried out by screws, which are closed by the front panel.

Additional Information
- The ventilation pipe must protrude so that the angle between the ridge and its upper part does not exceed 10 degrees, otherwise the level of thrust will be significantly reduced.
- In the inner part of the ducts, as well as at a distance of five centimeters from them should not be placed cables, gas pipelines and other elements of communication systems.
- Passage should be carried out to the hood, even with closed interior doors, and not in all cases, you need to install grilles. It is enough to leave a gap below the width of 1.5-2 cm.
- Too weak ventilation of the living space does not allow for a high level of environmental safety, especially if materials based on plastics, formaldehyde resins, etc. were used in the finishing process.

findings
This instruction gives an idea of how the ventilation in the dwelling is done not through the roof, but directly through the wall. With this option, not only the work on the device is simplified, but also there is an opportunity to save on raw materials, since the length of the output pipe can be significantly reduced. The video in this article reflects additional information.