Roof ventilation is an easy but important step in home
For residents of city apartments, the issue of ventilation is not as acute as for owners of private houses. In addition to the ventilation of the rooms themselves, one should also attend to the ventilation of the attic room in the house, and the air flow should circulate through the roof. Fortunately, it is not so difficult to do this work, so, for example, ventilation of the roof made of sheeting or soft tile is on everyone’s shoulder.
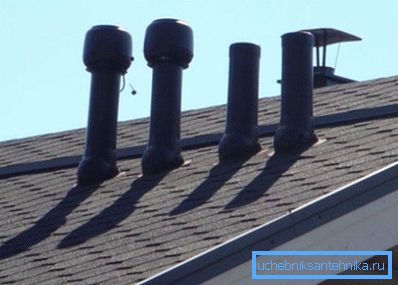
General information about ventilation
Ventilation issue can be divided into 3 main components.
You need:
- to ensure the normal circulation of air masses throughout the house (including the basement). Unpleasant odors should not stagnate in the rooms;
- do attic space. The microclimate in the attic is also very important, even though this room is non-residential (with the exception of penthouses), but its condition affects the durability of the roof;
Note! Structurally, the roof resembles a cake (vapor barrier film, a layer of insulation, waterproofing and the roofing material itself), so it is necessary to ensure air circulation between the individual layers of this “cake”. At the exit should get a ventilated roof.
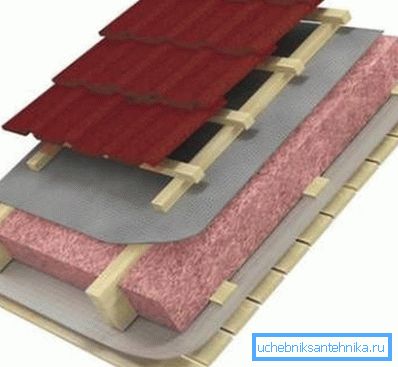
In this case, you will have to perform such types of work as:
- install air ducts in the house;
- bring them to the roof. To do this, the pipes will have to be laid through the overlap between the floors, the attic floor and the roof itself;
Note! The zone of special attention is the output of ventilation to the roof. If you do carelessly in the future, it may flow.
- install protective elements above the pipes.
As for the ventilated roof, the movement of air flow is provided at the stage of installation of the roof. More in detail this question is considered below.
Guide to vent to roof
Before you begin the work, it will not be superfluous to plan the placement of the duct on the roof.
In this case, it is necessary to proceed from practical considerations:
- The best option is the one in which the passage through the roof of the ventilation is made right through the ridge. True, given the prevalence of ridge truss systems, this approach is not always possible;
- if a truss beam system is used, the ventilation pipe should be located as close as possible to the ridge of the roof. This solution has 2 advantages at once: firstly, in winter the snow will not accumulate near the pipe, secondly, even with a slight elevation above the roof surface, the height of the duct will be higher than when shifted to the edge. This will create more traction in the system;
- when ventilating outlets to the roof are thought out, they should be positioned so that they are located between the rafter beams and the battens strips (if a non-continuous batten is used).
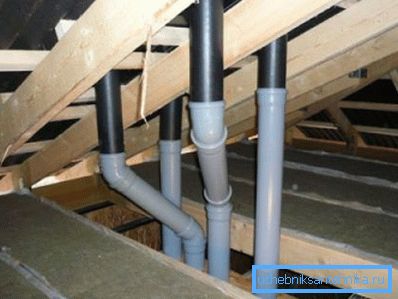
Note! If an error has crept into the calculations in the calculations, the duct can always be shifted slightly to the side with the help of a simple ventilation duck.
Installation of the passage element
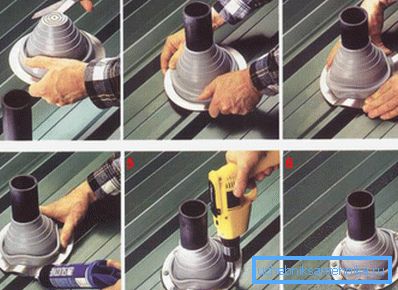
To ensure that the ventilation pipe passing through the roof does not cause a leak in the future, it is better to use purchased passage elements.
In this case, the instructions for the duct to the roof will look like this:
- First, the design position of the passage element is marked on the roof;
- then you need to make a through hole in the roof to skip the ventilation pipe. With waterproofing and insulation problems will not arise, but for metal roofs have to work grinder;
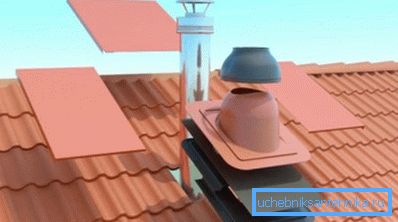
- the pipe is displayed on the roof;
- fitting of the passage element is performed, the locations of the screws for fastening the element are marked, holes are drilled under them;
- A sealant is applied to the bottom of the gasket, and the gasket is glued to the roof (some manufacturers recommend bolting instead of sealant);
Note! In order for the sealant to better stick the gasket to the roof, its surface does not interfere with cleaning and degreasing.
- then the element itself is installed and fixed with screws.
The final stage can be considered the installation of a protective cap above the pipe. If these recommendations are followed, the quality of the work done by hand will not differ from the work of professionals.
About height of ventilation pipes
In houses, natural ventilation is most often used, that is, the air moves due to the pressure drop at the inlet and outlet of their pipe, therefore the height of the duct is of great importance. Incorrectly chosen height of the ventilation pipe above the roof can negate the efficiency of the ventilation system.
Note! In some cases, it reaches the point that in one of the channels the air begins to move in the opposite direction, that is, it becomes not exhausting, but supply air.

When installing the pipe should follow these recommendations:
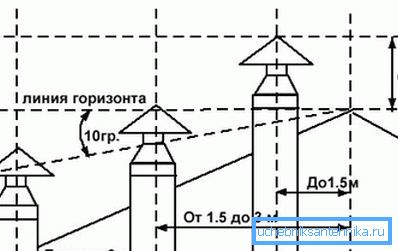
- if the exit point is located near the ridge (within 1.5 m), then the air duct should at least 0.5 rise above the ridge;
- if the ventilation pipe on the roof is removed from the ridge at a distance of 1.5 - 3.0 m, then its minimum height must be taken more than 0.5 m;
- on flat roofs, the elevation of the duct above the surface of the roof is undesirable to take less than 0.5 m.
Increase ventilation efficiency
In summer, when the temperature rises outside, the efficiency of natural ventilation decreases. In combination with an unfavorable wind direction, this can lead to a complete blockage of the ventilation system. In order for the ventilation on the roof of a private house to continue to work, elements such as deflectors are installed on the top of the pipes.
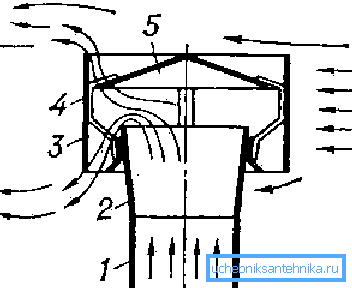
Outwardly, this useful addition looks like a small nozzle on the duct and consists of the following elements:
- umbrella;
- diffuser;
- lower cylinder.
Despite the simplicity of the design, there are 6 types of deflectors, but the principle of operation of each of them is almost the same. During wind in the area near the exit of the ventilation duct, an area of reduced pressure is created.
Due to rarefaction, the draft increases, in some cases, the efficiency of ventilation increases by 20-30%. Since the price of such a device is minimal, and the installation is simple, you can find a deflector on almost any roof.
Ventilated roof
In addition to the ventilation of the premises, attention must also be paid to the ventilation of the roofing pie itself, otherwise mold and dampness in the attic are guaranteed. Special attention should be paid to the ventilation of the attic roof, because in this case the attic is a living space, which means that the requirements for ventilation increase.
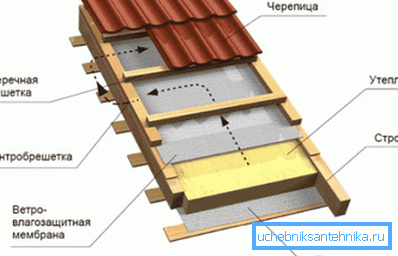
The roof is ventilated through the gaps between the individual elements of the roofing pie.
Depending on the number of such gaps, systems can be distinguished with:
- 1 the gap between the roofing material itself and the waterproofing film;
- 2 ventilation gaps - the gap between the film and the insulation is added to the gap between the roofing material and the waterproofer, that is, they do not come into contact with each other.
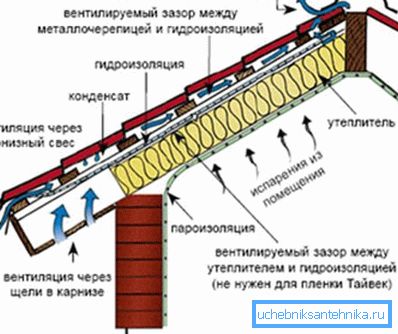
The ventilation process is as follows:
- air is taken at the bottom of the roof;
- air passes through the entire plane of the slope through the ventilation gap and is removed through the ridge aerator.
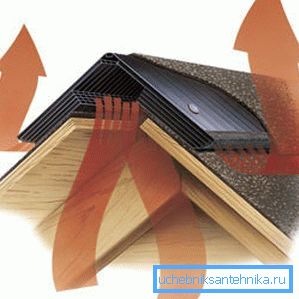
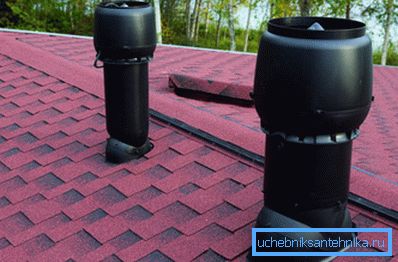
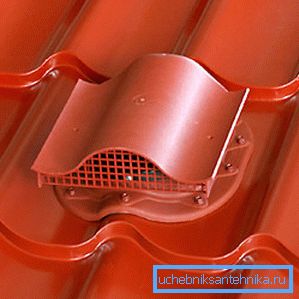
Aerator - a device that is used to ensure good ventilation of the roof. It can be continuous (ridge version), or point-like - more commonly known as ventilating fungus on the roof.
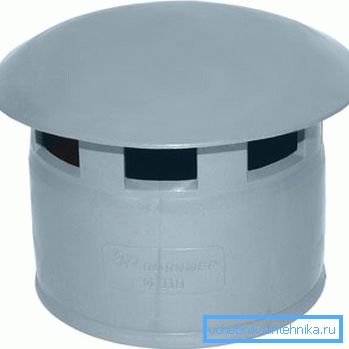
The ridge version is installed along the entire length of the ridge and ensures normal air circulation through the roof. Point can be used, for example, to eliminate stagnant zones. As a rule, point aerators are produced in the form of cute fungi, or small tiles, so choosing an option suitable for any roof is easy.
Also, ventilation fungi on the roof can be installed on the duct outlet to protect against debris entering the pipe. As for the number of aerators on the roof, here everything depends, firstly, on its size, and secondly, on climatic conditions. Recommendations of experts vary, some advise to adhere to the norm 1 aerator / 60 m2 roofs, others - 1 aerator / 150 m2.
In conclusion
Proper roof ventilation is not very difficult, but an important step in building a house. Non-functioning ventilation will cause a constant feeling of discomfort, dampness, which, in addition to the mood of the residents, will also affect the durability of the house as a whole. In order not to reach this extreme, it is enough just to follow the advice offered in this article.
The video in this article shows in detail an example of mounting a passage element on a metal roof.