Ventilation hood for the kitchen room: how not to make the
Some of the premises of a residential building need a special mode of ventilation. For example, it is desirable to install a fan for the hood in the bathroom, toilet.
Do not do without special equipment and in the kitchen. It will provide clean air in the room and protect not only residents, but also windows, walls, and furniture from the action of combustion products and fats.
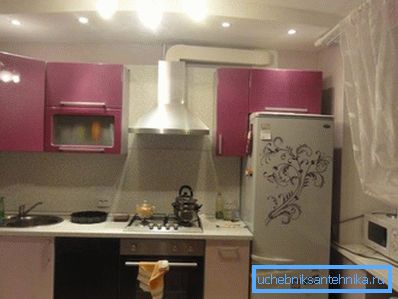
Classification of exhaust devices
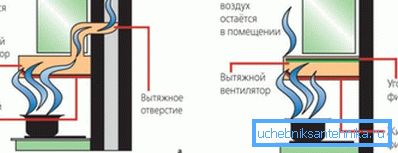
Exhaust devices for kitchens are classified according to the method of installation and the principle of operation.
Based on the method of installation, such devices are made.
- Ceiling and suspended analogues. They are mounted on a wall or ceiling above the stove.
- Built-in fixtures. Installed inside a locker or a special drawer. Outside, there remains only the bottom and the control panel of the device.
- Table hoods. The instruction says that they are used most often at catering establishments.
By the principle of operation, all hoods are divided into the following analogues.
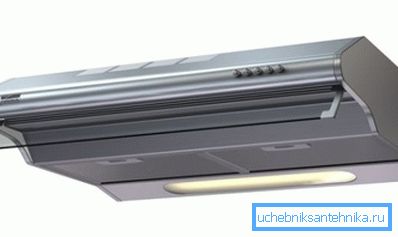
- Filter media. They clean the air as it passes through the filter. The most common of them are coal analogues. For their purity must be monitored constantly and as needed change.
Note! This hood is installed without being connected to ventilation. It is best suited for small kitchens in which food is not prepared, but only heated.
- Retractors. Their pipes take the polluted air directly into the ventilation shaft (channel), originally existing in the house or specially equipped to use the hood. For intensively used kitchens such devices are best.
How to choose the air duct and exhaust
When choosing a hood, consider the following points.
What factors to consider
- The exhaust power should correspond to the room area.
- Its dimensions are commensurate with the kitchen equipment.
- The ventilation duct for exhaust must have a sufficient cross section. Matters and his material.
- The design of the device must be in harmony with the interior of the room.
The minimum exhaust capacity is calculated as the kitchen volume multiplied by 10. So, if a room has dimensions of 4–3 m, and its ceiling has a height of 2.8 m, then the kitchen volume is 33.6 m ?.
Therefore, the power of the device should be 336 m? at one o'clock. Experts say that it is desirable to buy a hood with a margin of (small) performance.
Note! Dimensions of the device should be commensurate with the surface of the gas plate. If the hood is smaller, then a certain percentage of the products of combustion and odors emitted during the cooking process will go to the dwelling. That is, ventilation will be ineffective.
Pipes for the system
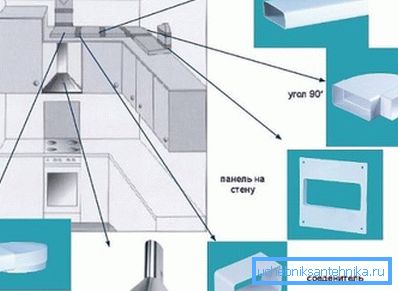
The exhaust ventilation pipe can be made of the following materials.
- Plastic. Does not rust, has light weight, just installed, chemically resistant, not afraid of temperature changes.
- Pipes and boxes of rectangular section made of steel sheet. Their price is low, but the material is susceptible to corrosion, has increased noise, is not very resistant to mechanical damage.
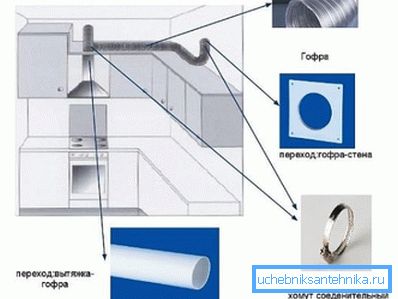
- Corrugated aluminum pipes. Their main advantage is excellent insulation, i.e. there are no sounds completely when powerful air flows through the channel. The shape of such pipes is easy to change, based on the parameters of the exhaust opening and the network configuration.
The only minus is that the corrugated ventilation box for the hood does not look aesthetically pleasing. However, the channel can always be masked by facing.
Device installation
Before you connect the hood to the ventilation, you should prepare the elements of the system and tools.
What will be needed
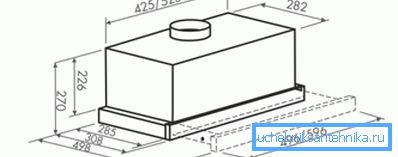
From the equipment and materials you will need the following.
- The hood itself, selected according to the appropriate characteristics and design.
- Brackets for fixing it.
- A set of pipes and fittings for the arrangement of the duct.
- Clamps for fixing the channel.
- Ventilation grille for exhaust, closing the shaft and simplifies the mating with her duct.
- Non-return valve installed in the duct and ensuring non-return of dirty air and odors.
The toolkit to be prepared.
- Perforator for drilling holes for mounting structure.
- Screwdriver for hood assembly.
- Measuring tape and pencil for measuring.
- Sharpened knife.
- Jigsaw or hacksaw.
- Building level.
Electrical safety fixture
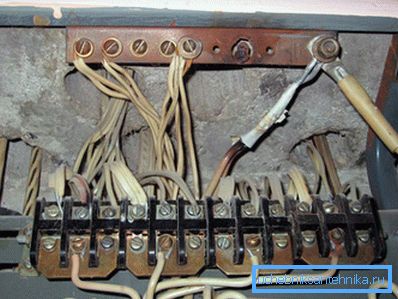
Kitchen hood is a device of increased electrical danger. There are always water vapors in the room. Oil and fats from cooking food are splashed onto electrical appliances.
This all can cause electric shock.
- Based on the above, the connection of the hood to the ventilation with your own hands must be accompanied by its grounding.
- In apartment buildings built in recent years, wiring already has a grounding phase. Therefore, you only need to put the socket with a contact for it at the hood.
- In old buildings, grounding will have to be built on their own.
Here is what to do:
- In the electrical panel on the landing, find the “neutral” - an imbedded pipe or a special tire with a mounting pin.
- Connect the power cable carefully to the terminal. Its cross section, minimum, should be 2.5 mm ?.
- Next, tighten the cable with the control nut.
- Route the wire through the premises to the kitchen to the place of installation of the outlet. To aesthetics did not suffer, you can use the plinth with cable channels, false counterparts for plastic walls or wall up the wire.
- Connect the hood to the cable. This should be done through the machine (power 6.3 A)
Note! If you are not friends with electricity, call the masters. The voltage in the shield is 220 V, it is life threatening.
Installation of built-in fixtures
The assembly stages of the embedded hood are below.
- First settling in the closet for her. You can buy it already ready or do it yourself. The cabinet should have only side and top walls. Dimensions of construction should be consistent with the size of the exhaust device.
- At the top of the cabinet with a hacksaw or jigsaw cut through the hole for the ventilation pipe and fix the adapter ring in it.
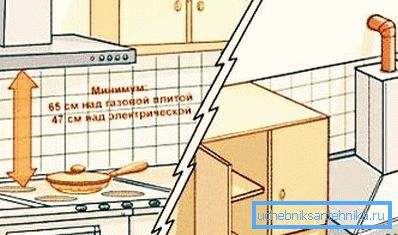
- In the marked place, fix the cabinet with the help of brackets. Do the gap between the stove and the hood as specified in the passport of the device. As a rule, it is 65 cm, if the stove is gas. When the cooker is electric, the indicator may differ.
- Attach the hood to the cabinet. Interface points must be of high quality and reliable. So you will avoid vibration and excess noise when operating the device.
- Before installation, check the operation of the electrical equipment of the device: duct silent fans for exhaust, lighting, etc.
- In an area protected from moisture near the hood, install an outlet. We already spoke about its obligatory grounding. At the end of the work, all you have to do is plug in the electrical cord of the hood.
- The hood is connected to the ventilation shaft using an air duct pipe. One of its end mates with the device, the other is displayed in the main channel of the house ventilation. The connection is made using the grille and clamps.
Installation hinged analog
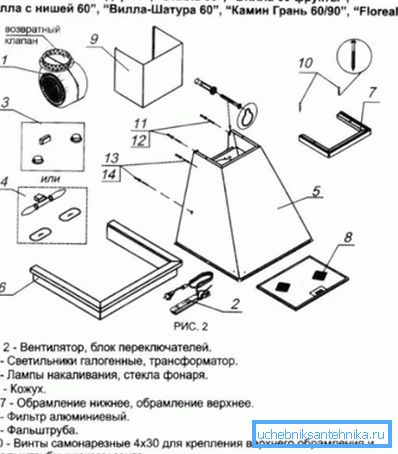
Installing a hinged device is much easier, since it does not need a special cabinet.
- On the wall at the required level are marked points for mounting the device.
- In the vicinity of this area, install a separate electrical outlet that is grounded.
- Install the hood on the fitted brackets.
- Connect the air duct to its outlet.
- The second side of the channel should be brought into the hole of the general house ventilation with the help of a grill and a clamp.
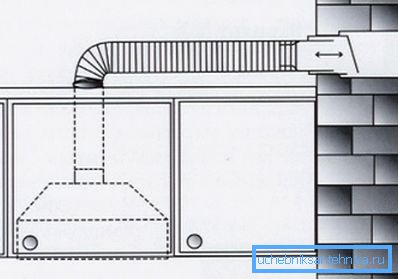
Note! Before you connect the hood to the ventilation, it should be noted that each of the turns and bends of the duct reduces the performance of the circulation device by 10 percent (on average). In other words - if there is such an opportunity, the ventilation duct should be made straight.
Conclusion
If you correctly select and correctly install the exhaust device for the kitchen, then you are guaranteed to stop the accumulation of water vapor, harmful combustion products and unpleasant odors in this room.
The video in this article will continue its theme.