A well casing helps to drill or clean the object.
If you are going to drill a well in your own area, you will need an interesting and convenient device - a pit. It will be useful both for construction and for cleaning an object already in use from debris and sludge.
This design is simple, but quite effective. It does not hurt to understand the device in more detail, as well as how to make a scouring pad for the well itself.
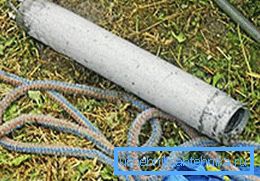
How the device is arranged
The well cleaning pan has a simpler design. But for drilling by the shock-cable method a slightly more complex device is used.
- A simplified version consists of a piece of pipe, where a check valve is located inside the bottom.. Sand, silt or clay, which often clogs the wellbore, falling into the lowered pipe, remains in it. All that is required is to lower the structure down, wait until it is full, then pull it out. Repeat the operation to achieve the desired result.
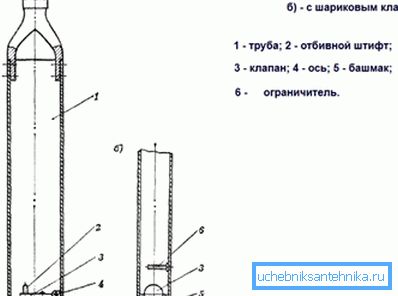
- For the shock - cable drilling of the well, a mechanism is needed that is also equipped with a percussion cartridge, as well as a driving hole.. Well drilling with a scum is done without borehole washing, which is important when opening and testing the aquifer.
Note! This method of drilling is considered to be though not as high-performance, but it is the most gentle for the well. Moreover, the shock - rope method is most effective when working with highly mobile soil layers (quicksand).
Device manufacturing
The diameter of the wells are different. Today we will figure out how to make the sink for cleaning the well of the most common size. When you tinker mechanism, keep in mind that it should be 1.5–2 cm smaller in thickness than the well itself. This is necessary for the unobstructed penetration of the device inside.
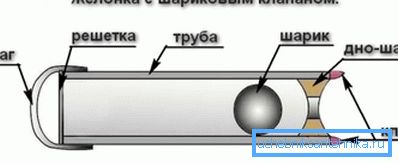
Ball Valve Design
- Cut a piece of metal pipe, with an inner diameter of 0.59 cm, length 80 cm.
- You have to buy or order a 4-centimeter metal ball.
- Weld a thick washer with a funnel top to the bottom of the pipe. Adjust the hole under the ball for a good entry.
- If the bottom of the puck has a flat plane, it is quite acceptable. Even the inverse funnel shape is acceptable.
- To prevent the ball from flying out of the pipe, an iron grid should be welded in its upper part.
- At the same end, weld a thick wire arc. Through it, the cable or chain of the desired length will be extended.
Note! In order for the well to be cleaned with a sludge easier and faster, from the bottom it would not hurt to be equipped with several metal teeth. When immersed, they will stick into the ground, loosening it.
How to make a ball for zhelonka
Not everyone will be able to get the ball of the desired diameter.
There is a very simple way out - make it your own hands out of scrap materials.
- Find a children's ball of the right size, preferably made of thick rubber.
- Cut it into two identical halves.
- Attach pieces of lead, shot, bearing balls or nuts to each of the halves. The main thing is to make the content as heavy as possible.
- Fill the remaining voids with epoxy glue and let it harden.
- Grind both sides of the ball to even planes, then glue them with the same epoxy.
- The ball is ready, the price is minimal, and its service life and durability will delight you.
Flat Flap
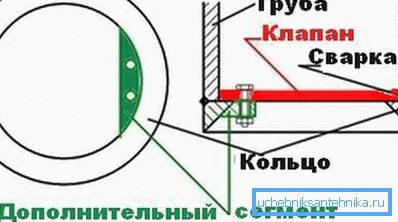
If it is impossible or unwilling to manufacture a ball valve, it is perfectly acceptable to make a flat locking mechanism in the fixture.
Such a device for wells is even easier; craftsmen manage to make it even from plastic bottles.
- The valve has an ellipsoid shape, moreover, its smaller diameter corresponds to the internal diameter in the pipe, and the larger - 2 cm wider.
- At the bottom of the pipe, not reaching 1 cm to the cut, drill two holes for the bolt. It is recommended to take it 6–8 mm thick, and a length exceeding the thickness of the pipe itself. It will facilitate the assembly of the structure.
- Screw the valve to the bolt from the top, with copper or aluminum wire at two points. For this, four holes are made in it.
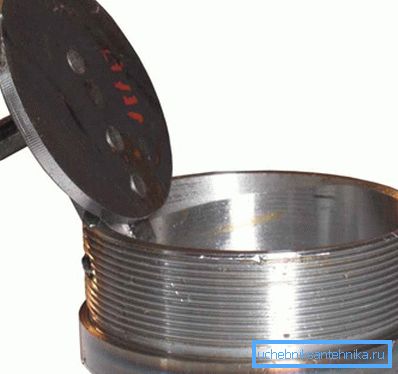
- Valve mounting should be free, then the bolt is easily removed from the wire rings.
- When assembling, insert, slightly bending, the valve into the pipe, then passing through the rings of wire, drive the bolt and tighten the nut.
How to use the finished device
Once you have done the pan for the format of your well, it's time to try out a useful device in practice.
- Pick up a strong cable, cord or chain. Its length should be with a margin.
- Insert the cord into the prepared loop at the top of the pipe.
- The instruction advises to lower the device into the well until it stops. Then lift it about 50–70 cm and release it sharply.
- Falling down at a certain speed, the ball inside the pipe will jump up, opening access to water mixed with silt and debris.
- Do not pull out the pipe completely after the first shot. Once she scooped up enough sand, therefore, lift and release the rope several times.
- After you feel that the cup is filled, pull it out and pour the contents.
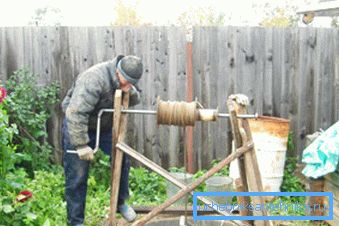
- If it is physically hard for you to do this kind of work, install a gate in the future that looks like a well analog. It will greatly facilitate the process of work.
Note! On average, for one lowering the pipe scoops out about 0.3 kg of clay or sand with water. When this is selected 3 cm of sediment. Based on these data, you can easily calculate the frequency of cleaning, as well as the time spent on work.
Conclusion
It is often not possible to clean a well with the help of a repair crew. The lack of access roads for a machine equipped with a pump or pump is not a reason to refuse to clean your communications. Making the simplest device, you will get rid of many problems.
A lot of good examples are offered by the video in this article, which tells in detail about the work process.