Borehole adapter for your home
Sometimes when drilling wells, the question arises, what is better, pit, caisson or borehole adapter (Pitless adapter), that is, what will be more reliable during operation. But there is no definite answer, because everything will depend on the arrangement of the neck, as well as on the correctness of the implementation of your choice.
Here you should also not forget that any device has its own advantages and disadvantages, and this will be discussed now, and besides, you can watch the thematic video in this article.
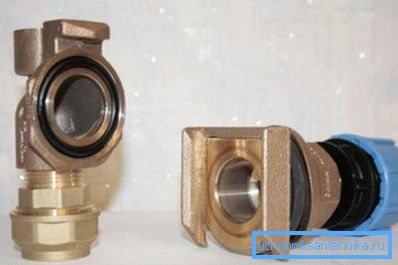
Much about downhole adapters
Purpose and Benefits
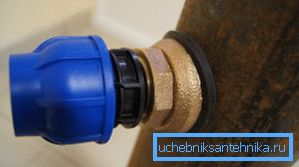
- All downhole adapters are used to connect the water supply to the casing from a submersible pump below the level of soil freezing. The device allows you to get by with low costs, since a concrete pit (caisson) is no longer needed in this case. In addition, not only the price of the project is beneficial, but also the small size of the device, which practically does not take place.
- Such arrangement of the well is very easy to install - it does not require any masonry and plaster in the pit, moreover, thanks to the sealing rings, this design is completely sealed, which makes it impossible for the groundwater, rain and melt water to penetrate into the well. It is possible to install a closed type (underground) and a large amount of groundwater is not a hindrance.
- Due to the small size of the installation of the downhole adapter is possible in cramped conditions, for example, when any underground communications are located very close to the casing of the well.
Note. For the manufacture of adapters of this type can be used bronze, brass, stainless steel and DZP-special food alloy, resistant to corrosion. In many countries, they abandoned bronze and brass because of the unacceptable amount of lead in the alloy.
Assembly work

After installing the well, you need to grind the excess upper part of it with the grinder, where the hole will subsequently be closed with the tip. Now we need to drill a landing nest for the trunk pipe that will go into the house, and it can be reduced by a bimetallic cutter below the ground freezing point. Consider that in each region this level changes, therefore you should inquire about this in any construction institution..

Now, as required by the instructions, we need to disconnect the adapter, leaving one part for rigid attachment to the wellbore pipe, and the other part for attachment to the pipe of the submersible pump. To lower the half of the part, we fasten it to the bar (there is a special threaded connection on top), lower it to the desired depth and screw the nut over the special seals on the retraction, and unscrew the bar back - we still need it. (See also the article Which Pump is Better for a Well: The Nuances of Choice.)
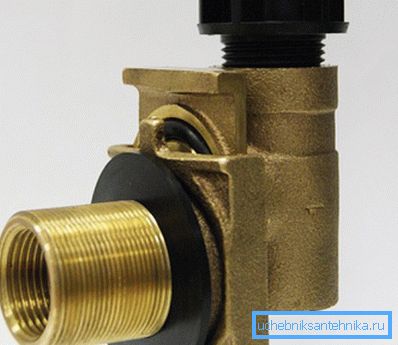
In the photo above, you can see how the two parts of the device fit together - the front element is fixed on the casing pipe, as you just read above, and we will need to attach the rear element to the polyethylene pipe from the pump. They are attached to each other with the help of grooves, which are connected in the form of a sled - a special lubricant ensures tightness, simplicity and ease of docking.
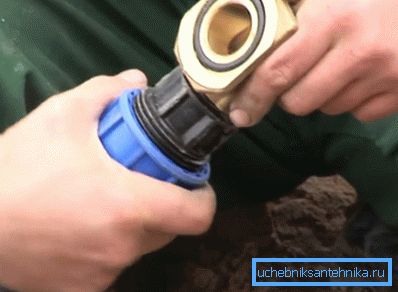
Now we proceed to the assembly of the submersible pump - we need to screw a fitting on it with a check valve, to which the polyethylene hose will be fixed. The depth for the installation of the pump and its capacity should be determined by the technical conditions that the drillers of the well issue in the instruction, and it is according to this that you will measure the length of the hose so that the water intake is uninterrupted.
Note. Be especially attentive to the choice of the diameter of the deep unit - it should be free to go inside the casing. In addition, do not forget that the pump needs to stretch to the side of the adapter sticking out from the side, and it should not get stuck.

Before lowering the pump into the casing, put on the end cap to fix the fastening cable on it later. Now installing the downhole adapter with your own hands enters the final phase - you will need to connect both parts together, but this will have to be done blindly, so here you need special attention.
And now we will again need a barbell, which we screw into a special threaded connection and carefully lower the submersible pump inside the casing, creating the right direction with a metal bar.
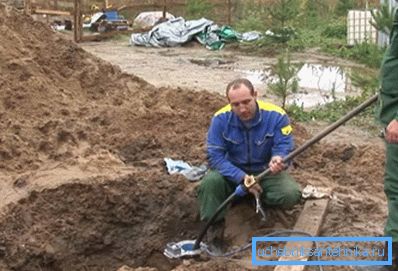
Getting into the grooves is not very difficult, so if it doesn’t work out the first time - don’t be upset - try again, just try to keep the bar in a strictly upright position. After the parts are connected, the metal pipe can be unscrewed - we will not need it anymore and proceed to connecting the power supply and mounting the main pipe.
But, before unscrewing the rod from the threaded connection, fix the cable on the head end, giving it a slight stretch so that the pump weight is kept on it, and not on the adapter connection. In the end cap there are special terminals for the cable, which always turns out to be short and needs to be extended, but for security reasons you can go the other way.
We splice the pieces not at the terminals, but between each other, closing the junction with shrinking, so that we no longer have to look at the twist.
The water main pipe that goes into the house from the casing should not be laid on the ground in a trench, but on the sand cushion and it should also be filled with sand. In order to make it all sit down, we pour plenty of water on the backfill and then throw in the ground. This measure protects the plastic wall of the hose from the deformation of the soil and from accidentally got there stones that can push or cut the polyethylene.
Connecting the submersible pump to the automation should be done in a room or in any utility building protected from frost - after all, next we will need to install a backup tank. The pressure switch and the dry-running sensor can be a single device, and can be sold separately. The second option is cheaper and, moreover, experience shows that it is more reliable in operation. (See also the article How to clean the well with your own hands.)
Conclusion
After describing the entire installation process, you probably appreciated all the advantages, because the downhole adapter, in fact, is a straight-through corner joint, which, by the complexity of the assembly, can be evaluated a little more difficult than any fitting. Of course, if you have the time and place, you can equip the caisson, but labor costs here are several times higher, and the cost is not commensurate with the option described in this article.