Choosing a faucet for the kitchen: types, their device and
First of all, it should be noted that the kitchen faucet mixer is absolutely no different from a similar appliance in the bathroom, which is installed on the sink. But, nevertheless, there is a very big difference in the principle of operation of different models in general.
And these differences are not only in appearance (the number of adjustment knobs, the shape of the spout, and so on), but mainly in the device and the principle of operation of valves. We will try to tell you about the principle of operation of all modifications of constipation, about the possibilities of their repair and will demonstrate the thematic video in this article.
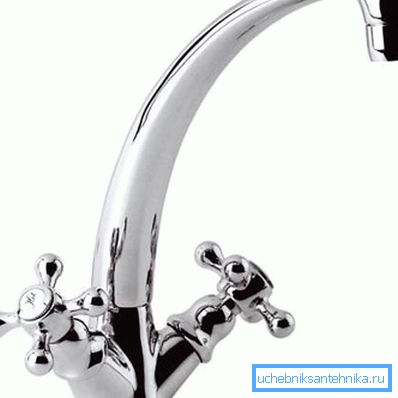
Mixers
Differences in valves
Note. This article focuses exclusively on the mixers. Water taps or grommets with a spout will not be considered here.
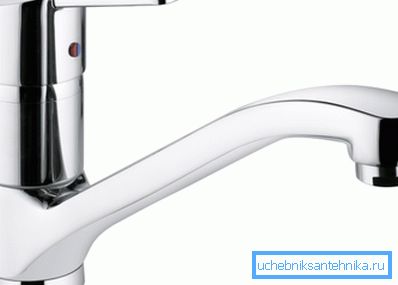
- Most often, if you see water taps for the kitchen with one lever (adjustment knob), then most likely, the stop valves of these mechanisms consist of a plastic or ceramic cartridge, which is responsible for mixing and adjusting the water pressure. Such mixers are very popular, as the installation process of the desired temperature and intensity of flow with one lever is very simple and convenient, especially in the kitchen - when one hand is busy with something, the other can be controlled by the device.
- In addition, single-lever taps for water in the kitchen can be made with ball valves, but in appearance it is completely invisible. - and in one and in the other case there are no external distinguishing features. But experienced plumbers can still distinguish - a device with ball valves is usually heavier than a similar mixer with a cartridge, but not much. The ball valve is more reliable than the cartridge, although it also wears out.
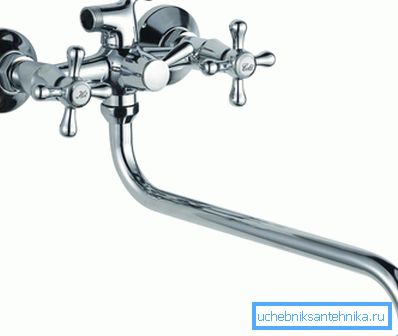
- In addition, water taps for the kitchen can be with valves, controlled by faucet-boxes, but these valves are not the same mechanism - they are either ceramic, that is, brass, with a ceramic pair to adjust the water, or with a worm gear.
- The visual difference between these valves is the number of turns of the valve in the cycle of closing / opening of water. So, in the case of ceramics, mixers are considered to be half-turn, although sometimes the turnover can be more than 300?, And in the case of a worm gear, their number can be from 5 to 10. Mixers with ceramic cranes are considered to be of higher quality, but the price for worm gear boxes is somewhat lower.
Cartridges
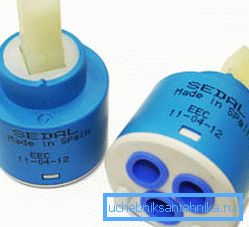
A cartridge with a ceramic core has always been considered better, although it is difficult to explain this preference to the author of this article. First of all, the rubber gaskets of the seal that you see on the underside of the right part in the top photo fail.
The fact is that after the wear of these gaskets, it doesn’t matter what material the core is made of - the seals cannot be replaced and the entire device needs to be removed and replaced with a new one.
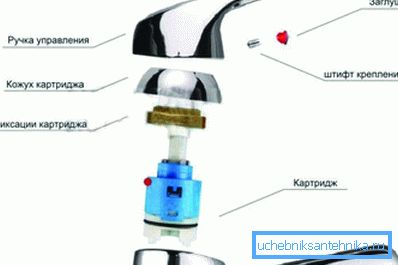
But, be that as it may, let's find out how to remove the faucet in the kitchen to repair it, or rather, not even to remove it, but to disassemble it, so a complete disassembly of the mixer is needed only if it is completely replaced.
Let's start with the lever switch - under it, on the case, there is a red and blue decorative cap that you need to remove. To do this, pry it with a sharp object such as a knife or screwdriver.
A screw will open under your view, which in this case has a slot more often, less often - a hex socket - you will need to make three full turns to the left to release the handle.
In most cases, if you pull the handle up, the handle will come off very easily, but if the mixer has flowed through the upper part of the body for a long time, there may be accumulation of salts and lime scale. Then dismantling should be done with a slight loosening of the lever in different directions.
Under the handle you will see a decorative washer, which is best unscrewed by hand, so as not to scratch, but if it does not work, then put a linen or calico napkin under the gas key (simple fabrics have better adhesion with the surface). Under the bottom is a lock-nut, which you also need to unscrew, only here you can use the key without fear of scratches.
Everything, now you just have to pull out the cartridge and go with it to the store. The fact of the matter is that they come in different sizes and they will pick you the right number on the spot. After that, you will only have to assemble the mixer in the same order in which the dismantling took place and turn on the water for testing.
Ball shutter
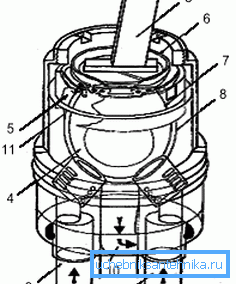
- -
- -
- Stem to adjust the flow;
- Hollow ball;
- Rubber saddle;
- Adjustment ring;
- Ball cuff;
- Adjusting cuff;
- Entrance for water;
- Water outlet;
- Sleeve ball.
First, pay attention to the ball valve device, which consists not only of the ball with holes, but also of various saddles, rings, seals, and so on, that is, the ball with the rod is supported by various small details.
The main problems of such a mixer can be a leak, difficulties with adjustment in one or the other direction, as well as a weak head. In most cases, problems may be caused by rubber jaws supporting the ball, which wear out, limescale or salt deposits can build up on them, but it can also be the wear of the springs, or of the ball itself.
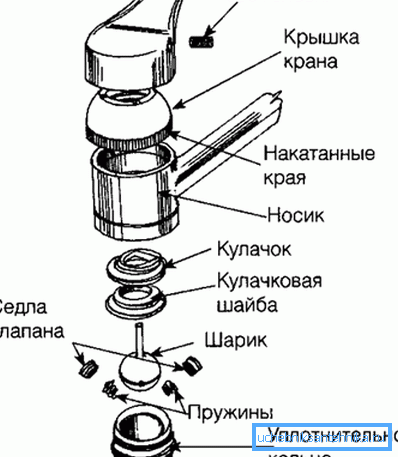
Now let's try to repair the ball mixer, and if it just flows from under the upper part of the body, then consider yourself lucky, but about everything in order, as required by the instructions.
At first, everything happens as when disassembling a tap with a cartridge — we remove the handle and for this we unscrew the screw (in this case it is more often for the hexagon than for the minus screwdriver) - three turns, just be careful not to lose it. After that, remove the decorative washer - it often resembles a chrome dome or cap.
In front of you (under the lid) there will be a plastic seal that can wear out due to rotation of the spout or become dirty, but if in the first case a new gasket is needed, in the second case it can be simply washed with household detergents. This element can cause leakage in most cases. (See also the article How to choose a sink: features.)
But if you had problems with adjustment or pressure, then disassembly needs to be done further - we remove the lock nut - it often has slots for the fork key (although this is not always), but dismantling can also be done with a screwdriver (from left to right). After that, you will have access to the ball constipation.
Note. Most likely, you will have to change the whole set, since individually you will not be able to find such details, although the kit itself is also not so easy to find. Ordinary plumbing stores do not order such repair kits, and they can most often be found in company stores or ordered online.
Cranes
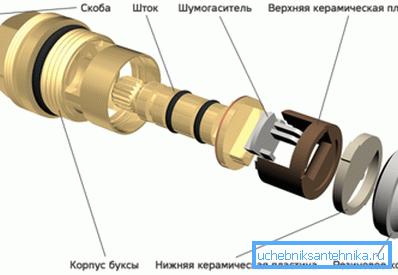
Now let's see how the faucet is arranged in the kitchen with two valves, which are regulated by faucets. And the bush itself is held by the lock nut under the valve.
First, let's look at how the ceramic pair works - the bottom plate with the hole always remains fixed, and the top plate is rotated with the help of a stem fork, driven by a thumb. If the holes on the ceramics coincide completely, then the passage is open completely, but when turning, the cross section of the passage changes up to complete closing.
From the bottom, the axle box has a rubber ring that is inserted into the landing bowl on the body - this rubber band serves as a sealant when water is supplied and it flattens out over time. If this is so, and all the other details of the mechanism are in order, then the axle box can be not changed, but repaired.
To do this, remove the retaining ring from the shank and push the sealer together with the ceramic pair with a rod, if it does not work, then hit the shank several times with the screwdriver handle - this interferes with the deposit (salt, alkali). (See also the article How to choose a sink faucet: features.)

After disassembly, glue on a movable plate 2-3 layers of tape, so you will increase the rod stop, and the gasket will press more tightly. You can also make a washer from copper wire and put it under the ring - the effect will be unambiguous.

In a box with a worm gear, everything is somewhat simpler - there is a rubber shut-off valve down there that wears out. It is very easy to replace it with a new one or cut it yourself out of thick, thick rubber.
Conclusion
We told you how to disassemble and repair this or that mixer, but it makes no sense to assemble the faucet in the kitchen, as this is simply done in the reverse order. You can choose a mixer based on your knowledge of the device of its valves.