Dacha shower with their own hands: what should be considered
On the site of souls - a necessary thing. In the morning, it makes it possible to get away from sleep faster and easier; in the evening, after working in a garden, it effectively reduces fatigue.
Moreover, it is needed if your property is not connected to the water supply. We will tell you how to build a dacha shower with your own hands step by step.
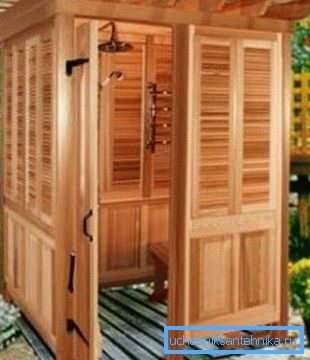
Structural Engineering
First of all, you will need to determine the location of the shower.
Where to place the booth
- If you want to arrange a shower in the summer house with your own hands, arrange it on the first floor, near the toilet. So you do not have to pull far water and sewer pipes. When there is good pressure in the system, or you will use a water pumping pump, the shower can be equipped on the second floor of the house.
- If the cabin is built on the street and only the sun warms the water in the tank, the instruction recommends taking a place under it on the sunny side, protected from the winds.
Note! Pick up the area to which it is possible to supply clean water and equip a sewage well there. Water supply will be convenient if the shower is placed near the water intake structure.
So do not have to pull away the pipe or hose. If the drains are not discharged into the septic tank, then the booth should be installed next to the gutter.
- It is undesirable to put the structure close to the borders of the site.
- If the shower is heated, it should be placed away from the residential building.
Dimensions and layout
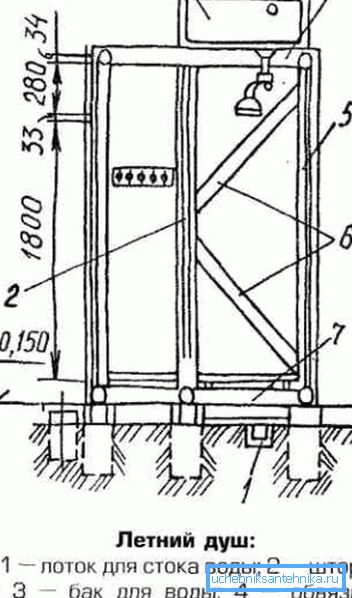
Further it is necessary to determine the dimensions of the future structure.
- A good water pressure will give a tank raised to a height of 2.5 / 3 m.
- Of course, the cabin must be made comfortable. Its minimum external dimensions are 1.5? 2 m. Then you can place inside the clothes hanger and shelves for hygiene supplies.
- The internal dimensions of the cabin must be at least 1–1 m. So you can freely during the water procedures raise your hands up and bend down without the risk of stumbling on the walls of the shower.
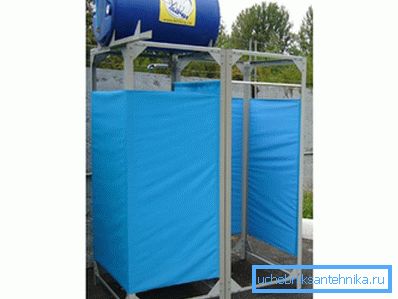
- Projects of a country dacha do-it-yourself with two sections are popular: a dressing room with a width of at least 6 m and the washroom itself. On this basis, the minimum internal dimensions of the cabin should be at least 1 × 1.6 m.
However, it is better if they are 1.4? 1.9 m. Adding here the thickness of the walls, you will get about 1.5? 2 m.
What building materials to choose
The summer shower booth can be made of many materials.
Their choice depends on your aesthetic preferences, financial capabilities and product characteristics.
- The most aesthetic structures made of wood.
- The most practical cabins from cellular or monolithic polycarbonate.
- The lowest price for simple structures on a wooden frame, the walls of which are covered with plastic film.
- You can make a country shower from a professional sheet with your own hands. However, it should be noted that the metal in the sun heats up significantly.
- The walls of the DSP and OSB are quite massive.
Necessary tools and materials
From the materials you will need the following:
- Sand, gravel, cement for the foundation.
- 4 steel or asbestos cement pipes with a cross section of 90 - 100 mm and a length of 1.5 - 2 m for pillars.
- Wooden bars section of 10 cm or metal corners for the frame.
- Selected building material for walls and roofs.
- Metal or plastic water tank 200 l.
- Watering can with valve, adapter and tape FUM.
- Reservoir for septic tank.
- Pallet.
- Door.
- Screws, self-tapping screws, antiseptic composition, silicone sealant.
Necessary tools:
- Capacity and shovel for mixing concrete.
- Hacksaw.
- Electric drill with drills and nozzles for screws.
- Hand drill.
- Hammer.
- Brush
Building shower
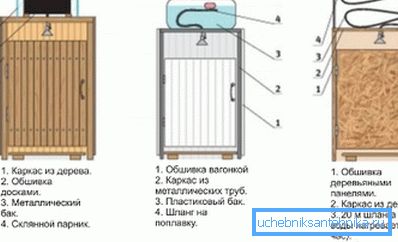
Having decided on the design, location and materials of the structure, make your own country dacha drawings. Then you can get to work.
Foundation arrangement
The most economical and simple in the construction of the column foundation.
At the same time, it is quite reliable and will safely withstand the weight of the structure along with a full water tank.
- First, mark the construction site according to the selected shower dimensions.
- Asbestos-cement or steel pipes can serve as foundation pillars.
- Drill 4 holes in the corners of the future booth. Their depth should be 100-150 cm.
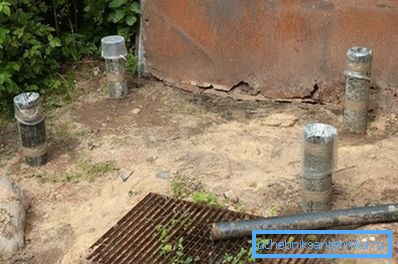
- Insert into the well pipe. Above the ground they should rise 50 cm.
- Fill the holes with concrete. Give it time to harden.
- Lay on the top of the support bars. Then attach them to each other and to the posts. So you get a closed harness.
Note! However, it is more convenient to assemble a frame from a bar on the ground. It is then attached to the supports with long anchor bolts. In this case, all the axes of the foundation must match.
Frame, floor, walls and roof of the building
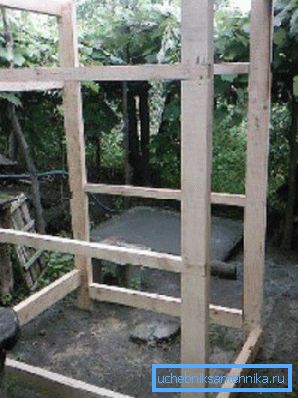
- If the water in the shower is heated, then pour the foundation with concrete or lay out a rectangular brick platform. Floors should be equipped with a slope in the direction of the sewer drain. On top of it should install a crate of wooden slats.
- Assemble on the foundation a frame of wooden beams or steel corners.
- Strengthen vertical racks of the “skeleton” of walls with cruciform binding.
- At the top, leave the ledges of the bars the size of the height of the water tank.. They will protect it from rolling down, and also serve as a framework for warming the tank.
- Roof make odnoskatnoy, with a slight incline, so it will be convenient to put the tank. First, bring down the roof sheathing, then lay a metal profile, slate or other selected material on it. Do not forget to make a hole in the sheet for the adapter, to which then screw the watering can.
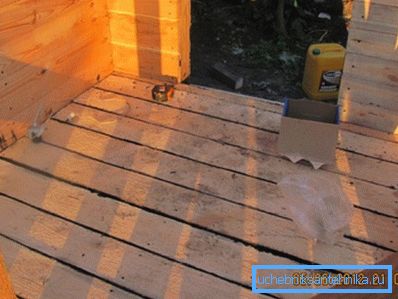
- Lay on the crate floor boards. Put a pallet on them and move it to a septic tank.
- The shower may not have a tray. Then the floorboards should be laid with a gap of 0.5 - 1 cm, through them the water will go into the drain hole.
- Next, sheathe the walls of the sanitary facility with selected material.. If you prefer an opaque coating as a decoration, then in order to have light in the shower room, it is advisable to make a small window in the upper part of any of its walls. It can be closed with polycarbonate, glass or covered with plastic or mosquito net.
Note! If the frame and skin of the summer shower are made of wood, it should be protected from moisture and harmful microorganisms. To do this, soak the wood with an antiseptic composition.
- If you choose polycarbonate for shower, then note that thick (from 6 cm and more) colored plastic is not as transparent as a thin, colorless material. To improve the decorativeness of the lining and make it opaque, you can apply a color self-adhesive film with or without a pattern.
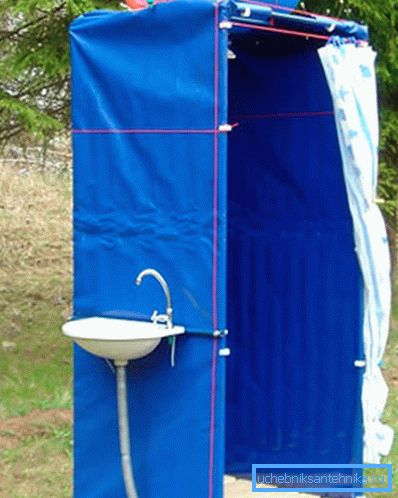
- The walls of the building can be made of canvas, tarpaulin, banner cloth or plastic shower curtains. The material can be covered with a frame or just hang panels on it. In the latter case, the lower part of the panels should be weighed down so that the curtain during water procedures is not broken by the wind (for example, sew or glue a reinforcing bar of appropriate length under the top).
- Next you need to install a wooden or plastic door.. Keep in mind that the more closely you fit it, the warmer you will wash and the less drafts arise. A simpler way is to use a curtain instead of a door.
Water tank
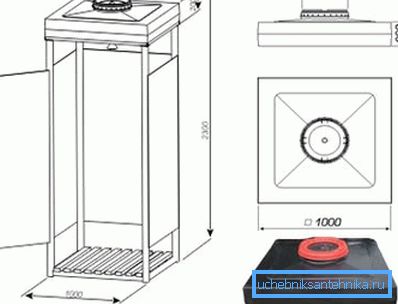
Now it's the turn of the water tank installation. It is best to choose a plastic tank, because metal counterparts are quite heavy. In addition, stainless steel steel tanks are expensive, and in black iron barrels the water quickly becomes turbid due to rust.
When building country showers with your own hands, you should remember the main requirements for a water tank.
- It should have a dark color. So the tank and, accordingly, the water in it, will quickly heat up from the rays of the sun.
- In the tank should be openings for manual pouring of water or under the hose, as well as for the adapter to the watering can.
You can use a conventional metal or plastic barrel, preparing it for the functions of a water tank. It is possible to buy a special tank for a flat-shaped shower. He already has connections and the necessary holes. Often, products are equipped with electric water heating and a pump for its injection.
Having inserted the adapter from the drain hole of the tank onto the watering can through the hole in the roof, fill the remaining circular gap with sealant. Next, stretch the plastic wrap over the tank. So the water will warm up in it faster.
Conclusion
It is rather simple to make country shower by own strength. The construction is compact enough and will not require a lot of power and materials for construction.
Watch the video in this article. It will introduce you to additional information.