Different shower drains and their installation
It is quite natural that the floor without a tray in a shower or a room is very convenient, as there is much more space, but in such cases a drain is needed and, quite naturally, this may raise the question of which shower ladder is better and how install it.
The thing is that there are quite a lot of such devices, they have a different configuration, therefore, because of this, the installation method may even differ, although its principle still remains the same. Let's try together to understand all these issues, and also, for a full understanding of the topic, we will see a video in this article.
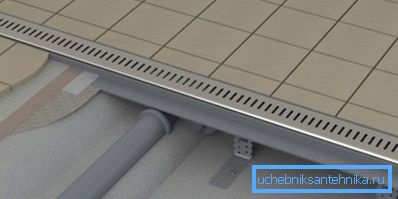
Shower gangway
What they are
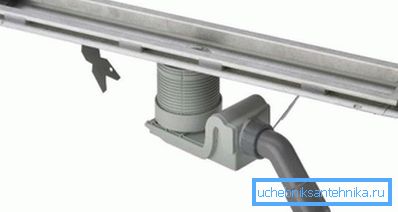
- Perhaps the most frequently used valve for such devices is water, which is collected in the knee of the lower part of the device (the knee is obtained below the level of the drain, therefore, there is constantly accumulated waste water). From a technical point of view, this is an ideal solution - the liquid itself serves as a plug from the ingress of air streams (odors) from the sewage system into the room through the drain device.
But there is one very serious disadvantage - if such a knee is not rinsed systematically with fresh water, then it starts to stagnate there, therefore, it will cause bad odors - the boomerang effect works.
- In addition to odors, standing water contributes to the proliferation of bacteria, and this is a more serious problem, so the instruction indicates that such premises should be periodically treated with disinfectants. The main advantage of such a device can be called its lowest cost, although in the presence of serious problems such quality as cheapness can hardly be called an advantage.
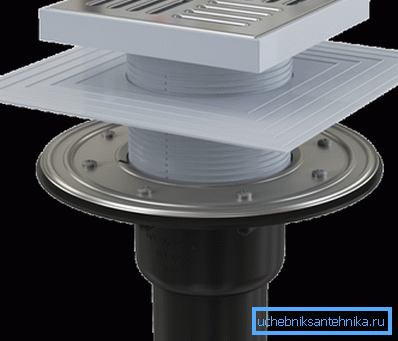
- In those cases when a dry floor drain is used in the floor, then, as you can probably guess, the water does not stagnate in any knee, but goes directly through the sewage pipeline to its destination.. The shutter in this case is a light ball at the inlet under the grate, which floats when water gets there - the passage is released and the liquid drains completely, after which the ball returns to its place.
- Thanks to this device, two problems are solved at once - first, the smell does not get into the room from the sewage system, and secondly, moisture does not accumulate there - the liquid that remains under the grate evaporates as quickly as it does from the ceramic tile of the floor.
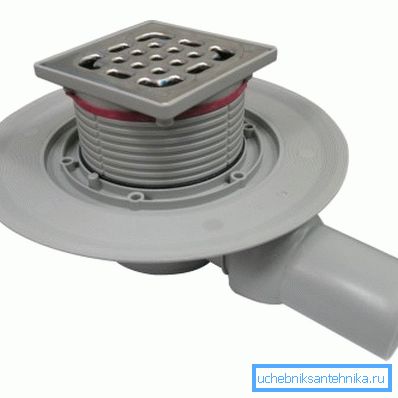
- As you understand, a certain slope is necessary for sewer pipes, and the discharge point will always be at the highest point and in order to withstand such a position it is necessary to have a certain space under the floor. But sometimes this space is not enough, that is, there is no possibility to lower the pipe at the drain to the desired depth, since this will not have the desired slope or it will disappear altogether.
- In such cases, angled fixtures are used, as in the photo above, but there will not necessarily be a round or square grid - this can also be a shower gangway going through the whole room.
Note. As you can see, the real device does not indulge with varieties on the plum principle - there are only two of them - with a dry one and with a water gate. In addition, they differ in the principle of installation - bottom and side. But according to the configuration and size of the grid can be divided into many categories, but it already depends on your taste.
Sewer pipe
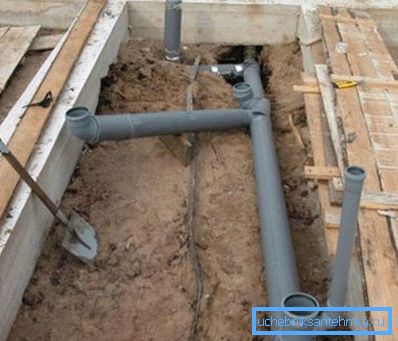
The very first thing you should be concerned about when you plan to install a shower ladder with your own hands is to lay a sewer pipe and connect it to the general system, or drain it to a septic tank (depending on the layout of the building). Of course, it is best when this issue is thought out even during design and embodied during the construction of a building, but unfortunately, this is not always the case, however, you cannot get away from the laws of physics, and you will have to follow certain rules and regulations.
| Device name | Bias cm / cm linear | Optimum tube diameter in mm |
| Bath | 1/30 | 50 |
| Shower | 1/48 | 50 |
| Toilet | 1/20 | 100 |
| Sink | 1/12 | 50 |
| Bidet | 1/20 | 32-50 |
| Washing | 1/30 | 32-50 |
| Sink, bath and shower with combined drain | 1/48 | 50 |
| Central riser | - | 100 |
| Discharge from the riser | - | 50-75 |
Table of optimal slope and diameter of pipes for sewage
Pay attention to the table above, and you will see that in this case you will need a pipe 50 mm in diameter (usually plastic), which ideally should run at a slope of 1.8-2.0 cm per linear meter.
Of course, it is very difficult to withstand such accuracy, especially when you have to do a gasket for a long distance, therefore, you can take as a standard an average value between 1 cm and 2.5 cm per linear meter.
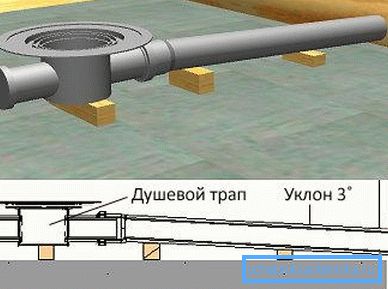
Note. When calculating the slope of the pipe under the floor, do not forget that the ladder for the shower also takes a certain place in the depth when diving, therefore, it would be very good if you already had it in place so that you could accurately calculate its immersion .
In this case, you need to rely on two indicators, this is the level of the screed and the thickness of the ceramic tile along with glue - if the height of the screed is easy to determine, then the tiles may not yet be available, therefore, you can start from the 15 mm figure.
Mounting the ladder in the shower
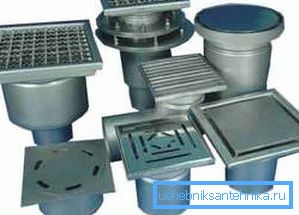
So, now we can virtually start the installation of the shower ladder with our own hands, and imagine that we have already chosen the model of interest to us and let it be a device with a bottom drain (it’s not a top configuration (type of grid)), 136 mm high from the top of the grate to the end of the nozzle. Remember this size (136 mm) - we will come back to it.
Having such parameters, we need the fate that it should turn out 2-3 mm below the upper plane of the ceramic tile, that is, in order to place a small depression in the place of the drain.
But that's not all - the floor in the shower room is also made in the form of a bowl, that is, it must have a small slope towards the drain hole and the tilers or you yourself must take care of this. But we are only interested in the place where we will install a ladder for the shower in the floor with our own hands and this should be the lowest point in the area of this room.
So, you should count from the top of the tie in this place, plus another 13 mm - also remember this number or make a virtual mark on the nearest virtual wall.
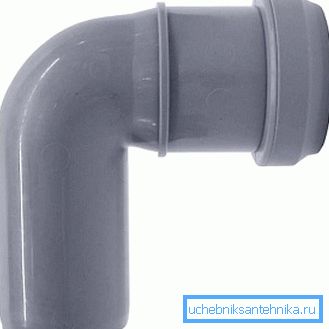
Most likely, when you use the bottom connection ladder, you will use a plastic corner for 90 ° to go to the sewer pipe, which you see in the top photo, therefore, you will have to add the height of this very knee.
Look at his image - on the socket, almost at the bend, there is a strip - it can be considered as a label - in this place the outlet of the drain will rest on the end of the socket. From this mark to the beginning of the wall of the conjugate nozzle is about 20 mm and the nozzle itself has 50 mm, which means that we will have 70 mm from the end of the drain to the bottom of the sewer pipe (although you can push off from 20 mm which remain to the upper wall of the pipe) .
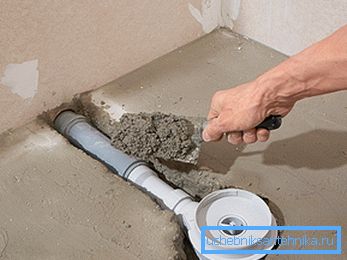
Now let's think about the virtual mark on the virtual wall, which should indicate the upper plane of the grate - from this point to the upper part of the sewer pipe we should have 136 + 20 = 156 mm. And if, on the basis of these calculations, you get a sewage slope of 1.8-2.0 cm per linear meter, then consider that you have coped with the task almost perfectly!
It happens that the pipes are hidden very deeply, since they take into account the level of soil freezing (if the sewage goes out of the foundation outside the house), then such calculations are much easier - you even have to add inserts.
But if you have such an opportunity, then it would be best for you to use more than one knee for 90? - so you take a sharp turn, which significantly reduces the permeability of the pipe.
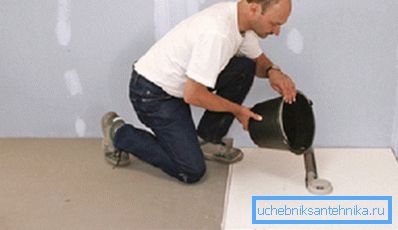
Recommendation. After installation, while you have not yet begun to lay the tile, be sure to check what you have done - pour a few buckets of water into the drain hole to make sure that the system works well.
Conclusion
By and large, installing a shower ladder with your own hands is a snap, it is a bit like the assembly of a children's designer, only physical strength is needed when docking pipes. Here the main thing is to withstand the slope and level of the upper plane of the grate so that there is never any water left on the floor.