Dig a well - ten steps to make your dream come true
If you think that there will not be enough weeks for such a serious event, then you are mistaken in one thing - in time, because the masters with experience take everything to do everything in four days. But the fact that the matter is serious, then you are absolutely right, moreover, in the whole arsenal of ensuring future work, there must be personal protective equipment - a reliable helmet and gloves, in any case. We will begin to answer the question of how to dig a well properly, with the usual for any such work - with careful preparation.
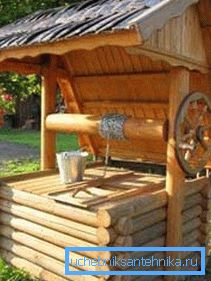
Week and you are provided with water on the site
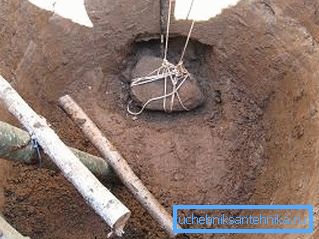
How well you get to the point and determine its success.
The first step is preparation
Here you have to do this:
- First of all, find this very water on your site.
There are several search methods, but among the most famous:
- ability to communicate with neighbors - be sure to consult with the owners of the surrounding areas that already have wells or wells; find out the operating time of the sources, their characteristics (head, depth) and behavior throughout the year, what is the quality of the water; the result of these conversations should be a map of the area with already existing access points to the water;
- try to confirm the guesses that have already arisen by performing a search yourself with the help of the so-called vine or electrodes;
- for control, at the expected test drilling points, be sure to leave bags with silica gel for a day - granules that are well absorbing moisture; if the granules in a day turn out to be wet, most likely there is water below.
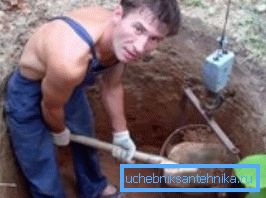
Helpful advice! Silikogel is an excellent “sensor” of moisture, but keep in mind that it reacts to both petroleum products and ether, it has a third degree of fire and explosion hazard, we are not advised to work with it without means of protecting the upper respiratory tract.
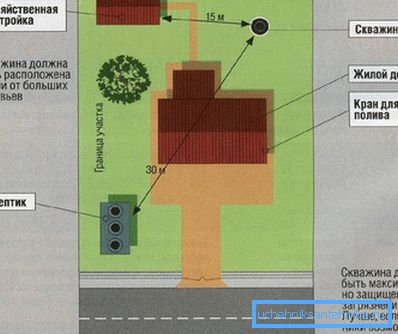
- Secondly, Accurately select the location for the well.
For him, there are some conditions:
- no closer than 5 meters from the neighbor's plot, otherwise you will have to ask him for consent to work;
- no closer than 20 meters from the silo and outbuildings to avoid contamination of the groundwater of the well;
- no closer than 20 meters from the main dacha dwelling house, in order to avoid affecting the soil at the well location;
- no closer than 7 meters from the nearest point of the carriageway outside the site is already a requirement of the SNiP;
- away from the trees - if you meet the roots of the trees below, this can significantly slow down all the work.
Helpful advice! In addition to tree roots, big stones are a real disaster when digging a well. You can, of course, hope that it will “carry it through” and this opportunity will not meet in the next 20 meters deep. But we advise you to go the other way and with the help of a special device, probe the ground for large massive solid objects.
If the probe gives a signal on the screen from such an object - this is a stone. The best way out of such a situation would be to slightly shift the point of the center of the well, rather than trying to deal with an obstacle.
- Well, and, thirdly, decide for yourself another important question regarding the legal registration of the work:
- if you are going to do a well and solve problems with your neighbors, the structure itself will be no deeper than 20 meters, then you do not need to arrange anything, such intervention in the depths is available to everyone and everyone;
- if the well is deeper than 20 meters, it is necessary to obtain official permission to carry out the work, and then register the source;
- if you decide to stop at the well, then regardless of the depth, it will require the creation of a well passport and official registration.
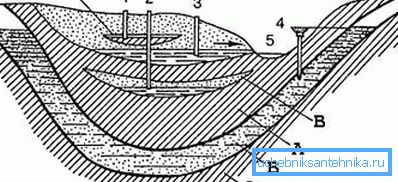
The following diagram of possible groundwater situations is all four that may occur:
- 1 - the highest level, which is located not lower than 4-5 meters - overhead; this water is easily available, but it will not be your goal, it is rather dirty and often disappears even in a not very dry summer;
- 3 - level up to 10 meters, water without pressure between the layers; This may already be useful to you, although you will definitely need a filter.
- 2 - level from 10 to 40 meters, what is called truly groundwater; when digging a well, they are our goal;
- 4 - here the water comes under pressure from depths from 40 to 250 meters (depending on the terrain); it is the famous artesian water, such only for wells; The behavior of artesian water largely depends on the presence and activity of nearby water bodies (5).
The second step is test drilling.
Actually the final decision on whether there is water and what to do, a well or a well, you will make after conducting a test drilling, which must answer two questions:
- whether there is water below and its bedding level is the first;
- and second, very desirable - what is the nature of the soil at the drilling site; In general, it is necessary to strive to obtain the picture shown in Figure “B”:
- A - first half a meter of peat;
- B - further, about 2 meters of earthy sandy loam;
- C - now, up to 2 meters of clay;
- D - here sand is from 2 to 4 meters;
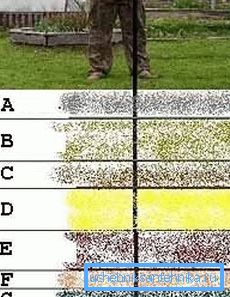
- E - clay layer up to 3 meters, which is a good sign of the presence of water and is the top waterproof layer;
- F - the next two layers already speak directly about the presence of water, although their auger passes almost imperceptibly; first, 5-10 cm long;
- G - then 20 centimeter predzhilnik;
- H - this is the purpose of drilling - the desired water layer.
The third step - the choice of material for the formation of the well
The most important step, which will determine the well-being of the well in the future. Quite a lot of materials to choose from are wood, brick, and stone.
But on the other hand, in modern times, everything will be much simpler - everywhere, to solve the problem, how to dig a well on its own, reinforced concrete rings are used. It is necessary to break the head, but only choosing a ring in accordance with the size of the future hydraulic structure.
Helpful advice! In this regard, we advise you to pay attention to the rings of polyvinyl chloride, this omnipresent PVC. The construction market offers excellent opportunities for the use of ultra-strong and resistant to external influences plastic, even with the construction of deep-water wells. The advantage of such rings is their very low weight compared to competitors made of reinforced concrete.
Among the rings that are suitable in size for wells, you have the following (three characteristics are given: height, mm; internal diameter, mm; weight, kg) types:
- KS-7-6: 600/700/250;
- KS-7-9: 900/700/410;
- KS-7-10: 1000/700/457;
- KS-10-5: 500/1000/320;
- KS-10-6: 600/1000/340;
- KS-10-9: 900/1000/640;
- KS-12-10: 1000/1200/1050;
- KS-15-6: 600/1500/900;
- KS-15-9: 900/1500/1350.
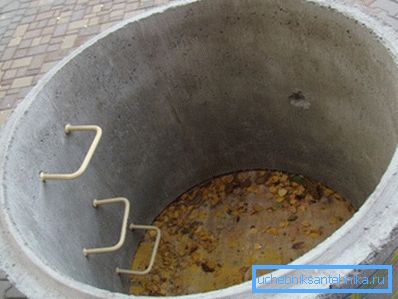
Usually, rings K-7-10 and K-10-9 are chosen for the formation of wells, in other words, 100 or 90 cm in height with a hole diameter of 70 or 100 cm. Here you should always compromise between the size and weight of the ring.
Helpful advice! When choosing rings, we advise you to pay special attention to the presence of a docking profile at the ends and, like aerobatics, the presence of an internal staircase. This will greatly simplify all the work.
Fourth step - tooling preparation
Frankly speaking, the availability of rings solves many of the problems of creating wells. All the work would be turned into installation inside the rings of a friend to a friend, if not for one “but”. A “but” is quite significant - the weight of the rings, which, depending on the type, ranges from 400 to 600 kg (recall, the world record in the push in weightlifting is only 264 kg).
Therefore, when working can not do without:
- a crane - which is expensive, given that the crane will have to be rented for the whole working day during the week;
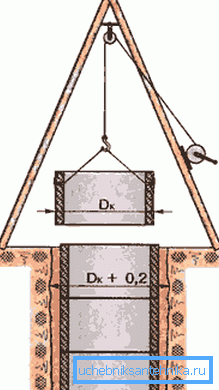
- or, a special tripod, sufficiently reliable to hold the weight of the rings (figure “C”);
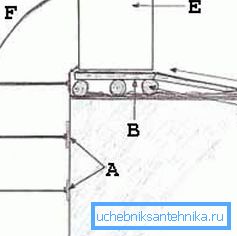
- or, constructing a podium for mounting the ring, rolling it up and tilting it into the mine (according to the “D” scheme).
In the diagram "D":
- A - locking brackets;
- B - a board of boards;
- C - roll of logs;
- D - trap;
- E - set ring;
- F - direction of the ring installation; the tooling itself may seem very simple compared to a tripod, but it requires
- the use of physical force when the ring leans;
- in addition, the lower ring, on which the installation is made, must be practically flush with the ground (or even the upper level of the shield B);
- All alignment has to be done manually, which is very difficult when the weight reaches 600 kg.
Progress
When the training has been carried out in full and the strategy for installing the rings has been worked out, the process itself will be as follows.
The fifth step is to prepare for the installation of the first ring.
It is the first ring that will be at the bottom that will determine a lot:
- first we make markings on the ground for digging - a circle with a diameter of 40 centimeters larger than the diameter of the ring;
- proceed to digging the block, while there are two shovels here - tychkovaya and shovel, each has its own task;
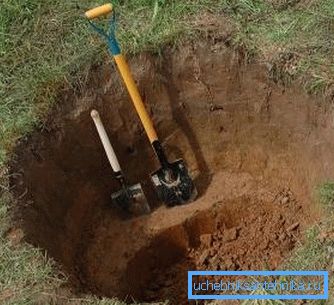
- very carefully process the sidewalls of the resulting groove;
- strictly speaking, the more you can manually “go down” like this, the better, but, in general, it is enough to make a hole 10–20 cm larger than the height of the ring;
- when the height is reached, level the bottom;
- then put the tripod and check the reliability of its fixation;
- we roll the first ring on the trolley, fasten it to the tripod slings and lower the ring exactly in the center of the pit;
- align the perfect position of the ring, both vertically and horizontally, there can not do without a level.
The sixth step is to install the remaining rings.
When the first ring stands, the installation of the others is already proceeding in the same way:
- if the ground is not heavy, then, starting from the center of the circle at the bottom and gradually moving to the sides, we extract the ground;
- if the ground is heavy, it is better to start extraction of the soil, on the contrary, from the sides, practically from under the ring;
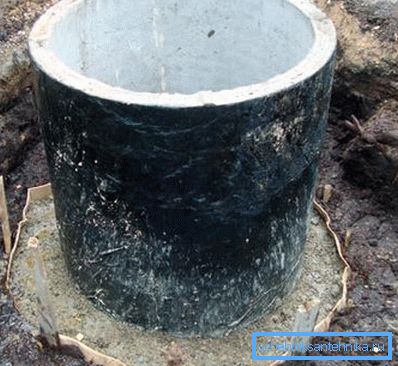
- at the same time, the whole structure will begin to sink under the weight of the rings, and it will eventually consist of 3–4 tons on a 6–7 ring or 6–8 meters depth;
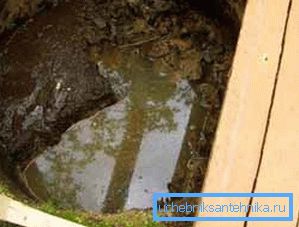
- gradually removing the ground, at the same time and align the design;
- this continues until water appears below.
The seventh step - removing the first water and waiting
At this stage, more will have to wait:
- when the first water appeared, we delve a little more in the center;
- then extract all the water along with the sand applied and
- let us leave the building alone for 12 hours;
- if after this time the water has accumulated again, then again we remove it along with the sand, very often this operation is done several times, reducing the waiting time if water is collected quickly;
- a sign that it is time to take the bottom, will be the emergence at the bottom of the pronounced water veins that go all over the bottom;
- the appearance of veins is a signal to stop working for a day, no less.
The eighth step - making the bottom
After 24 hours, it is time to take up the bottom:
- we pump out water;
- align the bottom;
- bottom 30 centimeters laid fine sand;
- then also 30 cm - large;
- even higher - a layer of shungite - a mineral that perfectly collects moisture;
- further above — a layer of medium-sized pieces of coal;
- above coal - a layer of quartz crumb;
- and as the top layer - 20-30 centimeters of silicon gravel.
Ninth - work on the rings
Work on the rings is performed inside and outside:
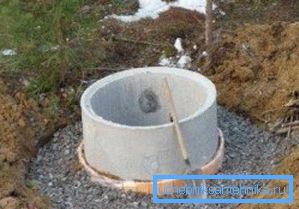
- but we start outside, falling asleep and carefully tamping sand-gravel mix between the ground and the rings;
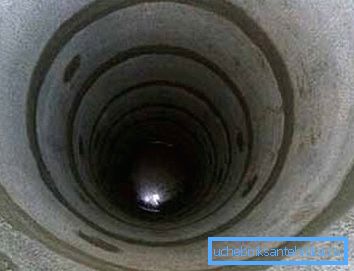
- when backfilling has been brought to the ground level, we proceed to the concreting of the joints between the rings - a very important operation;
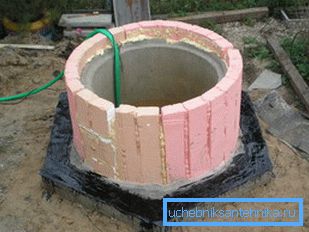
- on the uppermost ring we make a concrete shirt at the junction of the ring with the ground just below ground level.
Tenth - clay castle
Work on the surface completes all the work:
- here, first of all, we perform a protective clay lock, which is supposed to prevent the penetration of moisture to the outer casing of the well;
- then we are already engaged in the design of the upper part of the well - the tip, then the action is more at its discretion, based on its own aesthetic ideas, how should such a structure look from the outside;
- you only need to do one thing — a well cover for the well to prevent even foliage from getting inside.
Safety
Speaking of such work as digging a well, it is unforgivable not to mention safety precautions, because the work can be classified as potentially quite dangerous:
- First of all, perform work only with a partner who can help in case of emergency situations;
- Secondly, be sure to work in a reliable helmet and gloves;
- third, constantly check the presence of gas in the mine - if the torch does not burn, then it is time to ventilate the space below;
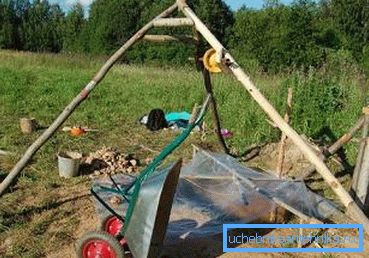
- fourthly, Be sure to use only reliable proven equipment, the price of negligence here, neither more nor less, your health.
findings
By and large, the answer to the question of how much it costs to dig a well under water does not exist, even if you ask it to a master with extensive experience in similar works. After all, you never really know what you will meet on the way down, and how the ground will behave. The answer will sound strange: “According to the circumstances.
There it cost 30 thousand, and there, literally, in a half-kilometer - all 100 ”. But it can be even worse: they dug a well - and there is no water, which also happens. Therefore, we repeat how thoroughly the preparation will be carried out, and this result will be obtained.
We also recommend watching the video in this article.