Digging a well in the country with their own hands
Even if a country house is rarely visited, there still need a source of water to not go about it to the neighbors, we will consider how to make a well in the country with their own hands.
Of course, you can drill a well on the sand or even an artesian, if, of course, you get a special permit, but the first option (well) will be more convenient to operate using several parameters. Below we will talk about this in more detail, and in addition, as an additional material, see the thematic video in this article.

About wells
Device
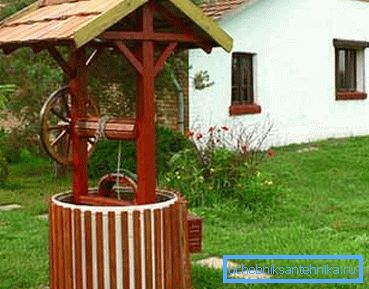
- If we talk about the constituent elements, then the well can be divided into three parts - it is the water intake, that is, the level where the water source is, the mine or the trunk of the entire underground device and the tip or aboveground part. But here we should not confuse the decorative and protective design with the upper concrete circle - just the names remain identical.
- Now let's look at the functions of each of the parts and start from the top.. The cap is designed to protect the source from dust and precipitation, which means that it is not only a concrete elevated ring of the well, but also a lid, which can be a whole miniature house. In addition, this arrangement prevents the freezing of water in the mine and the tighter the lid, the better the desired temperature will be maintained.
- This is followed by a mine or a water intake, where the dynamic and static water level is fixed (if you use a submersible or surface pump, the instruction provides for a mandatory calculation of the flow rate of the well). This suggests that when digging should include the use of water-pumping device, as it should be lowered a meter below the mirror. So, the sump should be equipped so that the hydrophore intake hose and the submersible pump fit in there. And this means that the distance to the mirror from the unit at the dynamic level will be one meter, and the distance from the suction side to the bottom of the well is at least 30 cm.
- And finally, the most important part is the source of water or an aquifer, which may be located in different locations at different depths.. As a rule, these are sandy layers through which the sources pass, but in special cases it may even be limestone. Depending on this, you will mark the level of digging.
Do it yourself
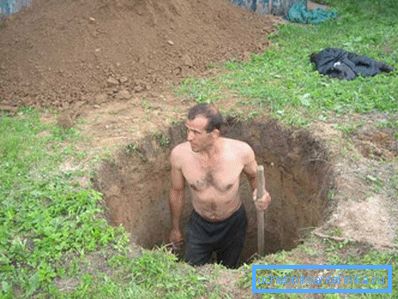
Now the most basic and perhaps the most dangerous part of the entire production is the digging of the mine, which will be carried out manually, with a shovel. The thing is that this process can be life-threatening, therefore, special attention and compliance with safety regulations are needed here.
Of course, preference is given to hard soils, but, alas, it is not always possible, therefore, fixing the walls are the basis not only of safety, but also of life.
The walls of the mine can be made from different materials, for example, wood or stone, to the well for giving, but it is much more convenient to order concrete rings for this.
The average depth of this arrangement can be from 10 to 20m, but in some cases it is necessary to dig even deeper to reach the aquifer. After that. As you reach the water, you will have to go deeper by 1–1.5 m in order to ensure a sufficient flow rate at a large water intake.
But digging the ground with constantly flowing water is quite difficult, so it will be very convenient if you have a submersible drainage pump on hand that is suitable for pumping out dirty liquid. In any case, you can even rent it for the time of work, as it will be extremely difficult to scoop out a bucket of bucket.
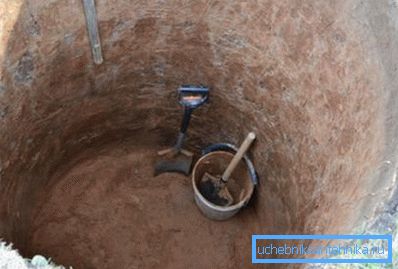
At the bottom, you should equip the bottom well filter, which is usually made of crushed stone of different fractions. So, for the first layer, a small fraction is needed - you fall asleep by 10-15 cm, then with the same layer you fall asleep the middle fraction and, finally, the largest fraction is needed upwards - this will allow the water to remain transparent.
If there is solid ground on your site, then the mine can be dug to the very end without strengthening its walls, but this is not always the case - sometimes loose soil is found. In such cases, you need to dig a hole for one ring, install it there and continue to dig inside.
The ring will sink under its own weight, and when you go deeper by a meter, put the next ring and so on until the very end - in this way you will fix the walls and be able to protect yourself from collapse.
This method with the gradual extension of the rings can be applied to any soil, as the safest. The fact is that during the collapse of the people who are in the depth, most often die, so safety should be in the first place. When digging a well on soft ground, it will be more convenient for you if you dig from the center to the walls, but if the soil is solid, then it is done the other way around - from the walls to the center.
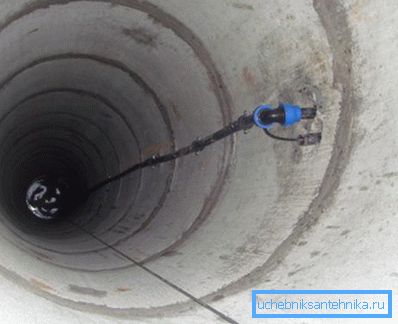
In order to prevent ground water from the upper layers, as well as rain and melt water from entering the mine, the rings of the well are fixed between them with a cement-sand mortar, but this can be done only in a dry state.
At the depth where the rings are in the water, this is impossible to do, so in such cases you can use tarred hemp. If you use a hydrophore or submersible pump at the water intake, then you will have to pierce a ring - carefully seal the hole around the hose with cement.
The technology of this production is quite simple, but you need to constantly use a plumb line or building level, so that the walls of the shaft are strictly vertical. In some cases, when you are not sure that there is an aquifer at a given place, it is possible to do test drilling.
Cap
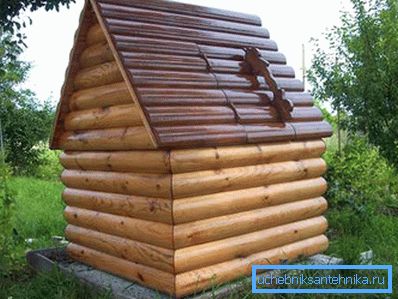
When you have installed all the concrete rings, then you have to take care of the tip, that is, make the cover and the house so that the garbage does not fall inside. Here, of course, there are several options when choosing a material and the price, of course, will also differ, but we will analyze with you the method of mounting the log house.
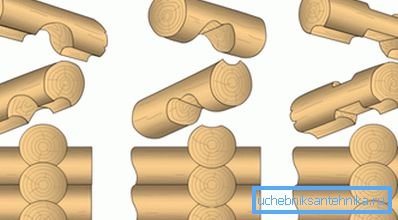
You can order a rounded glued log, and if you specify dimensions, you will only need to assemble them in the form of a designer. For normal solid wood, you can use the dressing methods, which are shown in the upper image, it is:
- a) ohlop in half-wood,
- b) cooled by a crest
- and c) to okhryap.
In fact, log huts were cut in such ways, so that for many it is familiar, but you cannot lay logs on the ground - for this you need to make a concrete base so that they do not bend.
For the lower strapping, you will need a solid or glued laminated timber with a minimum section of 100 x 100 mm. From it you can also make the top trim, on which you can install a box with a roof. In addition, it will be the basis for the gate and it will load on the water intake (lifting a full bucket).
Note. The use of glued wooden profile may be more profitable, because such a tree is almost not afraid of moisture. Therefore, having spent once, you will save yourself from repair for years, and besides, the tip will keep an attractive appearance - the tree will not turn black from old age.
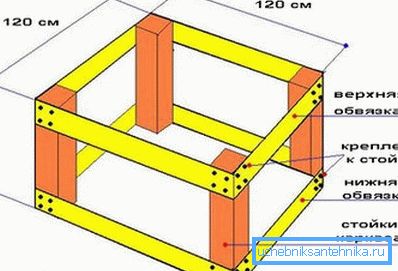
You can raise the frame to the height of the above-ground ring, and then install the roof in the form of a canopy, or close the house completely and we will now learn how to build such a structure.
For a deaf structure, you will need a frame, where you use 10050 mm beads as risers and rip it at the bottom and on top with boards 100-120 mm wide and at least 40 mm thick. To make it more convenient for you to assemble the structure, first assemble one wall of the frame, then the other and connect it to each other.
Note. For work it is best to use screws with anti-corrosion coating. Nails rust over time and, moreover, they can be stretched, weakening the entire structure.
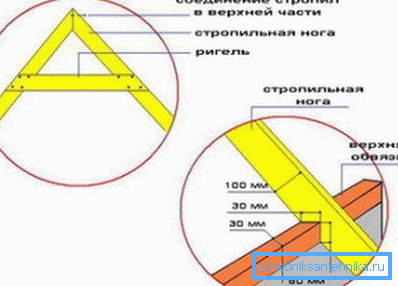
For roof trusses you can use the same bar of 10,050 mm, and the height of the roof will depend on its length. Between the two legs are connected by screws, where the ends, sawn off at an angle, should fit snugly to each other. In order to get the angle right, you can use a building block, and if there is none, then mark the beam, overlaying it one on another.
In those places where the rafters will be attached to the harness, cutouts are made, but the rafter should not be cut more than 30% of its width.
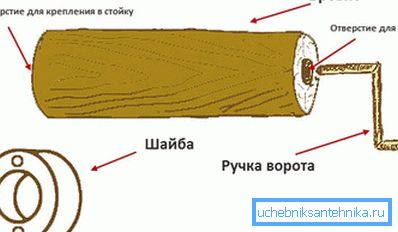
For the manufacture of the gate you need a piece of a good log, on which there are no knots, smooth fittings of 14-16 mm and two metal washers, and even better if it will be ball bearings.
To prevent the log from splitting, its edges should be bound with a metal strip and only then drill the holes for the handle on one side and the shaft on the other. Do not forget that the fittings can rotate in the log, so its end must be flattened, pre-heating on a gas burner.
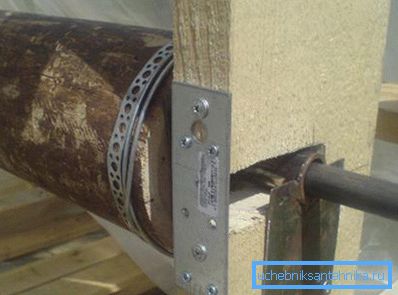
To make the fastening of the gate more reliable, wooden stands can also be shackled with a metal strip, as shown in the top photo. The roof can be covered with corrugated sheet metal, metal or ordinary slate.
Conclusion
To make a dacha well with your own hands, you will have to spend the main efforts on digging mines and installing rings. Making the head does not take so much time, and you can do it at any time. The main thing is that the garbage does not fall inside, so after digging, immediately cover the shaft with a lid.