Do-it-yourself plumbing: from project to pipe installation
To build a water supply system in the house or an apartment with their own hands is a rather difficult task, but still feasible even for those who have not previously encountered similar tasks. Having spent some time on preparation, you will be able to successfully perform design and installation work, while saving on payment for the services of professional plumbers.
Naturally, before taking up the tools, it is worth exploring all the available information. And for this we have tried below to provide basic data that may be useful to you.
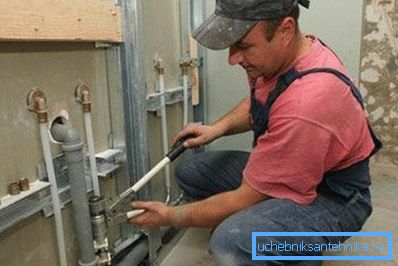
Water supply system design
Water source
If we need to design a water supply system in an apartment, then difficulties almost never arise. This is due to the fact that with centralized water supply, it is required to lay literally several meters of pipes to connect the entrance to the room with all the consumption points (there will be two or three of them).
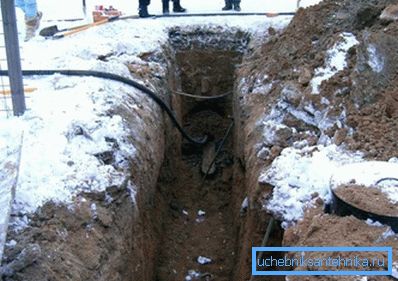
Where it is more difficult to deal with the water supply of a private house:
- First we need to determine the source. If a local water supply system is connected to the settlement, then we need to coordinate the connection to it in the municipal water supply channel or another licensing authority.
- The next question is connecting the highway to the house.. Here, quite often it is necessary to decide how to lay the plumbing under the road, since communications are not always laid before asphalting. The most reasonable way out in this situation will be to attract construction equipment, namely, installations for horizontal directional drilling.
- If you do not want to spend money, or you need to cross a road no longer than 8 - 10 m, then you can try to do it yourself.. Experts on the question of how to make a puncture across the road for a water supply system, recommend the use of a horizontal drill with extension rods. Of course, the complexity of the procedure is very large, but if you have more time than money, it is worth trying.

Note! According to SNB 3.03.02-97, the distance from the water supply to the road is at least 2 m from the edge of the side stone. However, in each specific situation it is worth resolving the issue separately, since often these norms are ignored by previously laid communications.
- If there is no water main, then it is necessary to equip a separate source. In this capacity, there may be various wells and boreholes, equipment with special pumps for the supply of water to the house.
- For more efficient use of the source, in addition to the pump, it is worthwhile to install an expansion tank for storing water reserves.. The presence of such a tank will contribute to uniform pressure in the pipes, and you can use the water supply immediately, without waiting for the pump to pump the next portion of water.
Note! The installation of expansion tanks also minimizes energy consumption and increases the service life of the pump due to its rarer switching on.
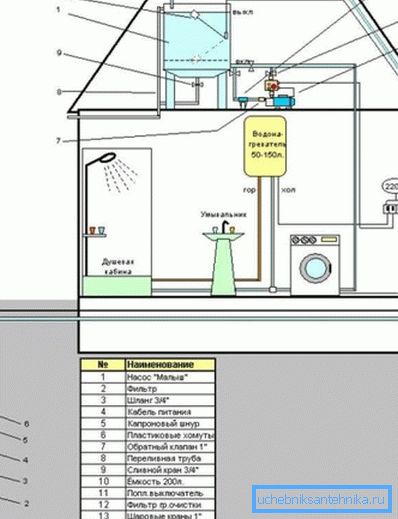
- Finally, you need to think about comfort.. In a private house, the only source of hot water will be an electric, gas or solid fuel heater, so when planning communications for this device it is necessary to provide a separate place.
Piping within the house
Within the house itself, too, you need to design pipe wiring. Of course, it is best if all the consumption points are located as close as possible to the point of entry, but this is not always the case.
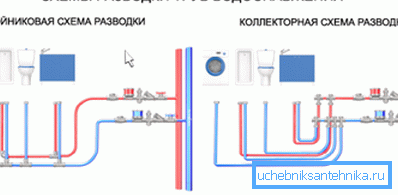
There may be two options for planning:
- More economical is the so-called serial wiring. From the riser, we lay one contour running along all consumption points, and in front of each point we perform a sidebar tee. Through a tee we connect the crane to a water supply system, saving thus considerable volumes of material.
- The disadvantage of sequential routing is the instability of pressure: as soon as we open one tap, the rest of the pressure drops to almost zero.
- It is for this reason that the collector (parallel) wiring is used. A collector with several outputs is connected to the riser, and the circuits of hot and cold water supply are connected to these outputs - one for each point of consumption. The price of such a solution will be significantly higher, but in large houses it is worth implementing just such a scheme.
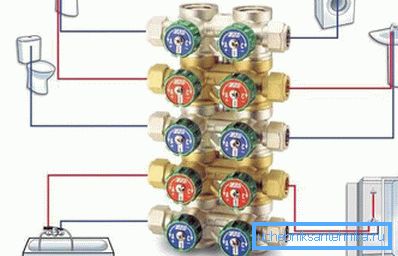
Finally, do not forget about the sink. Typically, the installation of water supply is carried out in parallel with the installation of the sewer network, so be sure to consider the need for laying pipes for drainage.
Tools and materials
Choosing pipes
When our project is ready, you should decide what materials we will use to implement it in practice. And first of all, it is necessary to choose suitable pipes, since the reliability and durability of the entire system largely depends on them.
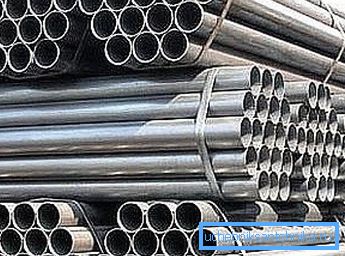
To analyze the options currently available, it is worthwhile to study the following table:
| Material | Benefits | disadvantages |
| Cast iron |
|
|
| Steel |
|
|
| Copper |
|
|
| Metal plastic |
|
|
| Polypropylene |
|
|
| Polyethylene |
|
|
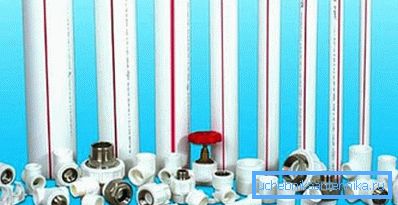
As can be seen from the table, different materials for plumbing have different advantages and disadvantages. However, it is often polymer pipes that are used for self-laying of the system, or products are combined: the outer part, laid under the ground, is made of cast iron or dense cross-linked polyethylene (PEX), and the inner part is made of polypropylene or metal-plastic.
We select tools
In addition to the pipes themselves, as well as fittings suitable for them and valves, we will also need tools.
If we build the whole system with our hands from the beginning to the end, then it is worth buying:
- Shtroborez or the puncher for work with the bearing designs.
- Saw on metal or plastic (depending on what pipes we will lay).
- Welding machine (if it is planned to install permanent connections of steel pipes).
- Soldering iron with solder (respectively, for copper pipes)
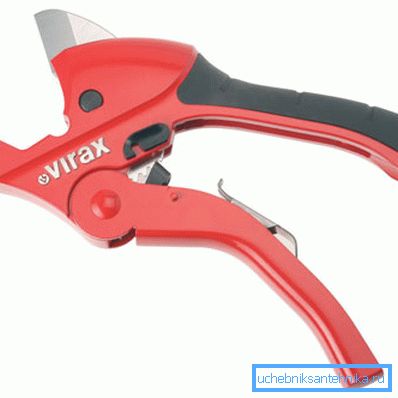
- Pipe cutter is a special tool that will facilitate the process of fitting products to size.
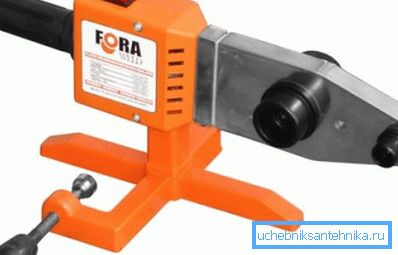
- Soldering iron for plastic pipes or crimping for press fittings.
- A set of plumbing tools - adjustable and open-end wrenches, trimmers for stripping pipe edges, etc.
- Level and roulette.
- Hand tool.
Also, do not be amiss to take care of the availability of a sufficient number of gaskets and sanitary winding. With the help of these parts we will ensure the tightness of the points of attachment of valves.
System installation
Open and hidden gasket
In this section, we will describe how to make plumbing yourself.
And let's start with the preparation of the base on which the pipes will be installed:
- The least expensive is open laying. In this case, all the contours are placed along the walls of the room and fixed on the base with the help of clamps. Fixation should be made sufficiently rigid to prevent accidental displacement of the pipe, but fasteners should not pinch the product and deform it.
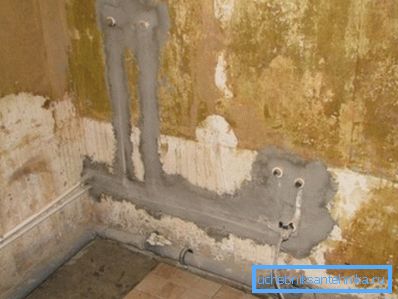
- However, many do not like the appearance of water pipes, and therefore in open areas they are laid in the thickness of the wall. To do this, in the construction material we make the grooves using a wall chaser or a perforator, fix the communications in them and gloss over the grooves with mortar.
- You can make a compromise solution. In this case, we lay all the pipes openly, but hide them behind decorative boxes. This is especially convenient if you need to mask a relatively small area, since the rest of the contour is already hidden behind furniture (for example, a kitchen unit).
Pipe connections
Now it's time to discuss the actual installation of the water supply network. Whatever material we choose, the pipes will in any case be connected using fittings — straight couplings, elbows, bends, etc. The design of the fitting and the method of its fastening on the pipe depends on the installation technology.
The easiest way to do it is to assemble the water supply system at the welded fittings or with the help of special tools for metal-plastic pipes. We will consider both of these options in this section.
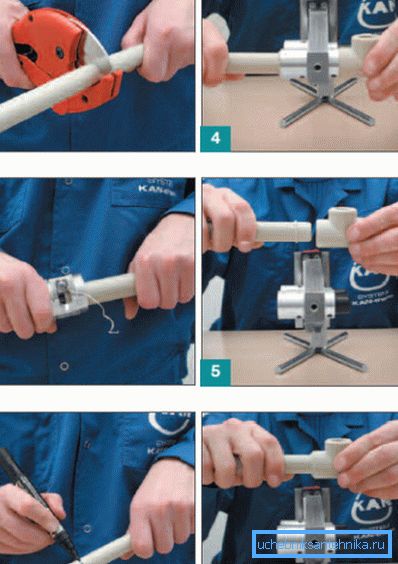
Welding is used to connect pipes made of polymer:
- Products cut to size, carefully cleaning the edges. If metal reinforcement is part of the pipe wall, we remove it so as not to reduce the quality of welding.
- Select the fitting, the diameter of which corresponds to the diameter of the pipe, and the configuration - the task.
- A pipe and a fitting we attach to nozzles of a soldering iron. We turn on the soldering iron and heat the parts as much as the instruction requires (time depends on the thickness of the plastic and the power of the device).
- Remove parts from the nozzle and connect, pushing the pipe into the fitting without rotation. We fix for 30 seconds, after which we release and give the plastic to polymerize. You can use the connection in half an hour - an hour.
Note! When removing the pipe material should not stick to the nozzle, otherwise there may be problems with the connection. If plastic fragments remain on the soldering iron, it means that the Teflon coating has become unusable and the working element needs to be replaced.
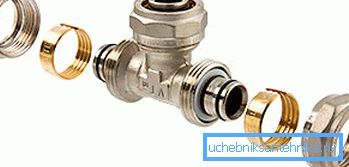
Metal pipes can be connected using fittings of various designs.
Less reliable, but at the same time easier to install are clamping:
- We cut the pipe in size and put a nut and a collar on its edge, which will clamp the structure in the fitting.
- Be sure to flare the end of the pipe with a calibrator - this will avoid the deformation of the sealing rings.
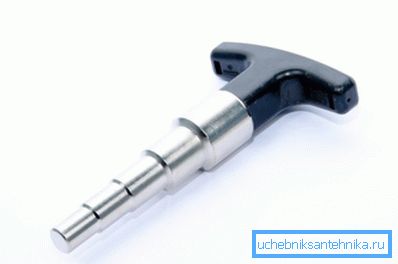
- Insert the fitting into the flared pipe, align the clamping clamp and tighten the nut until it stops. A sign that we put enough effort is a slight crackle of the clamp.
Press couplings are more reliable, but their installation requires skill and special tools:
- The fragment of the pipe cut to size is calibrated by carefully aligning the internal lumen.
- We put on the edge of the crimp sleeve.
- The fitting is inserted into the calibrated nozzle, additionally protecting the connection from corrosion with a dielectric gasket.
- Fix the connection with special tongs. An insert is installed in the clamp for this, the diameter of which corresponds to the diameter of the pipe being joined.
- If we did everything right, then this mount should withstand a working pressure of up to 10 Bar.
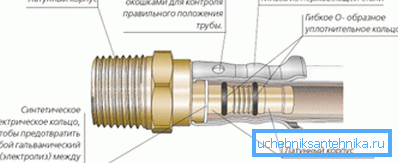
According to one of these methods, the entire water supply system is assembled. After that, we will only have to install the valves, connect taps and mixers, as well as perform a test run. If there are no leaks at the joints, then we did everything right!
Conclusion
Everybody can equip a water supply system with his own hands, but only the one who spends time and thoroughly examines all aspects of the upcoming task will succeed in ensuring that the system has a long service life. You can learn more about the features of self-laying water pipes by viewing the video in this article.