Downhole adapter: self-installation rules
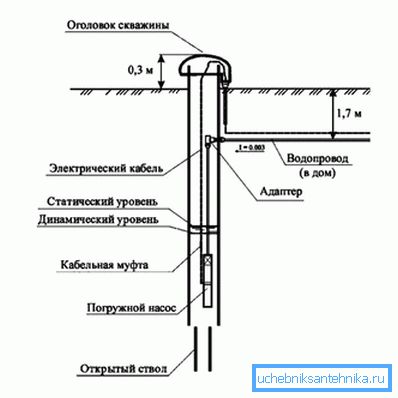
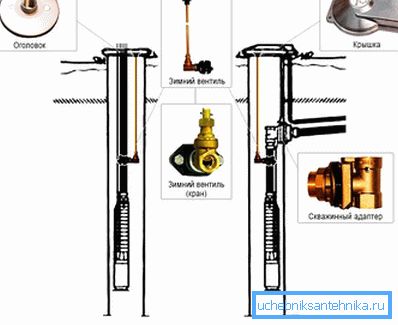
An adapter or plug adapter is a relatively new fitting on the market that allows you to connect a water pipe below the depth of soil freezing. At the same time, full access is maintained for the repair and maintenance of the water source and water-lifting equipment.
Device design
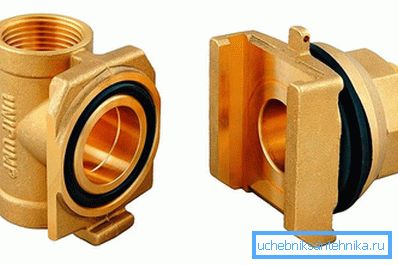
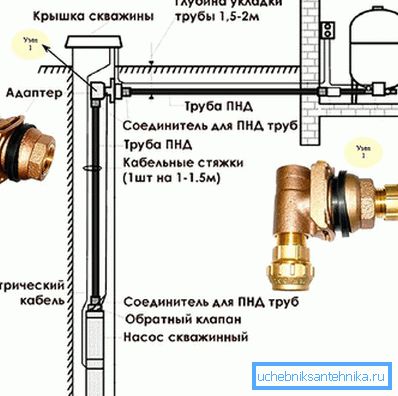
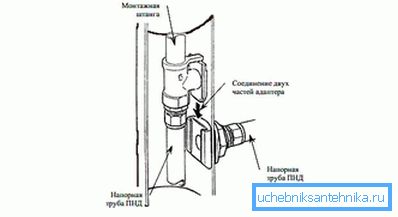
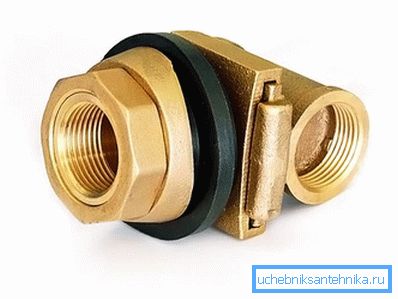
The design of this device is quite simple. It consists of two elements. The first part of it is stationary and is mounted from the inside of the casing into a hole drilled in it, namely, through a rubber sealing ring and a clamping curved metal plate, which is fixed outside with a flare nut. The second part, to which the lifting pipe with the pump is attached, is inserted into the wedge-shaped slide of the first fixed element, such a connection is called “dovetail”. Thanks to it, a reliable and tight connection between parts of the adapter is created. This product is made from a copper or brass corrosion resistant material.
Advantages and disadvantages
The advantages include:
- low cost, which is several times less compared to the caisson;
- quick and easy installation that does not require special tools and skills;
- compactness, unlike a caisson, does not occupy the territory, only a neat head will be visible above the surface of the well;
- possibility of installation at a high level of groundwater;
- good tightness of butt joints.
Since this device has recently appeared on the market, there is no long operating experience. So far, special flaws have not been found. Of the minuses it can be noted that, compared with the caisson, automation, hydraulic tank, cranes and other equipment will have to be carried out in a separate room.
Before you install, you need to compare its size and diameter of the casing, so that you can freely lower the pump into the well. The adapter extends approximately 3 cm from the inside of the casing.
Installation procedure

Before installation, you need to make a T-shaped wrench. It can be made of plastic or metal pipe. In this case, you will need to tinker with metal, cutting threads. With plastic, everything is much easier thanks to compression joints. On the one hand, the key has a thread that will be screwed into the adapter, and on the other hand, a tee is attached, which makes it easier to twist and unscrew the key from the device. The length of the key should be equal to the depth of installation of the structure, counting from the edge of the casing.
Installation begins with digging a trench to a depth of freezing. After the trench is ready, a hole is drilled in the casing with a bimetallic drill. The milling cutter should correspond to the diameter of the outlet adapter pipe or be slightly larger. Then, using the key, the adapter is fully assembled and the non-removable part of the adapter is lowered and fixed with a cap nut. For ease of installation, you can highlight the hole with a small flashlight lowered into the well.
In order for the mounting part of the adapter that is attached to the wall of the casing to not jump off and fall into the well during installation, the removable element to which the key is attached must be turned 1800. So, it will be removed by moving down, not up. After the nut has been baited, the adapter must be re-turned into a normal state and compressed. Also, in order not to lose the sealing ring, it must be treated with silicone grease for greater tightness.
Before proceeding with the installation of the removable element of the device, you must attach the pipeline, cable and cable of the required length to the pump. It is advisable to orient the cable and cable so that they are on the opposite side of the pipeline. The coupling that connects this device to the water pipe must be brass, and in no case plastic, as under the weight of water, as well as from pump vibration, it can be pulled out of the adapter. Also for a more reliable connection, you need to use a plastic pipe labeled SDR11, since it has a thicker wall.
After everything is assembled, the pump is lowered into the well and using the key to connect both elements. The assembly wrench is not necessary to remove, it can be cut flush with the casing. The prepared video describes in more detail about other features of the installation.
The safety cable is fixed on the tip. It only partially relieves the pump load on the adapter and should be slightly tight. Therefore, for more reliable and durable work it is necessary to use metal casing, although it is possible to use it on polymer, but, again, they should be casing.
Video
Learn more about the installation work, as well as get practical advice from a specialist, you can view the video:
Scheme
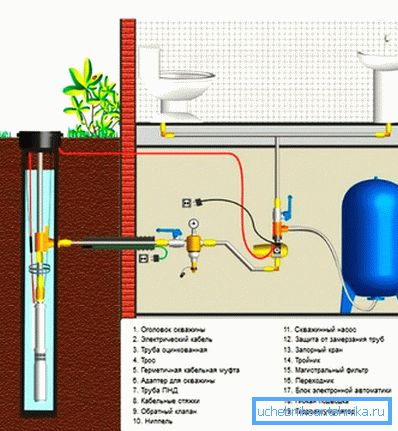
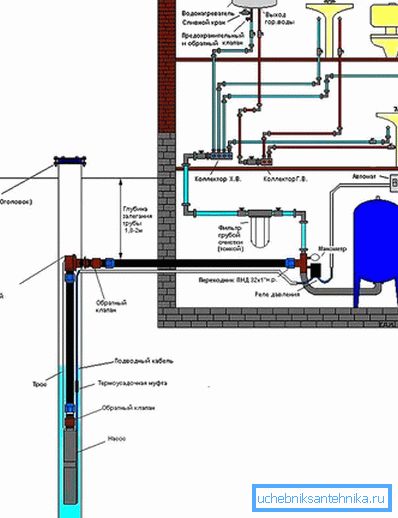
If you have to install a downhole adapter, then these schemes will help you understand the principle of its operation, as well as the features of its assembly:
