Drawings of the house for the well - an example of your
In such a motley sphere as construction, there are a lot of tasks for the most varied tastes. If you want to feel like an outstanding organizer, invite a brigade to build a house and try to manage it.
You want to create something amazing designer - and here, too, there is a huge field of activity. If you want to feel yourself a jack of all trades - please try to build a house above the well at the dacha.
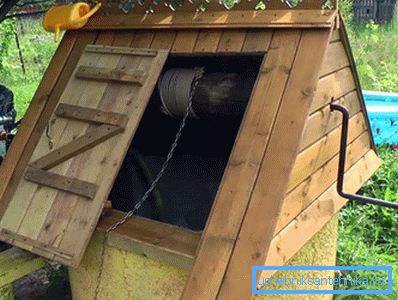
Ease of implementation
This is very necessary for the well itself, but it will bring you real pleasure as a master. But to begin, as always, will have to drawing.
At once we will say that a well working well is a rather thin “organism”, and inept intervention can significantly upset it. As a result, at best - turbid water, which is pumped, is not pumped.
Therefore, the drawing house should take into account the following points of the construction of the well:
- the most important thing is the location of the clay castle, its following parameters:
- depth at the well;
- length from the well;
- tilt angle;
- thickness.
- in addition, the size of the building itself
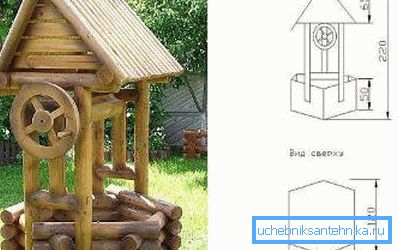
Helpful advice! It is not worth while trying to create a drawing of a house of a well to enclose “paper monsters”. We advise you to be in the spirit of the design itself - a simple idea and a simple design and an understandable, simple drawing should correspond. Often in this case there will be no need for detailing - only an isometric view and two views from the side and from above with dimensions (as in drawing “A”).
Cautions
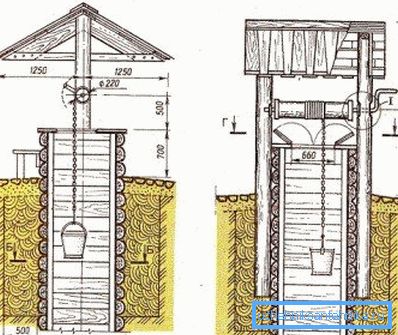
Look at the variant drawing "B".
Pay close attention to the following point:
- the most important:
- the roof pillars are surrounded in the ground by a protective clay layer; (See also the article Plastic hatch for the well: installation features.)
- the well has a clay castle;
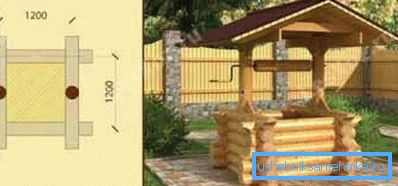
- the whole roof structure is supported on two round pillars, driven into the ground by one and a half meters;
- in order to avoid violation of the protective lock of the well, the whole construction with the perspective of the house should be designed and erected simultaneously;
- if you start building a roof from scratch, when the castle is already in place, protection will inevitably be broken, this cannot be forgotten.
Two variants of drawings
We present two versions of the house above the well, the most common ridge type.
First option
This option is being built on the previously prepared parapet:
- A - two boards connected to each other, which form a roof ridge;
- B - rafters of the sloping part;
- C - the door;
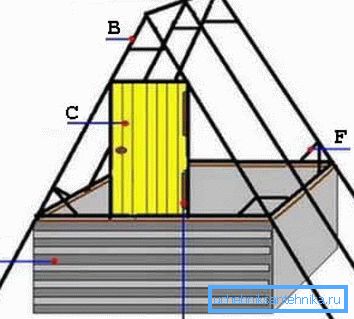
- D - the parapet lining of the well, here you can use any material of your choice, if only it was first waterproof, as one of the options - slate;
- E - door hinges;
- F - fixation-stiffening ribs, which are also called "lashing".
When such structures are created, first of all it is necessary to pay attention to the joints and exact shutter speed of all sizes, which are indicated on the drawings:
- A - rafter connection in the upper part of the “thorn-groove” type;
- B - truss foot;
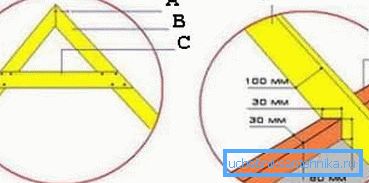
- C - bolt, commonly used stiffener;
- D - truss foot;
- E - top trim.
Second option
This option is so well developed that the drawing itself can serve as an assembly algorithm:
- 1 - the lower frame of the structure, which is mounted on the enclosing parapet of the well;
Helpful advice! In the manufacture of sidewalls and slopes, we advise you to use a joint of the “thorn-groove” type. This type will help to create a truly tight connection that prevents the penetration of moisture. In addition, it will not be superfluous to provide for additional insulation of the slopes from the inside with roofing felt or any available material that provides good protection and is also resistant to low temperatures.
- 2 - the side of the house, which is best collected separately, and then set in place; note that a hole is made in the side wall to install the shaft of the well;
- 3 - an additional stiffening rib, the shaft of the well on both sides does not enter directly into the sidewall, but through this bar;
- 4 - triangular protective corner on top;
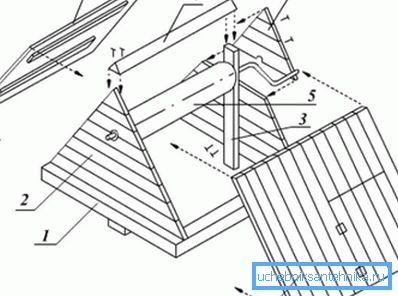
- 5 - shaft of the well;
- 6 - sidewall from the handle;
- 7 - the roof slope, which is also assembled separately, and then installed;
- 8 - a ramp with a door hinged in it.
We draw attention to the implementation of this project will require 24-28 screws (not counting the mounting loops).
Very often one of the main components of the roof of the well is an uncomplicated wooden frame, which can already carry a ramp on top, sides and a door.
The frame consists of only 12 wooden parts:
- A - top piping, these four pieces;
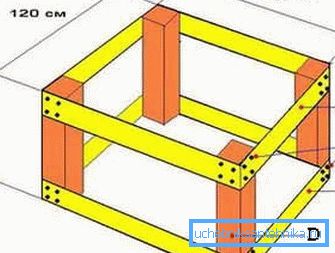
- B - fastening to the racks; 8 screws are required for each strapping (in total, thus, 64);
- C - bottom piping, there are also four;
- D - frame stands.
Helpful advice! Any professionally made drawing, especially with the use of wooden parts must necessarily indicate the use of what tools it is designed. If this is not the case, you will most likely have to worry about a saw blade, an electric planer, a hacksaw, a jigsaw (this is already for fine work), a hammer, a Phillips screwdriver and pliers. And tools such as level, pencil and tape measure should always be at hand and so.
findings
Despite the simplicity of the proposed designs, it is very important to approach their drawings with maximum accuracy. This is especially true when the structure starts to affect the structure of the well itself. (See also the article Decorative wooden wells: how to make yourself.)
The price of mistakes can be very unexpected and unpleasant - a violation of the soil layers, the divergence of the well forming rings and, as a result, a drop in water quality. Be sure to check out the additional video in this article. It will help you more precisely to place accents in the proposed work.