Dripping tap how to troubleshoot
Sooner or later, any tap fails and, as a rule, it is expressed in the fact that water starts to drip from the spout in the closed state of the valve. Most often, you can repair it yourself without even possessing any special knowledge and skills. Below we will look at how to make the tap not drip.

Causes of valve failure
Many people do not know what to do if it drips from the tap and rush to purchase a new mixer. However, if the device is in good condition and has not lost its attractive appearance, then it is more expedient to repair it.
There are several reasons why there is dripping from a tap. Therefore, before proceeding with the repair, you need to diagnose the device. To do this, you should carefully examine the mixer to determine where exactly the water flows.
There are two options:
- Water drips or flows from the spout;
- Leak out from under the valve.
Depending on where water is dripping from, repairs are done in different ways.

Gasket replacement
First of all, consider what to do if the faucet drips from the spout. Immediately it should be said that this fault is the most common. The reason for this is the wear of the gasket of the check valve. As a rule, it requires replacement every few years.
The fact is that the gasket is in contact not only with water, but also with metal surfaces, as a result of which it wears out gradually. Often this damage is not only accompanied by a leak from the spout, but also produces a buzz when the valve is opened.

Instructions for troubleshooting this issue are as follows:
- First you need to turn off the water in the kitchen or in the bathroom (depending on where the tap broke).
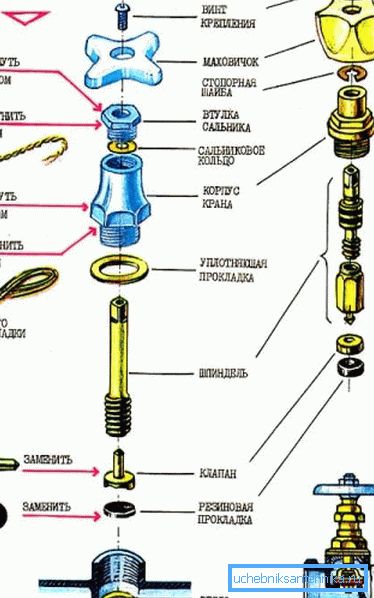
- Then you need to otkovyrnut plastic cap and unscrew the locking screw, holding the handle of the crane.
- Next, use a suitable wrench to unscrew the bush and remove it..
- After that, you should dismantle the gasket and purchase a similar repair kit in the nearest specialized store..
- Then it is necessary to install a new gasket with your own hands in place of the old one and assemble the mechanism in the reverse order.
- At the end of the work you need to turn on the water and watch the mixer - in the closed state, it should not drip, and in the open there should be no extraneous sounds.
As a rule, if there is a spare gasket, it takes just a few minutes to replace it.
Tip! It is easier to install the axle box in the open position of the mechanism.

Box replacement
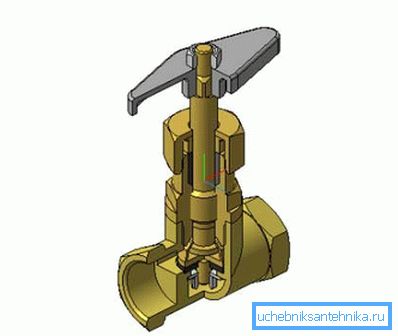
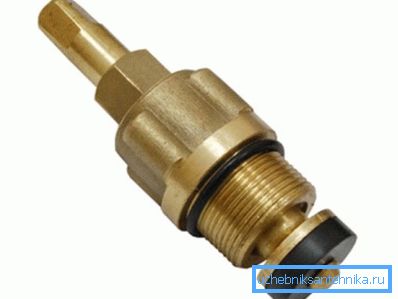
If the replacement of the gasket did not bring the desired result, then the problem lies not in the gasket, but in the wear of the axle box. This part is a unit that is inside and regulates the flow of water.
It is unlikely that it will be possible to repair the axle box on your own, so you need to buy a new one. You can install it without any problems, for this you also need to turn off the water in the bathroom or in the kitchen and unscrew it with an open-end wrench or adjustable wrench, after removing the handle as when replacing the gasket.
Worn oil seals
It often happens that the mixer does not drip in the closed state, and water starts to flow in the open from under the valves. The reason for this failure is the wear of the oil seals. To eliminate it, you just need to unscrew the packing nut and replace the oil seal itself.
I must say that the gland can be made independently, however, there is no guarantee that it will work for a long time, so it is better to purchase and install a new one.

Single lever mixer repair
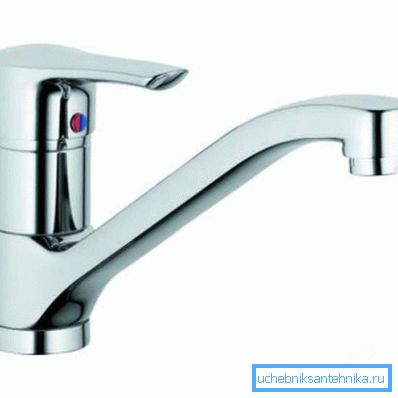
Often on the forums, people complain that the ball valve is dripping, but in reality they mean a single-lever mixer. Despite the fact that similar devices of sink mixers fail much less frequently, they are also not insured against damage.
Repair such a device can only be one way - by replacing the cartridge.
To do this, follow these steps:
- First of all, you need to otkovyrnut plastic cap on the lever.
- Then you need to twist the locking screw located under the cap, and remove the mixer handle.
- Next, it is necessary to remove all the decorative parts of the mechanism, as a result of which the nut that secures the cartridge will open. It needs to be unscrewed.

- Then you should pull out the cartridge and check the condition of the seals located on the end. If it is possible to replace them, you can do without replacing the cartridge, otherwise you will have to purchase a new part. The price of the cartridge is quite high, however, in any of its replacement will cost less than the purchase of a new mixer.
- After replacing the cartridge, you need to reassemble it.
Tip! To increase the life of the cartridge, you must install a coarse filter at the outlet. This is due to the fact that this part, as a rule, fails when solid particles hit between the plates.
Here, perhaps, are all the reasons why the mixer is dripping, and how to eliminate them.
Conclusion
As we found out, it is up to every home master to repair the crane, and a substantial amount can be saved, since the new faucets are expensive. The only thing is that the dismantling and assembly of the structure must be done carefully so as not to break the mechanism. (See also the article Connecting sinks: features.)
From the video in this article you can get some additional information on the designated topic.