How and what is the waterproofing shower in the apartment
No matter how long the repair of the bathroom has been postponed, but there comes a time when it makes no sense to wait. All the tools and materials have been bought, the time for work has been found, everything that can be done is read, the rest is asked from Uncle Petit. It remains only to turn off the water and proceed to the "dirty" stage, but you need to understand that this room is the most difficult in the alteration and improvement because of high humidity.
The spores of mold and mildew will feel great here, if you can’t properly carry out protective measures. Constant moisture can gradually penetrate into other rooms, becoming an excellent nutrient medium for their distribution. And if the waterproofing of the floor becomes useless, the neighbors below will also hardly like it.
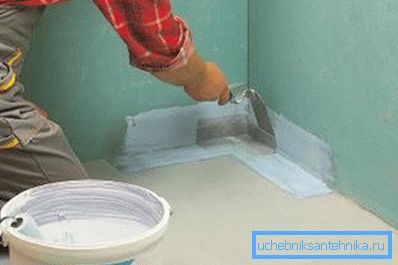
What should pay attention especially
Not all areas in the bathroom are exposed to excessive moisture.
Therefore, it is worth paying attention to:
- bottom of the walls and floor;
- shower cabin;
- place near the sink;
- bathroom.
How to choose a waterproofing
Manufacturers are ready to offer a wide range of products in this direction. But everyone has their own "duties", so it would be simply unwise to acquire the first one that came across.
Each package usually has a manual that describes where the mixture is used and for what reason. So, before you go to the building supermarket, find out what your walls and floor are made of. (See also the article Rain Shower Showers: Features.)
Tip: it happens that using one type of waterproofing is enough, but we strongly recommend an integrated approach to this process so that the most suitable material is used in each zone.
Kinds
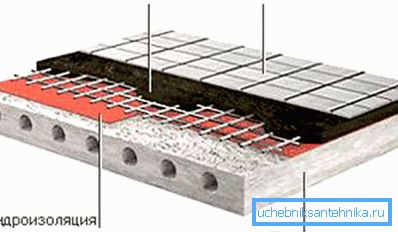
Let us consider in more detail what type of waterproofing the industry can offer in this case:
| Roll |
The method is the cheapest, but the service life of moisture protection is small. |
| Coating |
The second type is dry mixes from polymeric materials and cement. Their preparation is done by adding water. Application:
Dignity - high elasticity and do not require additional screed. |
| Polymer |
|
| Penetrating |
|
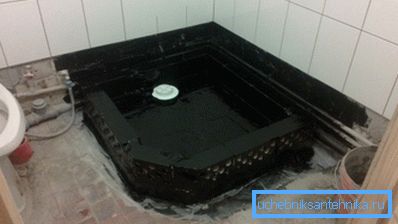
Tip: when choosing a waterproofing material, the type of substrate on which it should be applied plays an important role. For concrete, it is possible to recommend penetrating or polymer-cement options, when processing walls of brick - bitumen mastic or polymer cement membranes.
Waterproofing the floor in the shower
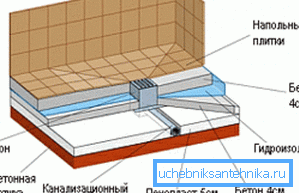
Regardless of whether there will be an indoor pallet or not, the floor requires the most reliable waterproofing. At the same time, we recommend lowering its level relative to other rooms in the house, or make a high threshold in order to separate the room from the hallway. (See also the article Wall shower: features.)
Polymer cement
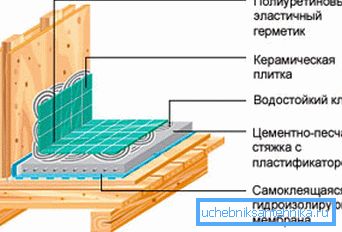
We will carry out waterproofing with our hands using polymer cement mastic:
- There should not be even a hint of dirt, debris, remnants of plaster on the floor surface. Everything should be thoroughly cleaned from it.
- Take a spray bottle and slightly moisten the prepared floor.
- Mix mastic components as indicated. Bring the mixture to a uniform state.
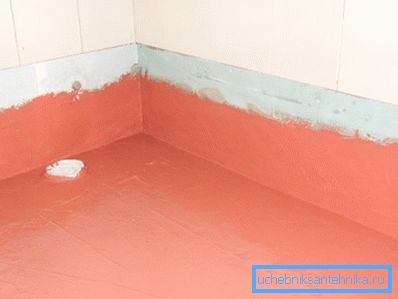
- Take a hard bristle brush and apply waterproofing to the floor and 150 mm up on the wall.
Tip: Spend more time on the joints of the walls and the floor, places of communication. For best effect, reinforce them with polypropylene mesh.
- Wait for the first layer to dry.
- Moisten the surface again and apply a second layer of mastic. Wait until it dries.
Tip: do not rush, to carry out finishing work in the shower only after the time specified on the packaging of the material.
Roll
If there is no desire to spend a lot of money, then roll waterproofing will suit you, although the service life is small.
Let's start:
- Level the floor surface, removing differences more than 5 mm.
- Seal the joints with a cement-sand mortar.
- Cut the canvas so that they went on the wall at the level of 150-200 mm.
- Moisten the segments with diesel oil so that they become more elastic, better adhere to the base and remove excess quartz sand from the surface.
- Do not rush, let the panels rest for about 24 hours to level the surface.
- Prepare the floor - clean it from debris, dirt and dust deposits.
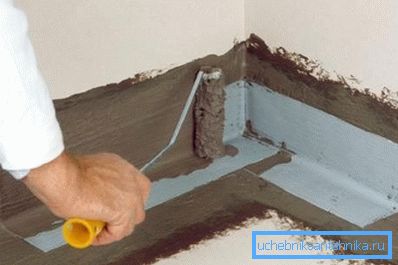
- Apply on its surface bitumen mastic with a continuous layer.
- Put a waterproofing material on it and roll it.
- Lay the next layer in the perpendicular direction to the first one.
- Heat the mastic and coat it with the prepared surface. Wash quartz sand on top for better adhesion to the screed.
Tip: the canvas should not be end to end but overlapped by each other 100-150 mm. These places should be lubricated and glued very carefully. If air bubbles arise between the wall and the floor, they should be removed with a knife.
Conclusion
Waterproofing the floor in the shower or bathroom is a necessity that cannot be ignored. You can use several methods and materials for this. The main thing in the work - to choose the right waterproofing to the type of surface. The video in this article will provide an opportunity to find additional information on the above topic.