How to build a summer shower from a bar with a dressing room
A good summer shower is a necessary element of any summer cottage, because it allows you not only to wash off the dust, but also to refresh yourself after working under the scorching summer sun in order to regain strength. To make such a shower on your own is completely easy, however, you must first familiarize yourself with some of the nuances of this work. Further, as an example, consider how to build a shower stall with a locker room from a bar.
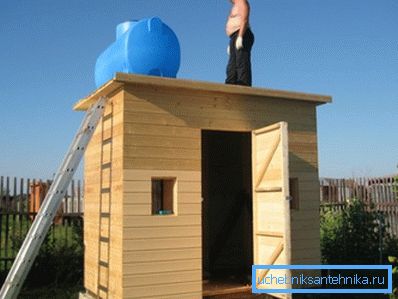
Building shower
Approach to the construction of the summer shower, as well as to any other construction work, it is necessary in stages.
Conventionally, the whole process can be divided into several parts:
- Project preparation;
- Site preparation and basement arrangement;
- The construction of the frame and finish shower;
- The arrangement of the soul.
Below is a detailed look at all these stages.
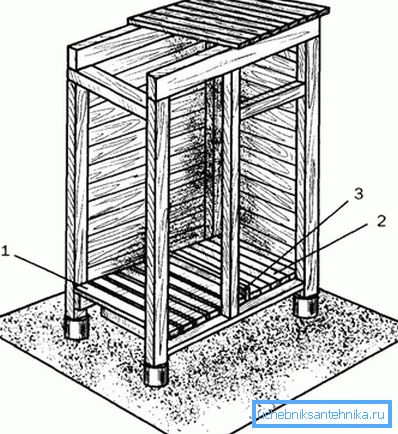
Project preparation
Structural features of the future structure, its size, appearance and other points are determined at the design stage. Therefore, it is necessary to approach it no less responsibly than to the construction itself.
Getting started, first of all you need to decide what will be the size of a summer shower with a dressing room. To wash it was convenient, the size of the shower must be at least 1x1 m.
I must say, many gardeners make one serious mistake - they build a shower stall convenient for taking water procedures, but during operation it turns out that there is no place for things in the shower. If they hang inside the booth, they get wet.
Therefore, to the size of the washing you need to add 60 centimeters under the locker room. As a result, the construction will have dimensions of 100x160 cm. As for height, in most cases two meters are enough.
After the dimensions are determined, you should complete the drawings of the summer shower with a changing room with your own hands. At the same time, it is not necessary to draw all the parts on a scale with high accuracy.
The main thing is that the drawing shows the main structural elements and their dimensions in millimeters. The presence of such a project will avoid errors in the construction process, and thereby save time and building materials.
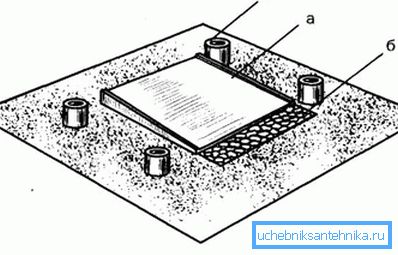
Foundation preparation
After preparing the project, you can proceed directly to the construction of booths. As mentioned above, you should start with the arrangement of the base.
Instructions for performing this operation looks like this:
- First of all, you need to prepare a construction site - clean it from grass, stones, debris, etc.
- Then markup is performed. To do this, in the corners of the future structure, drive in pegs and pull threads along the perimeter.
- Next, you need to perform a columnar foundation of asbestos-cement or metal pipes. For this purpose, in the corners of the future structure, holes with a depth of about 150 cm are made, with the expectation that 20-30 cm of pipe remain above the ground.
- The bottom of the holes should be filled with sand and rubble.
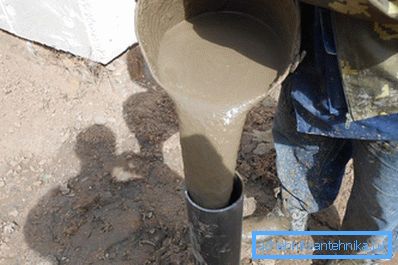
- Then pipes are inserted into the holes and are concreted from the outside and inside. At the same time, the inner part of the pipe should be underfilled by 30-40 cm.
- After installing the columnar foundation, you need to perform a concrete tie with a groove and a slope in the direction of the drainage pit. To do this, first performed pit, which is filled with a layer of sand and rubble.
Then formwork is made of the boards, the reinforcing mesh is laid and the structure is poured with concrete.
Note! Pipe installation should be carried out along plumb lines to ensure their vertical position.
The process of preparing the foundation is completed. The only thing you need to perform a drainage pit, which will leave the waste water. As a rule, its depth is about 50 cm.
The walls of the pit need to lay brick or stone, and the bottom is covered with a layer of sand 15 cm thick and then gravel.
Frame construction
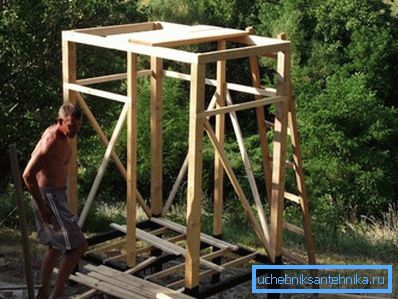
The skeleton of a shower stall can be made of a timber with a section of 100x100 mm.
The work is done in this order:
- First of all, timber must be cut into parts of the desired length.. All sizes contains a summer shower design with a dressing room.
- Then the lower part of the supports should be trimmed and inserted into the pillars.. For greater reliability, the posts can be additionally bolted to the pipes.
- Next is the bottom strapping.. It should be noted that the lower trim bars will serve as lags for the floor, so they should be placed horizontally. In this case, all connections should be made with screws, not nails, which provides a more reliable and durable installation.
- After that, the top trim is performed., to which the boards of the roof are nailed.
- Then a support is installed between the lower and upper strapping., and thus formed the future doorway.
- Next you need to complete the floor of the soul. To do this, lay on the boards of the lower trim boards at a distance of about one centimeter from each other. The presence of cracks will allow water to freely flow into a non-concrete area and from there fall into the drainage pit.
- At the end of the work it is necessary to sheathe the frame with boards, and also install the door. The latter can be done independently or ordered in the carpentry workshop.
Note! Before using boards and boards they must be treated with an antiseptic agent.
Shower arrangement
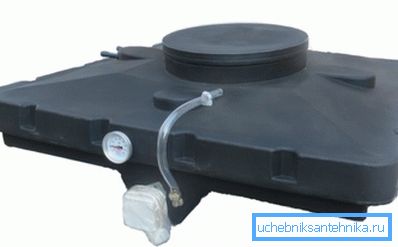
Now that the cabin is ready, it remains only to equip the shower. Its main element is the tank, which is installed on the roof. If you want the shower to be as comfortable as possible, you can purchase a special heated shower container in a specialty store.
Inside this device are heating elements that provide heated water to a comfortable temperature. Complete with such a tank is supplied shower head and other necessary accessories. It should be noted that the set price is cheaper than the cost of all items separately.
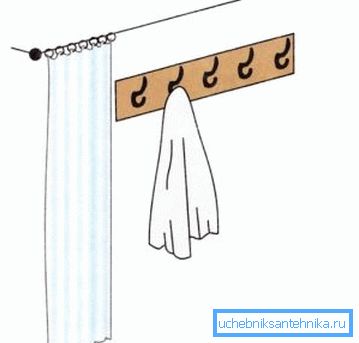
After installing the tank with fittings, you only need to complete the dressing room. To do this, to the left of the entrance you need to hang a board with hooks. It is possible to separate the dressing room from the washroom with a waterproof curtain and a high threshold.
Here, perhaps, is the whole manual on the independent construction of a summer shower.
Conclusion
Make your own shower with a locker room of the bar can every home artist. The main thing is to make a project correctly and carefully mark and trim parts. For the rest, you just need to follow a certain sequence of actions, which is given above.
You can read more information on this topic from the video in this article.