How to build a summer shower to give frame type
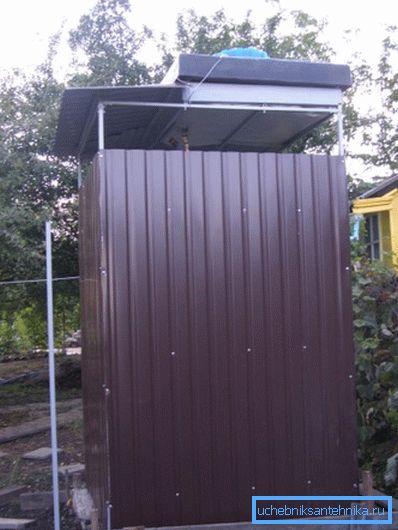
As a rule, when arranging the suburban area, a shower stall becomes one of the first buildings, allowing not only to wash, but also to cool down on a hot summer day. There are many options for the construction of this design, ranging from simple "temporary shelves" of the boards, and ending with the construction of capital stone structures. In this article we will look at how to build a simple and at the same time quite durable frame summer shower for the garden.
Order of construction
The construction of the summer dacha shower can be divided into several stages:
- Project preparation;
- The choice of location;
- Draining;
- Foundation and frame making;
- Cabin arrangement and trim.
Below we take a closer look at each of these stages.
Project preparation
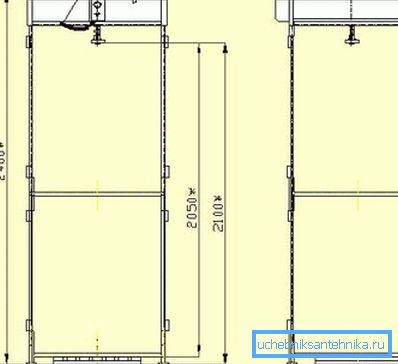
To simplify the work and avoid possible mistakes, first of all you should prepare a project. It does not have to be an exact scale drawing. The main thing is to draw on paper the basic units of the structure and indicate the dimensions of all the parts in millimeters.
The most common options for a summer shower in the country - is a frame construction of a wooden beam or steel tube. Regardless of the material of the frame, the design, as a rule, consists of four racks, interconnected by a lower and upper trim, and also reinforced with braces.
The size of the summer shower in the country are chosen at its discretion. Most often, booths do an area of meter per meter. To make the design more convenient, you can add another 60 cm in length under the dressing room.
The height of the building usually leaves 2-2.5 meters, so it makes no sense to make the construction higher.
Location selection
The choice of location is no less crucial step than the construction of the shower stall itself.
The site must meet the following requirements:
- Moderate distance from the house.
- The possibility of organizing the drain.
- Lack of a shadow that is important at natural heating of water.
Of course, it is desirable that the site be flat, otherwise additional forces and time will have to be spent on earthworks.

Plum arrangement
An average of about forty liters of water is consumed per person when bathing. If a large family lives in the country, besides a hot summer day, a shower is taken several times a day, you can only imagine how much liquid will be consumed. Accordingly, it is necessary to provide conditions for the rapid outflow and disposal of wastewater.
For this, it is best to do your own waste pit. Its size and depth depend on the water flow, i.e. the more people live in the country, the greater should be the volume of the pit.
The simplest way to make a drain pit is to dig up a pit with a depth of about two meters and put car tires into it, which will ensure the tightness of the walls. The bottom must necessarily fall asleep with a layer of sand and rubble.
The pit should be located at a distance of about two meters from the shower stall. Moreover, it should be borne in mind that the drain pipe from the booth to the pit will be laid under a slight bias to ensure effective drainage.

Wooden frame making
Wooden summer shower for giving is usually built on a column base. For its construction will need metal or asbestos cement pipes with a length of about two meters.
Instructions for the construction of the structure is as follows:
- It is necessary to begin work with preparation of the platform - cleaning of garbage, grass, etc.
- Then you need to perform markup. To do this, pegs are driven in at the corners of the future structure, and a thread is stretched between them.
- After that, in the corners of the future structure, pits more than one and a half meters deep are dug out. The exact depth is chosen taking into account the fact that the pillars should rise 30 centimeters above the soil level.
- Next, the bottom of the pit is covered with sand and rubble.
- After that, the pipes are installed in a strictly vertical position and filled with concrete (inside and outside). At this stage, it is important to set the pillars so that their ends are located in the same horizontal plane. To simplify this task, a string should be pulled around the perimeter, which will serve as a beacon. Into the concrete poured into the poles, insert the reinforcement rods to a depth of about 30 cm so that they rise 10 cm above the end of the pipe. These pins will allow to fix the grillage on the piles.
- While the concrete of the foundation solidifies, it is necessary to make a concrete tie between the pillars, having previously laid a drain pipe. Moreover, the screed should have a slope in the direction of the drain.
- Next, the piles are connected by a bar 100x100 mm (grillage). To fit the timber on the pins, drill holes of a suitable diameter. Between themselves, the bars are connected with a metal corner and screws. In this case, the summer shower for giving will turn out to be quite strong and durable.
- Then racks are installed at the corners, which are also fastened with metal corners and self-tapping screws. To further associate the rack with the grillage, use bracing.
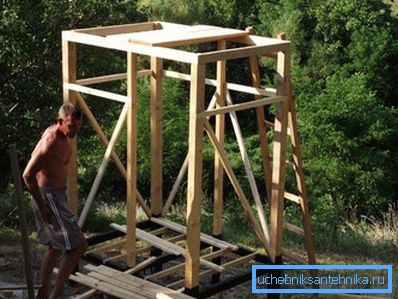
- Next is strapping on top of the supports.
- After that, the grillage stacked boards at a distance of about a centimeter from each other. The slots provide unobstructed draining of water on the concrete platform.
Note! Before the construction of the structure, all wooden elements must be treated with an antiseptic composition to prevent the wood from rotting.
The process of manufacturing a wooden frame is completed.
Metal frame making
As mentioned above, the frame is often made of metal profiled pipes or corners. In this case, the foundation is not made, but the booths are driven into the ground and concrete is poured together with the platform.

The rest of the metal frame is the same as wooden. The only parts are welded together. True, you can assemble the structure on bolts, but this will take much more time and effort.
Cabin arrangement
After installation of the frame, a tank is mounted, which can be installed in two ways:
- Directly to the top trim - in this case, the tank serves not only as a water tank, but also as the roof of the structure. Accordingly, it should be flat and correspond to the size of the booth area.
- On the roof - in this case, first the roof of the booth is laid (boards or decking), after which a tank is installed on top, which can be of any shape.
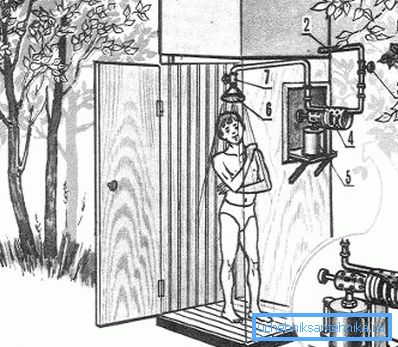
Before installation, a fitting for connection with a hose or tube, to which a shower head is attached, is cut into the shower tank. After installing the tank, all the necessary fittings are assembled.
Tip! In order not to draw water into the tank with your hands, you can purchase a pump and feed the liquid into the tank directly from the water supply source through the pipeline.

I must say that for a comfortable shower, regardless of the weather outside, you should worry about heating the water, which can be implemented in the following ways:
| Type of heating | Description |
| TENG | This option involves the acquisition of containers with heating elements. This method is very convenient, however, quite costly, since the price of electricity has constantly been rising. In addition, the shower turns volatile. |
| Boiler on the wood | An efficient and affordable way to heat water, especially if there is a forest near the summer cottage. |
| Blowtorch | In this case, a heat exchanger is installed between the tank and the shower head, which is heated by a blowtorch. This method is quite simple, but effective. |
Finish
After installing the tank and accessories, it remains only to sheathe booth.
To do this, you can use:
- Ordinary boards;
- Clapboard;
- Polycarbonate;
- Decking;
- Plexiglas, etc.
This operation will not cause difficulties. The main thing is to correctly cut the material and attach it to the frame with self-tapping screws. The only thing you will need to perform the door, the design of which usually represents a frame with a skin attached to it.

At the end of the work, you should attach a board with coat hooks to the far wall of the shower and hang the curtain. At this point we can assume that the summer garden shower for the dacha is built.
Conclusion
It is quite simple to build a summer shower on your own. To do this, you only need to properly prepare the project and then follow a certain sequence of actions. Of course, it is desirable to have skills in working with wood or metal.
You can read more information on this topic from the video in this article.