How to decorate the well with their own hands: tips on decor
After the well is dug out and equipped, it must be arranged to fit the structure into the landscape. And it is from this point of view that finishing the well with your own hands is the most preferable, because in this way we will be able to implement the most daring design solutions.
Below we describe several options for such finishing with a detailed listing of the materials used, tools and techniques.

Training
Purpose of exterior finish
In most cases, the well on the site is not only a source of water, but also a complete piece of furniture. That is why many of us are not limited to installing a simple concrete ring, but try to somehow decorate the structure (see also the article The water supply scheme from a well: several options for all cases).
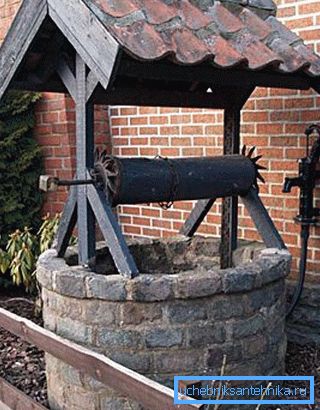
In addition to purely aesthetic moments, decorative decoration also performs quite practical functions:
- First of all, the roof or cover prevents leaves, branches and other debris from entering the well shaft. So the cleaning will have to be carried out much less frequently.
- Secondly, blocking the cavity, we create a comfortable microclimate in it. Due to this, the water maintains a stable temperature both in frost and in heat.
- Also, do not forget about safety: high-quality fencing can prevent children and animals from falling into the water. And we ourselves, moving around the yard in conditions of poor visibility, will be safe.
As for the wells with a closed mouth, in which the pump is responsible for the rise of water, design plays an exclusively decorative role.
Materials and tools
Performing the design of the above-ground part of the well, we can use a variety of technologies.
However, one of two options is most often implemented:
- Either a log house or a log is erected on the surface, on top of which a roof is installed (single sloped gable or tent).
- Or, as the above-ground part, a concrete ring is used, which undergoes decorative finishing.
Note! In the second case, the neck of the well most often overlaps with a removable or hinged lid.
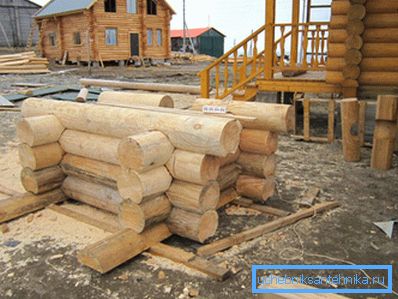
The choice of materials for finishing is really huge:
- Felling can be folded from a log or timber. In this case, it is desirable to use wood that swells minimally when wet.
- You can also make a plank box, but you should take into account that in terms of durability the board is significantly inferior to a bar and a log.
Tip! All wooden parts must be treated with water-repellent and antiseptic.
Concrete rings are usually veneered with various materials.
For this purpose are used:
- Natural and artificial stone.
- Decorative front brick.
- Brick and ceramic tiles.
- Siding.
- Decking, etc.
Since finishing requires very little material, the price usually does not play a significant role. The choice should be based on your ideas about how the design itself should look.
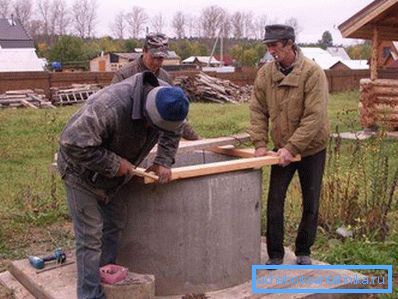
As for related materials and tools, their set depends on the chosen technology. If we make a log cabin with a roof, then we will need tools for working with wood. And for the lining of the concrete ring will need cement, plaster mesh, a set of semi-grates, spatulas, etc.
Technology work
Gable "house"
The first option we considered would be a gabled house, inside which the well itself would be located. This design is distinguished by maximum tightness: due to the presence of the roof, access to water will be blocked from all sides (read also the article Independent installation of a pumping station in a well).

Instructions for the construction of such a house will be as follows:
- At the first stage, we need to assemble the frame. Racks are made of durable timber with a section of 80x80 mm and more, and the strapping is performed from a board up to 40 mm thick.
- Frame dimensions should be slightly larger than the size of the well itself.
- All parts are connected with screws or durable nails. The length of fasteners should be 75-100 mm.
- Assembled frame set on the ground or concrete pavement. Under the base we place two layers of roofing material, which makes it possible to slow down the process of wood decay.
- Next, collect the rafters: for their manufacture, we need boards with a thickness of 30 mm and a length of at least 180 cm.
Tip! The longer the planks, the higher our structure will be, and the less rain will accumulate on the roof.
- Rafters fastened to the frame by cutting. From above we connect the truss system with a ridge bar.
Next, perform the trim:
- The easiest way to veneer the roof and side surfaces of the frame profiled sheeting or metal. A bit more laborious is the boarding.
- It is mandatory to place a waterproofing membrane, polyethylene or roofing material under the roofing material.
- Gable parts must be made of wood.
- In the front gable we set up a hinged door.
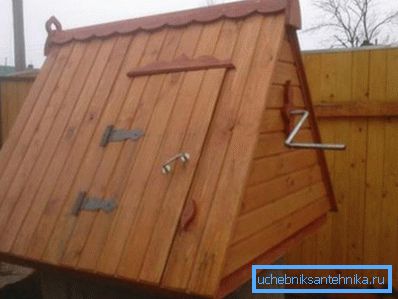
- Under the door, make sure the shelf is wide enough to install a bucket of water.
Felling with roof
A log cabin is built a little differently:

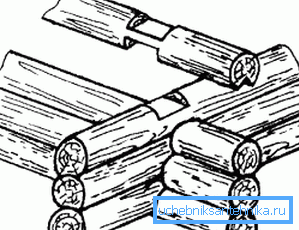
At the base around the neck lay bars, connected in half-wood.
It is advisable to saturate them with used engine oil to minimize hygroscopicity.
- On top of the bars we begin to lay a log house of rounded logs.
- We assemble logs with a protruding part, using wooden pins for joining.
- Typically, the height of the frame is five or six crowns. On top of the last crown, we can lay another one of a four-sided beam to get a reliable support.
- Next, on the sides set two logs as racks. In the center of the posts we fix the shaft for the wooden gate (even if this part is exclusively decorative).
- On top of the rack stack frame of the board with a minimum thickness of 30 mm.
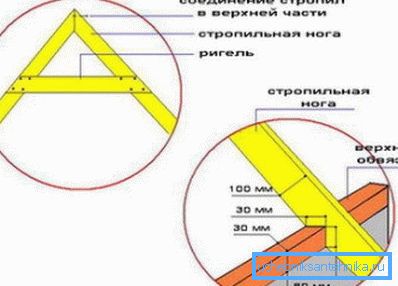
- We fasten rafters to the frame, which are reinforced with transverse bolts.
- We cover the roof with euro-slate or metal tile.
Tip! Carrying the rafters over the edge of the frame should be at least 40 cm - so the roof will be more reliable to protect the well from debris and rainwater.
Hexagon log has a more complex structure. With its construction, the roof can be fixed not on two, but on four pillars, which significantly increases the safety margin.
Facing
If the upper part of the well is a concrete ring, then it can also be decorated.
Finishing a well with a stone is done by the following algorithm:
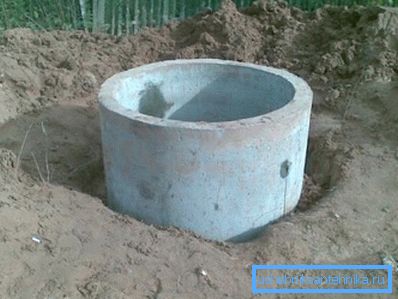
- First, we clean the concrete base of dust and debris, and then treat the field with a penetrating primer. It is best to use two priming layers, pausing between their application.
- When the second layer of primer is fully cured, we attach a plaster grid of metal to the concrete ring. For fastening, we use anchors with a plastic sleeve and special steel plates.
Tip! In some cases, the net can be simply wrapped around the ring and pulled off with a wire.
Next, proceed to the lining itself:
- First, prepare the adhesive composition. The type of glue depends on the material used, but in any case, it must be designed to be used outdoors.
- Then we prepare the facing material. With a tile, usually there are no questions, but when working with a stone, you will have to tinker - you need to think about the placement of all the parts so that you get an interesting pattern.
- Apply a trowel to the mesh with a glue composition in such a way that the maximum amount falls on the concrete base. Align the layer of solution to a thickness of 4-5 mm.
- We apply a tile or a fragment of a stone to a selected place and press it tightly, simultaneously aligning it on a plane.
- After finishing the facing of the side surfaces, we lay a row of tiles on the upper edge, creating a support for the bucket.
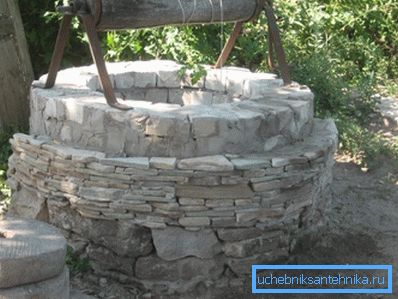
In conclusion, it is necessary to wipe the interlayer stitches with a waterproofing compound. This is usually done the next day, when the glue dries.
Another way of finishing can be facing with bricks. In this case, we simply build a circular wall of facial blocks around the perimeter of the ring, connecting them with a cement-sand mortar.
Tip! To securely fix the bricks on a concrete base, several dozens of anchors can be driven into it. Then we lay these anchors in the seams.
Conclusion
Of course, such a voluminous topic as the finishing of wells with their own hands cannot be fully disclosed in a single article. And the reason for this is simple: there are many technologies, and the design options can be listed almost infinitely (find out here how to clean the well in the country).
However, we hope that the above recommendations will be enough for you to begin with, and if you have any questions, the video in this article will help answer them.