How to dig a well on the country site itself
Mankind, alas, cannot do without water, it affects physiological needs, and it is also necessary for technical purposes. If your private house is connected to the central water supply or there is a natural reservoir nearby, this is very good. And if not, then you have to either equip a well on the site, or dig a well yourself, which will be discussed below.

Choosing a place
It is desirable that it be close to housing and to places where water will be directly needed.
Criterias of choice:
- it should be understood that the water, after it passes through the upper permeable horizons, can be polluted, especially if there are large sources of various pollutants nearby. Therefore, do not make a well near the compost, garbage and manure heaps, and at the point of discharge of sewage. When you have to dig the well yourself on a slope, it must always be above the source of the pollution;
- consider also the local hydrogeological situation, for example, in a swampy area, well water will not be potable, since water will penetrate from the surface along with everything that gets in its way.
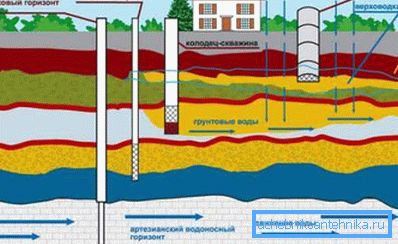
Where does the water in the well come from
Before you find out how to dig the well yourself correctly, you need to understand at what depth you can get quality drinking water or ordinary technical water. After the rains pass, the snow melts, the water begins to accumulate just above the impermeable layer, which consists of thick, thick clay.
Consider the depth of groundwater underground:
- overhead - up to 5 m;
- soil - up to 10 m;
- ground - up to 40 m;
- artesian - below 40 m.
Calculate the needs of water and choose the diameter of the well
Water supply of a small suburban area consists of watering and own needs, which approximately need 1-2 meters.3 water. It should also be noted that the full filling of the source after it is drained takes 2-12 hours and depends on its volume, characteristics of the place and season.
Tip: the smaller the diameter of the well, the faster it will fill up.
If this source is dried once a day, and the full water column is up to 1 m, the diameter of the concrete rings will be 1.12 m. It should be reminded to the owners of such wells that water has a regeneration time, so get 1.5-2 m3 fluid you fail.
Know also, frequent filling of the source will affect the quality of water in it, which will not have time to settle, especially. If you need it for drinking. Concrete rings with a lock are best suited for such structures.
They will provide a good density of connections, allowing you to protect the well shaft from possible displacements. Their only drawback is the price, which is higher than that of ordinary concrete rings without a lock. The term of operation of products is about 50 years.
Time to set up a well
If you decide to start digging it with your own hands in the spring, when the snow has almost melted, you can go wrong with the depth of the source, since the water table is high. Therefore, the April well in the winter time will be dry.
Consider that seasonal fluctuations in the level can be 1-2 m. Because of this, experts recommend starting to dig a well in the fall and winter, at a time when the water horizon is located at the lowest level. When the water horizon suddenly drops, you can deepen the source rings with a smaller diameter.
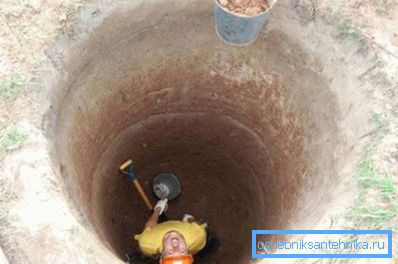
The most acceptable depth when released into the aquifer is 5-20 m. There are wells up to 30 m, but such a construction is fraught with complications and will be unprofitable compared to the well.
Process
In fact, there are no specifications or SNiPs explaining how to dig a well independently. Usually it builds a team of three people.
Below is a guideline that will visually explain the whole process.

- Before starting work it is necessary to prepare devices and equipment. You will need a winch to lift buckets, you will also need a tripod to fasten it.
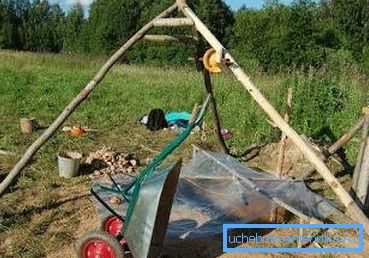
- To work in the face you will need a shovel and a short crowbar. All occurring stones must be tied with a rope and lifted to the surface.
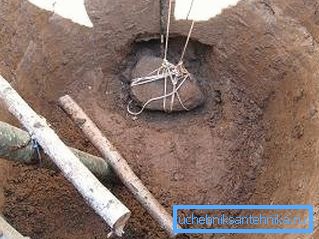
- The assistant raises the bucket and carries the soil to the dump.
- You can connect another person who will periodically change the picker and lifter, since the work is usually carried out intensively. Consider also that after a depth of 3 m the temperature in the building will drop to 10? С, and the air will no longer be ventilated.
Tip: for artificial ventilation, you can use an umbrella, which must be lowered into the mine and raised from it, improving the microclimate.
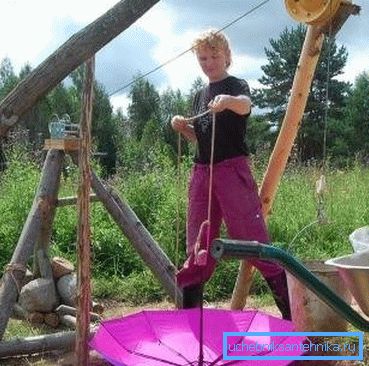
- After the pit has been dug by parameters, the first concrete ring with a flat butt or lock is inserted into it. Its weight exceeds 700 kg, so you need to be careful.
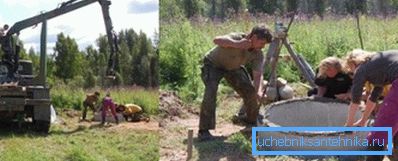
- Choose a primer from under it, and it will gently fall below, making room for other rings. If it fails too deeply, you can put one ring on another, but at the same time its manufacturer prescribes that the installation should be carried out with the help of crane equipment. Therefore, all the cracks and chips will be only your fault.
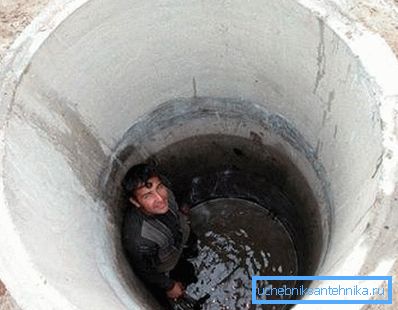
- Continue to build up the column until it reaches the aquifer level. For the change in dry loam or sand, the team can put 2-3 rings. In heavy soils - stony and on raw clay work becomes hard labor.
The approaching aquifer will be indicated by a noticeable cooling when the temperature drops by another 1-2? C, and mini-fontanels begin to run along the walls. In strong, dry soils, you can first dig a shaft, and then lower the rings into it, using a barbell and a gate.
How to protect the source from overhead
It would be ideal if the rings were pulled together with special metal brackets that would be bolted through the wall of the ring. In addition, to prevent penetration into the source of the water pipe, a flax rope should be laid in the joint between concrete rings and the joints should be sealed with a mixture of cement and liquid glass.
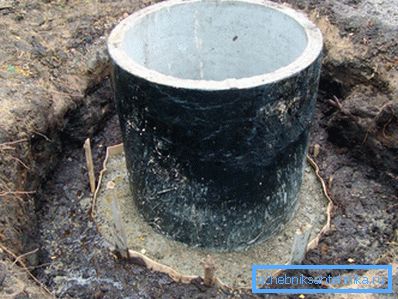
Additionally, outside, after the rings are buried, it is necessary to pick up the source around the perimeter and coat the entire surface with waterproofing material. Do not believe that the quality of water from this deteriorate, it is just the workers do not want to do their work.
The quality of the water can deteriorate due to the fact that the water pipe will enter the mine through the not sealed seams outside. Fill the excavated space with blue clay and warm the concrete with foam to protect the source from freezing.
Since the water intake takes place from below, therefore, after the mortar has hardened, continue the drilling of the well. Place one or two rings in the aquifer.
Then seal all internal joints with a solution, adding liquid glass to it. At the bottom pour a layer of gravel 200-300 mm thick with a fraction of 50-250 mm, which will become a water filter.
Fill up the annular space with sand and gravel, tamp it all up with clay, making a kind of clay castle that will prevent melt and rainwater from getting into the source. Do not bury the upper ring in the mine to protect the well from dirt and snow, make a thorough waterproofing of the upper joint with the entire column.
Start pumping water from the source when the level in it reaches such that it is possible to lower the pump into it. The duration of the buildup of the well is long. Until the water quality satisfies you.
Remember that when building such a structure you endanger yourself, especially when you decide to dig a well yourself. During this period, there is a high risk of injury, sometimes fatal.
During mine penetration, “quicksands” can occur, when a concrete ring can go sharply to the side and cripple a worker. So when deciding to dig or drill, consider these points.
Source design
From above, the well should be completed with a canopy in which to install a wooden gate, with a cable or cord attached to it, with a secure handle. Attach a bucket on a piece of chain, which will give the opportunity to quickly immerse it in water. You can decorate the pommel in the form of a gable roof with a hinged door, and decorate the remaining elements with a facing brick or stone (read also the article Building water wells: important principles of creation).
It will look great source, which is designed as a log cabin. Do not forget to also make a pavement around the perimeter of the well from paving slabs and install a bench when the ground is seated. It is also possible to equip the structure not with a classic water rise, but with a modern one, using an automatic pump.
Source care
High sanitary requirements are imposed on wells, and in and around it must always be clean. Animals at least in the three-meter zone should not approach the source of drinking water, and it is better to make a reliable barrier for them along the perimeter at a distance of 6 m.
Do not allow foliage from trees, insects, frogs, beetles, rain, snow and dust, etc., to fall into the open well, for which it should be equipped with a tight lid. You can make it from different materials, as long as dust and water cannot pass through it.
Water should be taken to the surface by one public bucket, which must be fixed inside the well. It is advisable to close it on top with a stainless steel mesh so that animals do not get water from it. To conduct routine inspection and clean the well should be 2-4 times a year.
Conclusion
The source of clean drinking water at a country site is not a whim, but a vital necessity, especially when it is not possible to use the central water supply. You can dig a well yourself, or you can hire a brigade of workers to do this, and you must follow safety precautions while working (see also Reinforced concrete sewer wells: construction and operation features).
In the presented video in this article you will find additional information on this topic.