How to disassemble the faucet: the sequence of actions when
How to disassemble the faucet in the kitchen or in the bathroom, should know any home master. We need this information at least so that, if necessary, we can fix the malfunction as quickly as possible, and only if this has turned out to be impossible - have we contacted specialists.
In the article we describe the main types of cranes used and give algorithms for their disassembly and elementary repair.
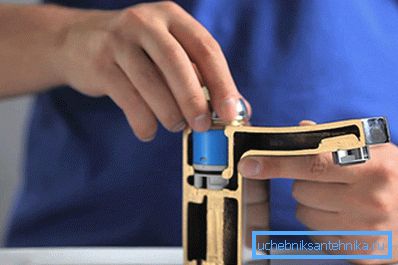
Types of faucets
Before you disassemble the kitchen faucet, you need to inspect the entire structure, and determine what type it belongs. And although there are a lot of types of stop valves, only a few are usually used in everyday life.
The most common will be:
- Products working with the use of crane axle boxes. Typically, this design have a double-lever taps or models with a single supply of water (hot or cold). The axle box is a cylinder, inside of which is placed the mechanism, combined with the rod. When turning the rod, the mechanism starts moving and closes the tube lumen with either a rubber gasket or special ceramic inserts.
Note! When parsing such a product, you need to remove not one, but two crane axle boxes.
- Cartridge Single Lever Cranes. Unlike the previous version, are controlled by a single rod connected to the lever handle. The locking mechanism is inside the cartridge, which is the main drawback of the system: this complex structure is practically beyond repair. Yes, and the price of cartridges is quite high, so that the replacement will have some impact on your budget.
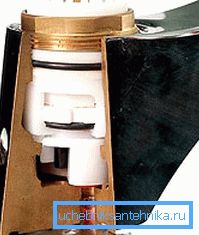
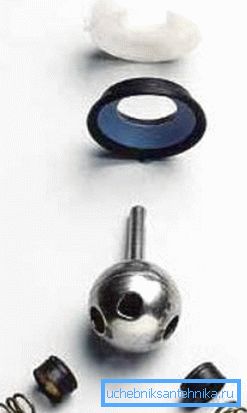
- Ball Valves. Usually installed on faucets in the bathroom to switch the flow of water to the shower, but in recent times can be used as kitchen mechanisms. The water flow is blocked by turning the ball with the holes in the central part, and Teflon sealing rings and spring-loaded gaskets are responsible for sealing the system.
Disassembly technique
Removing and repairing crane cases
If it was possible to determine the design, then you can get to work.
For models with bucks we do everything like this:
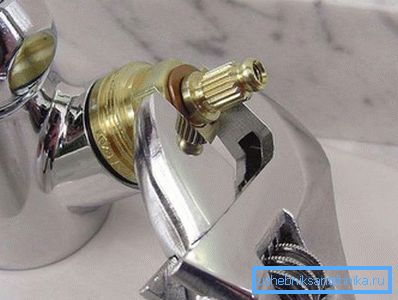
- Before you disassemble the faucet, be sure to overlap the water. And we do not just close the valve, but block the flow directly on the riser, because when removing the locking mechanism, the head will not hold back anything.
- Next, use a sharp knife or a flat screwdriver to lift the cover plate that covers the screw that secures the flywheel.
- Turn off the screw and remove the flywheel from the rod. Also, we may need to dismantle the decorative cap, closing the fixing position of the axle box.
- Then we take an adjustable wrench, grab the bush and unscrew it from the socket, trying not to damage the thread.
Note! Place a rag on the floor or countertop to allow the remaining water from the pipes flowing out of the hole to be absorbed into it.
- Remove the bush and perform its repair (installation of a new gasket or ceramic plates). If the product cannot be repaired, replace it with a new one.

- We perform the assembly in the reverse order. Before installing the decorative lining, it is worth checking with your own hands the tightness of the threaded joint by supplying water from the riser and opening and closing the valve several times. This can be done either by using a rod to be gripped with pliers, or by temporarily installing the flywheel without fixing.
Dismantling the single lever crane
Instructions for disassembling a single lever mixer will differ in a number of points:
- Use a screwdriver or a knife to raise the pad on the front surface of the case.
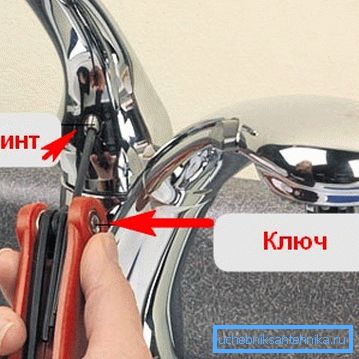
- Under the lining, there is usually an end screw, which we unscrew with a hexagonal key of the corresponding section.
- Remove the handle, then twist the cap nuts. As a rule, modern models of cranes are completed with two nuts: the top one is ceramic, and the bottom one is clamping.
Note! Sometimes the clamping nut has special holes for the company key. In this case, you will have to either purchase a special tool or use the items at hand.
- Remove the cartridge from the slot and replace it with a new part.
- We carry out the assembly of the crane, trying to tighten the nuts tightly, but without undue effort, which can lead to the breakdown of the thread.
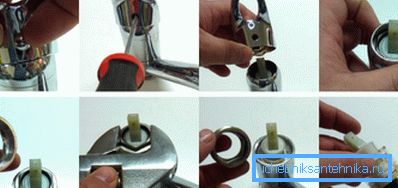
Disassembly ball mixer
How to disassemble the ball valve in the kitchen, knows almost every plumber.
We act very simply:
- We hook a decorative overlay and unscrew the screw fixing the handle with a hexagonal key.
- Remove the handle from the body, then unscrew the locking nuts.
- We take out all the pucks, remembering their sequence.
- Capturing stock, remove the ball.
- We dismantle the sealing elements, after which we perform their replacement.
- Install the ball in place, and then fasten it with washers and nuts.
- Return the handle, fixing it with a screw on the front side of the mixer.
But not everyone knows what to do with the spherical adapter in the bathroom. By the way, this is quite understandable - the design of the spherical mixer is done with the expectation of maximum strength, which, accordingly, complicates the dismantling process.
However, this does not mean that such a product can not be repaired.
We act like this:
- We unscrew the nut, which fixes the spout of the faucet - so we will get access to the faucet from one side.
- We dismantle the attachment of the shower hose, opening the upper part of the faucet.
- Using a hex key 12 mm (this size is suitable for most models), unscrew the locking sleeve, gaining access to the ball mechanism.
Note! This key is not in the standard set (usually the maximum size is 10 mm), so you have to use the available tools. Often, for this purpose, a fragment of hexagonal reinforcing bar bent under 90 is taken.0 - the section is exactly the same!
- Remove the O-rings by installing new ones.
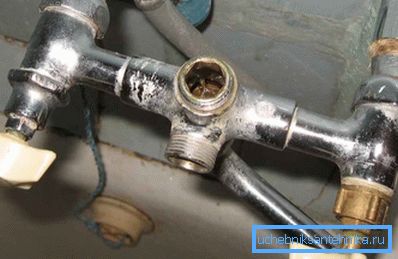
- Screw the coupling into place, after which we attach the spout and shower hose. By adjusting the density of pressing the ball with a clutch, we can make the shower switch move easier, or vice versa, tighter.
Conclusion
If you understand how to disassemble the faucet in the kitchen or in the bathroom, then you should have no problems with the repair of this equipment (see also the article Coupling faucet: manual for installation, operation and repair).
And for a more thorough study of the issue it is worth further to watch the video in this article.