How to drill a well with your own hands - the opinion of a
The presence of water in the house, as well as on the summer cottage - one of the most important conditions for the prosperity of the estate. Central water supply is not everywhere, plus it can work intermittently. Imported water is a temporary and expensive option.
The best way to arrange a personal well, and how to drill a well with your own hands in the house or in the country, we will discuss in this article.
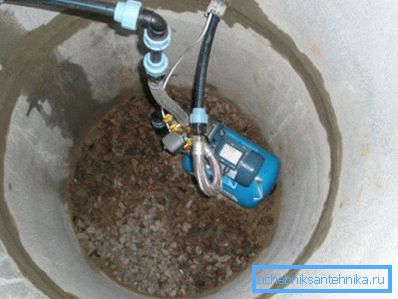
Before starting work
Determine the depth
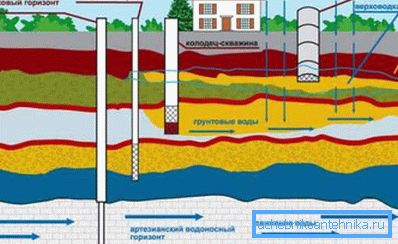
- First of all, you should decide for what purposes you need water.. The fact is that if you started the whole process for watering cucumbers in the country house, then you don’t have enough deep wells up to 20 m. Which is filled by groundwater flowing relatively close to the surface, but it can usually be used only for technical needs. .
- If you want to get water suitable for drinking and cooking, then you will most likely have to go deeper already to a depth of 50 m.. There are aquifer sand layers, the water in them, thanks to natural filtration, is much cleaner. But this water is recommended to be periodically checked for compliance with sanitary standards.
Tip: if you are doing everything exclusively for family use, then you can build a well from the depth of the sandy layers directly in the basement of your own house, and install filters in the house if the water is not clean enough.
- The ideal option is the arrangement of an artesian well.. But often this kind of work is beyond the power of an amateur. Artesian water is taken from layers of porous limestone, for the most part, occurring at a depth of 20 to 200 m. Plus, the limestone is a fairly strong rock and it is difficult to “pass” through it. But on the other hand, such wells are distinguished by their cleanliness, high return up to 10m? per hour and solid service life, up to 50 years.
Find a place
- Before you drill a well under the water with your own hands, determine the place. So, if you plan to install water supply in the future, it is better to do it closer to the house or right in the house.
- Of course, after the completion of the work, the construction will take up little space, but it is better to position it so that it does not stand on the road and is close to the place for which the bathhouse, greenhouse, house, etc. were settled.
- It is important that the platform was flat. In the course of the work it was convenient to install a mini-derrick and remove the selected sludge.
- If possible, try to locate the structure in the lowest part of the site, this will reduce the amount of physical work on excavation.
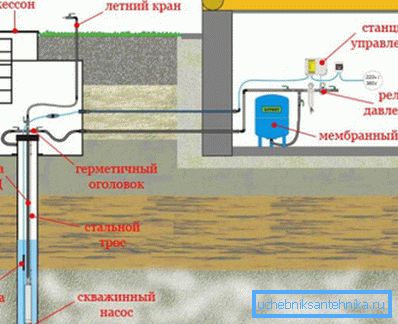
Important: it is categorically not advisable to equip a well closer than 20m from a landfill, toilet or a compost pit, the probability of dirty sewage entering the water is high. This is especially true for shallow wells.
- When the place on the site is determined, arm yourself with a nylon rope, with a load on the end and go around all the neighbors in the district that have wells, measure the depth of the wells. So you can, approximately, calculate how much pipes you need. If this is not possible, go to the local geodetic station or geological survey, there may be such data.
- If someone from the neighbors ordered work in a decent construction or exploration company, he must have a geological scheme in the section. On it, you, without difficulty, decide with what soil you have to work. Even at a considerable distance, up to 500 m in the plane, the differences in height will be up to 1 m.
Tip: there are places where slate (rock) starts at a depth of 2–3 m, it’s impossible to punch a well in such a place with your own hands, you need to contact specialists. From experience: you can dig a well with a jackhammer. Hard, but real.
Getting started
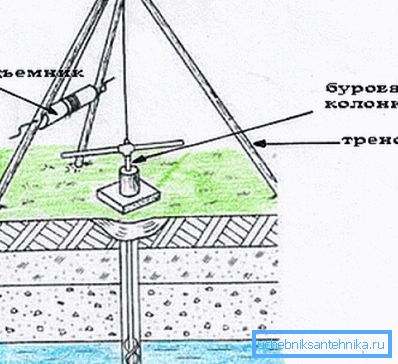
- Before you drill a well for water with your own hands, stock up with the necessary tool. First of all, it is desirable to have a tripod, performing the role of a derrick. When shallow aquifers, you can do without it, but in this case, swing your muscles and protect your lower back.
- It is advisable to start by digging a pit with a size of 1.5 x 1.5 m and a depth of 2 m. The walls of the pit should be strengthened with wooden formwork. At the bottom of the pit, in the center, dig a hole of a meter depth. Then you can not go through the usual shovel, you need to go to the special tool.
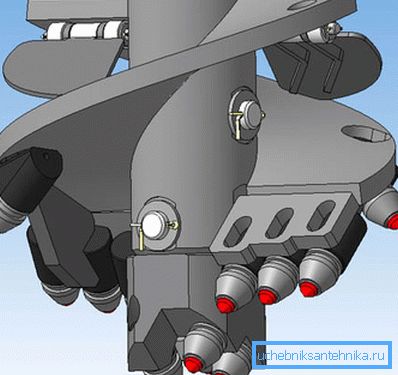
- For the work you need a few special tips. First of all, it is a coil, better forged, it is a kind of drill. As an option, you can use the fishing ice ax. Spoons can be used instead of the coil.
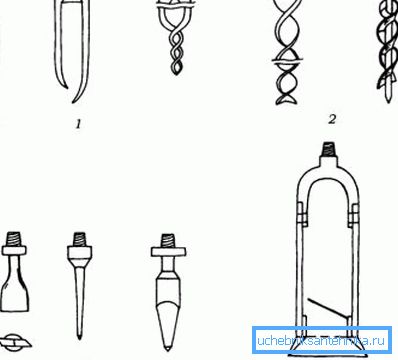
- In the picture: 1 - drilling spoon; 2 - coil or auger; 3 - types of "chisel"; 4 - small bowl.
- Also, if stones are encountered, the chisel head comes in handy, making it easier to break an obstacle. And one more necessary nozzle of the shell, it is useful for excavating wet sandy loam at the last stage.
- The working nozzle is attached to the column, which is composed of steel pipes of small diameter, about 25 mm. Colon builds up as it goes into depth. The pipes must be firmly interconnected, the choice of connection is at your discretion, threaded or with a pin. The connection must be strong and reliable, because if the nozzle fails, you will have to start all the work again and in a new place.
- Based on the fact that we decided on what, approximately, the depth of our water, to the reservoir, we pass quietly. Deepening in this way at a time can be done no more than 0.5 m, depending on the strength of the soil. In other words, every 50 cm you will need to pull out the column and clean up the accumulated sludge, here you will be helped by a derrick with a winch.
The video in this article shows several stages of burial.
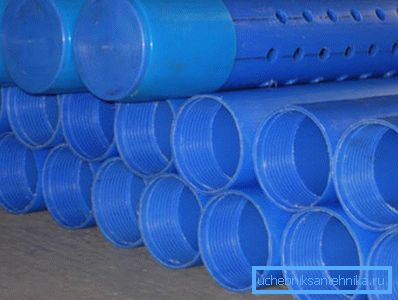
- As soon as the ground goes wet, you must prepare a production column with a filter at the end and casing for the well. End-to-end design, commercially available. The approximate price of these parts is 1500 rubles per 1 meter of a column with a filter and 300-400 rubles per linear meter of a plastic pipe with a cross section of up to 150 mm.
- If the depth is not great, then you can assemble the entire structure on the surface and insert it entirely. Otherwise, at considerable depths, as they go deeper, casing pipes are inserted and expanded. Naturally, the drill, in this case, should be somewhat smaller in diameter than the pipe.
- When the drill enters the aquifer, you will immediately feel the progress will become much easier. After that, remove the coil, because with it you will not pull out the liquid sandy loam and go to work as a shell. It has a check valve with which wet soil is retained in the nozzle. It is better to fasten the sink with 2 cables, the first main cable, and the second one.
- So with the help of zhelonka we go through the entire aquifer until it stops. When it is over, you will immediately feel that the nozzle is firmly resting on something solid. After that, you can chisel deep, but not much more than 100 mm, since, having pierced it, you can open the way to the water down, and then you will need to go deeper to the next aquifer.
- Selecting a silt in the well with a sludge or a special thin-walled pipe with a check valve, proceed to the installation of a filtration column. When the column is installed, and inside it there is practically no sand, the bottom of the pipe should be silenced.
- One of the easiest ways to do this is to stitch a canvas bag along the diameter of the pipe, fill it with a mixture of sand and cement, in the ratio of 1 kg of sand, plus 1 kg of cement. Cement is better to use high grade 300 - 500, lower it all the way into the pipe and allow it to harden for 2 - 3 days.
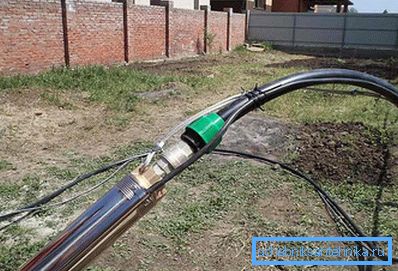
- After blocking the pipe from the bottom, lower the shell and check for the presence of sand in the filtration column. If there is a little sand, we lower the pump and pump out the water, it is not recommended to lower the pump to the stop, leave it hanging at a height of 50 cm. Dirty water is pumped out and as soon as it goes clean, you can carry it to the sanitary-epidemiological station for testing.
- On the video in this article you can see the final stage of installation.
- In addition to drilling with a screw, it is possible to drill in a shock way. This method is somewhat slower than the previous one, but it is easier and in this way it is possible to perform work alone.
- The instruction here is simple, we drill down with a serpentine to a depth of several meters. Next, remove the coil, take a special nozzle in the form of a pipe, the edges of which, on the one hand, have notches for easier penetration into the ground, on the other hand, a ring for hooking the cable.
- The wall thickness should be at least 3 mm, the length of the projectile is about 50 cm, it can be further weighed by welding a shank from a pipe of smaller diameter. The cutting edge must be hardened.
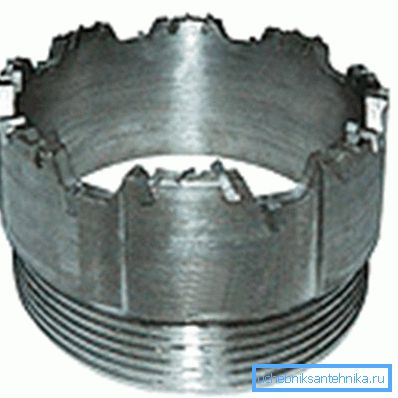
- The principle is simple, from the height of the surface of the earth, this design is thrown into the well and, due to its weight, enters to a certain depth. Next, pull the nozzle out and clean out the formed plug. For 1 hit it takes 3–5 cm. But when you get to the water, you will also need a shell to choose liquid sandy loam. Subsequent actions are described above.
The video in this article shows the principle of the shock method.
Conclusion
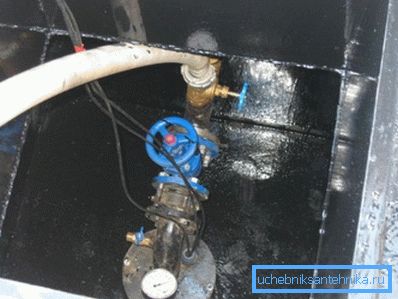
The impressive view of the derricks of many frightens off, but for a confident person the obstacles do not exist. Now you know how to drill a well under the water with your own hands and see that this is a quite doable task, and there will always be intelligible instructions on our website.