How to fix the shower switch: typical problems and their
This article focuses on how to repair the faucet in the bathroom: the switch to the shower is a rather vulnerable part of its design. We have to get acquainted with the main types of switches, their typical malfunctions and ways to eliminate these malfunctions.
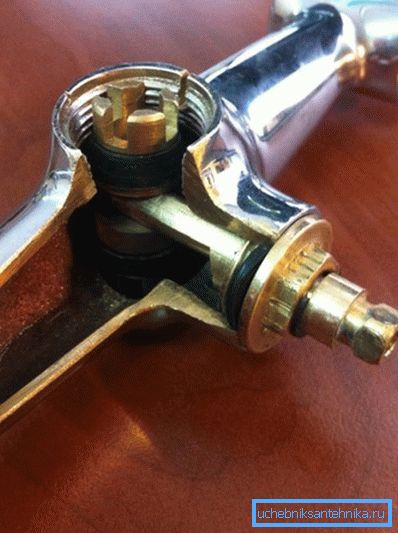
Types of switches
So, what they actually are:
- Cork provides switching from gusk to douche by turning massive brass cork with slots. Tightness is ensured by its dense lapping to the body of the mixer.
It should be clarified: the corresponding type of domestic mixers has long been discontinued, although some samples of these exceptionally fault tolerant products can still be found in the houses of the old building.
- Pushbutton switches use, as is easy to guess from the name, a button with a valve on a long stem. When pressed, it overlaps the water on the gander, and opens the shower. Reverse travel is provided by a spring; it is only possible with closed taps: the flow of water keeps the valve in the lower position.
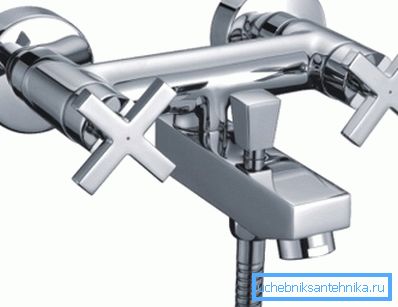
- Devices with a brass or plastic barrel with gaskets. It is set in motion by an eccentric inserted into the barrel groove; switching is carried out by turning the lever about a quarter of a full turn. The seal of the eccentric rod is provided with stuffing box gasket or, which is much more common in modern mixers, with annular rubber seals.
- Finally, the last type of switches - ceramic cartridges with fluoroplastic or teflon seal. Structurally, they are closest to the ceramic Kranbukse. Faucets in the appropriate design is easy to recognize, if possible, turn the switch lever for a full turn.
Problems and Solutions
So, what to do if the shower switch on the mixer broke, in each of the cases described above? Let's move on to the typical problems of each type of switch.
Suberic

As already mentioned, these products are exceptionally fault tolerant. Two diseases, however, they have.
| Problem | Cause | Decision |
| Great effort to switch mode | Tightened clamping nut | Disassemble the mixer; lubricate the tube with silicone grease; moderately tighten the nut |
| Leak on cork stem | Uneven cork or body wear | The solution is the same as in the previous case. Viscous silicone grease makes it easier to turn the handle and fill the unevenness of the rubbing surfaces |
Push button
What does a repair of a switch with a gander and a shower mode look like with a button construction?
She has three typical faults:
- The switch does not hold water: it simultaneously enters the gander and shower. The reason is uneven wear or complete destruction of the rubber valve. It is treated only by its replacement or, if the corresponding spare part is not on sale, by a complete replacement of the mixer.
- The button spontaneously returns to its original state after being pressed with a slight pressure of water. The reason is an excessively tight return spring. It is enough to bite off one or two turns of the spring - and the mixer starts to work absolutely normal.
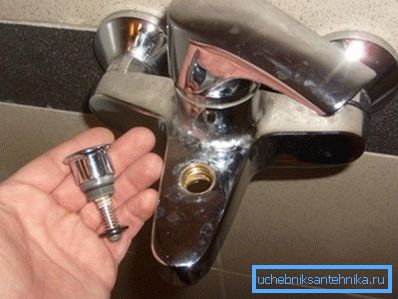
- Finally, if the shower switch flows on the mixer, the reason is the wear of the sealing ring. Again, it changes to the new; rings, as a rule, are included in gasket sets for the repair of domestic mixers. The price of a set rarely exceeds 20 - 30 rubles.
Hint: if the push button switch is equipped with a stuffing nut, instead of a rubber sealant under it you can lay a string of graphite gland.
With a keg
Here are the diseases of this construction:
- Do not overlap the water on the gander or shower. The reason is the wear of the gaskets or, more often, the destruction of the bolt fixing one of them. The problem, as it is easy to guess, is eliminated by replacing the gasket or bolt.
Useful: laying is easy to cut with your own hands from the old camera from the wheel of a truck.
- The switch does not turn to extreme positions. The reason is in the wear of the keg or guides in the mixer housing: because of the large gap between them, the keg gets twisted and wedged.
Repairing a shower switch for a faucet usually comes down to replacing a keg; A temporary solution to the problem may be the installation of improvised rails made of aluminum wire into the mixer body.
- When a leak occurs on the rod, the rubber seal changes again or the stuffing box is stuffed.
A beginner may have a reasonable question: how to remove the shower switch on the mixer, if the barrel does not want to leave the case?
Here the sequence of operations is important.
- Unscrew the mounting screw, remove the switch lever.
- We turn back the gland (if it is).
- Take out the eccentric.
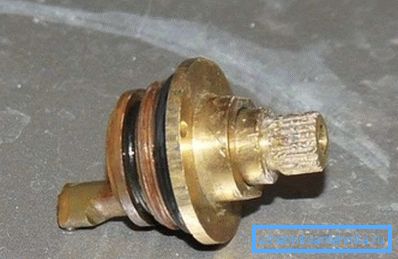
- Turn off the nut on the body of the mixer under the shower hose.
- Remove the gander.
- We push the keg through the hole in the body of the mixer from bottom to top.
Ceramic
How to repair the shower switch, the handle of which is able to do a full turn?
From modern mixers, these are the most fault-tolerant; The author can not remember any of their damage due to normal wear and tear.
Problems can arise only under the confluence of two circumstances:
- Lack of filters at the entrance to the apartment or house. When repairing the water supply line, it can get dross or coarse sand, which sooner or later will end up in the mixer.
- Significant physical strength of the owner in the complete absence of common sense. If you try to force a cartridge stuck in a scale, the result will be a bit predictable: either one of the ceramic plates or the plastic retainer holding it will break.
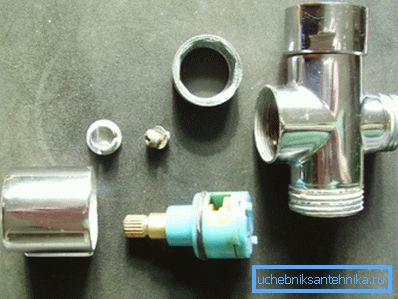
The repair manual in this case is also quite predictable: the destroyed cartridge is replaced with a new one. For replacement, it is enough to remove the handle and the locking nut.
Shower
Since we have touched upon the repair of the faucets, we will touch on the problems of the shower - hose and watering can.
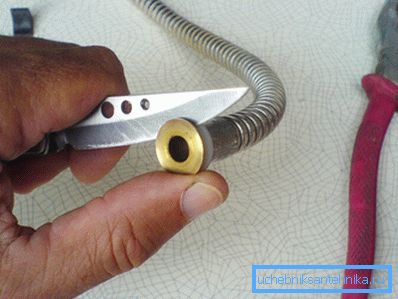
Hose leakage is usually associated with the destruction of the elasticity of a rubber tube that is hidden beneath metallic armor. The tube is easy to find in any plumbing store; she pulls on the liners, which are then pressed into the armor, while securely fixing the core.
If water enters only through a part of the holes in the shower, it is obvious that the watering can is either filled with sand and scale, or overgrown with lime deposits.
- How to disassemble a shower with a switch for cleaning? If its mesh is fixed with a stainless screw, everything is very simple: just unscrew it and you will get access to the holes from the inside.
Hint: the screw is often hidden behind a plastic cap in the center of the grid.
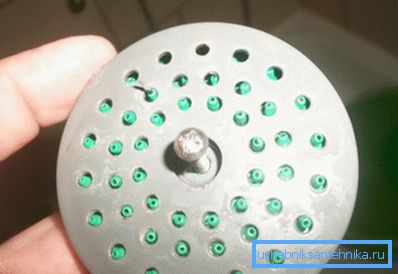
- How to disassemble a watering can shower with a switch if some visible fasteners are missing? Often the grid can be removed by holding the switch and rotating it counterclockwise. If it didn’t work, it’s likely that your watering can is snagged and not intended for disassembly.
However: it is easy to clean the holes in it with a stationery clip or a pin.
Conclusion
We hope that the above simple recommendations will help the reader in solving everyday problems. As usual, the video in this article can be an additional source of information.
Successes!