How to install a shower tank on the roof: technological
Installing a tank for a shower on the roof is usually one of the final stages of work on the arrangement of the summer shower. Usually this task does not cause any difficulties, however, if you approach the matter creatively, then here you can find a field for experiments.
Below we will tell you what you need to pay attention to when choosing and installing a water tank, and also give a number of practical recommendations.
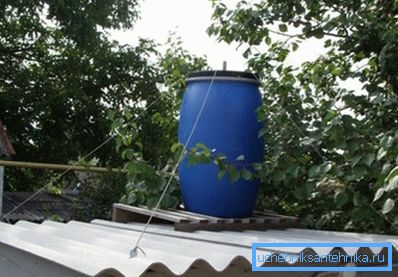
Design options
Varieties of industrial products
The summer shower is a fairly compact design, installed on the site and supplied with a supply of water. Most often, this autonomous stock is stored in a tank, placed either on the roof, or on a special external frame (see also the article Frame for the shower tray: a reliable support for our shower).
The upper arrangement of the tank facilitates the use of the system: water enters the faucet by gravity, so that it is not necessary to use electrical appliances to build up pressure.
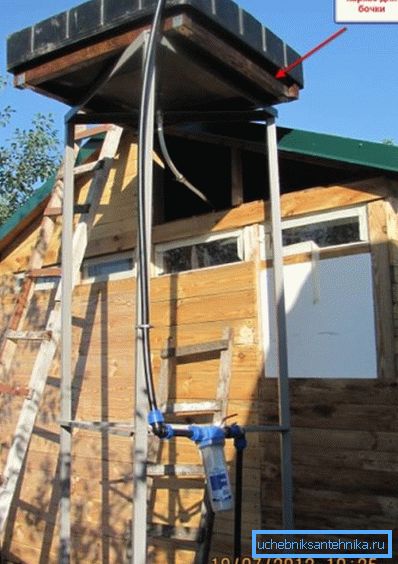
With the arrangement of the soul, the owners of suburban areas quite often acquire ready-made tanks specifically designed for this purpose. As a rule, such products are made either from metal (galvanized steel or aluminum), or from plastic.
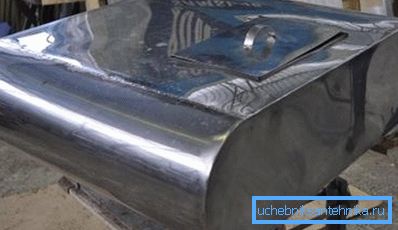
Both metal and plastic products have both advantages and disadvantages. These features can be analyzed by the table below:
| Tank material | Merits | disadvantages |
| Steel |
|
|
| Plastic |
|
|
| Polymeric canvas |
|
|
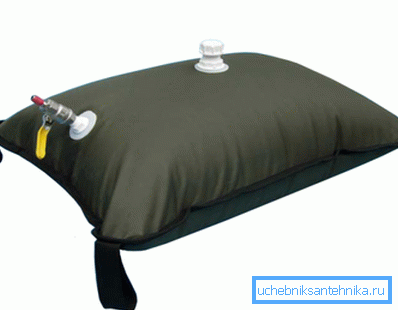
However, only constructions of factory production are considered here. If we build a shower with our own hands, then it is quite possible to use other suitable tanks.
Using handy objects
As a tank for the shower, you can take any container, so long as its size fits, and the material does not decompose on contact with water and does not emit toxic substances.
Most often, this list includes:
- Barrels. Here it is better to take not metal (they rust rather quickly), but plastic products. One of the drawbacks of the barrel is its shape: with vertical installation, it has significant windage and requires additional fastening. However, the barrel can also be laid horizontally, but then we need to seal up the holes in the upper lid as tightly as possible.
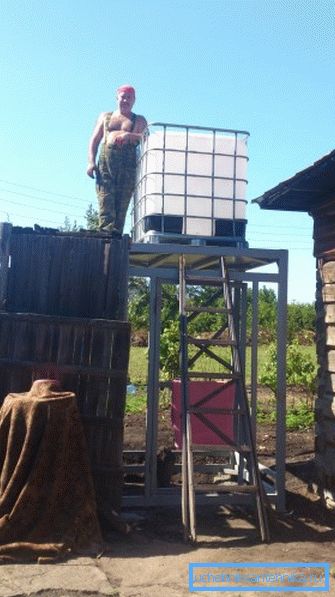
- Eurocubes - plastic containers of large volume. They are ideally suited for the role of a shower tank, but most often they are produced in fairly large dimensions (800 liters or more). That is why it is better to install a eurocube on capital structures, for example, on brick shower cubicles.
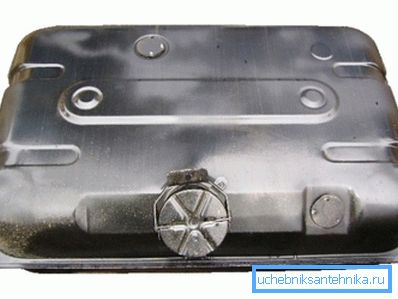
- Fuel tanks. The use of fuel tanks removed from heavy vehicles is quite popular in rural areas. These products are durable, good corrosion resistance, sufficient volume. In addition, their flattened form greatly facilitates the process of fixing the tank on the roof.
Note! Before fixing the shower tank on the roof, it must be thoroughly rinsed to remove all residues of fuel and lubricants. However, this applies to any previously used tanks - and fuel barrels, and food containers.
Thermobag making
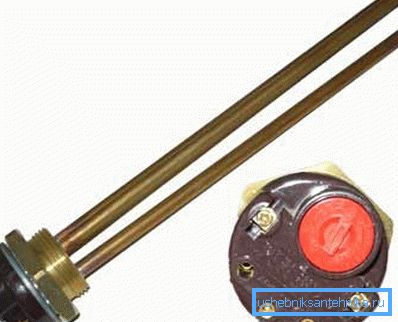
Sometimes solar heat is not enough to quickly heat the water in the shower, and therefore inside the barrel or tank, the owners place the heating element connected to the source of electricity. This solution allows you to get warm water quickly enough, but at the same time the consumption of electricity (and hence the cost of its payment) will be rather big.
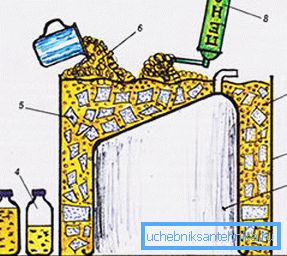
You can partially compensate for waste by equipping a thermal tank - a structure that retains the heat received as long as possible.
Instructions for creating a thermal tank is given below.
Note! Natural heating of such a tank under the influence of the sun's rays also occurs rather slowly, therefore using it without switching on the heating element is obtained only on the hottest days. That is why owners sometimes set such capacity as a backup system with a smaller volume.
- For the manufacture of the basics we take a metal tank. Inside it we put the heater. We open the wire from it with a switch on the phase wire and connect it to the switchboard.
Note! Using this design, we remember about safety: first, we never bathe in the shower when the heater is on, and second, we always ground all metal elements.
- Around the tank we build a box for insulation material. It is easiest to use asphalt, but you can make wooden formwork, and even a cylinder of penofola (foil inside, of course).
- Inside the body we fall asleep ecowool or granulated polystyrene. Also, crushed foam is sometimes used, alternating with layers of self-expanding polyurethane foam.
- From above we cover a heater with dense polyethylene for protection against a rain.
Such a multi-layer thermal tank will protect the heated water from heat loss, and we will be able to minimize the energy consumption for heating the liquid in the shower.
Mounting technology
Installing and securing the tank on the roof
The process of installation of the tank itself is usually not difficult:
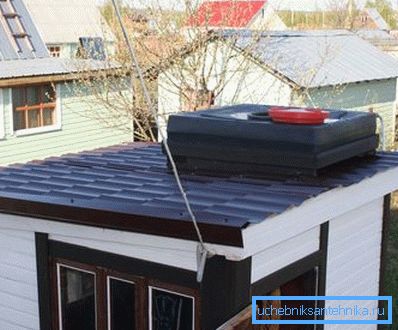
- If we use a flat factory tank, then it is enough to lay it on the pre-erected ceiling, aligning the lower nozzle with the hole in the roof. The side lugs (if any) are connected by segments of steel wire with anchor rings mounted on the roof or in the upper part of the walls.
Note! The power of the ceiling beams should be sufficient to withstand the weight of the filled tank without bending. You can check this by checking the horizontal level of the roof with a long level before installing the tank and after pouring it. If the deformation is revealed, it is necessary to remove the tank and strengthen the structure.
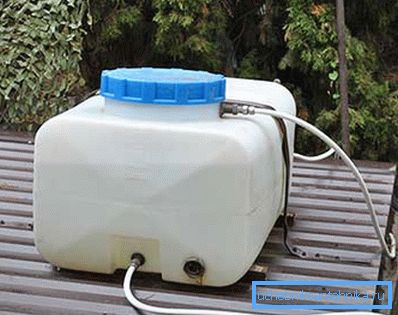
- The plastic canister or eurocube can be fixed with strips of thin metal. To do this, the billet is bent along the profile of the tank, and then attached to the roof with nails or screws.
- Before you install the shower barrel on the roof (meaning vertical installation), you should take care of the supports for it. For this purpose, the adjacent frame posts are usually used, around which a small plank fence is made. Having installed a barrel in this fence, we fix it with boards so that it does not move.
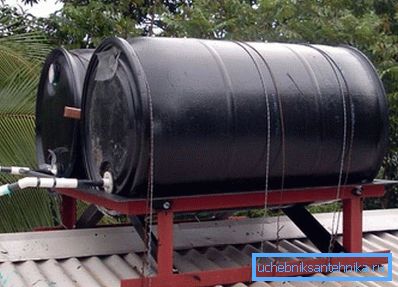
- On a flat roof, you can fix a barrel or a tall European cup with braces. To do this, use nylon slings, strong ropes or cables that are attached to the corner posts of the frame or anchors.
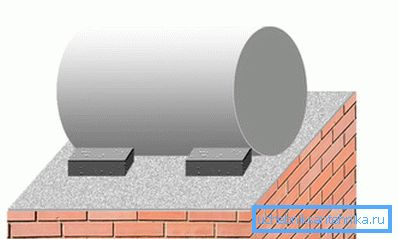
- If the barrel lies horizontally, then it is important for us that it does not roll away. It is easiest to limit lateral movement by placing a pair of bricks or cinder blocks under the tank.
System arrangement topping
Fixing the tank on the roof of the shower, we should think about how we will fill it.
There are two options:
- If the source of water in the country is a well without a pump, then you will have to carry water in buckets. Accordingly, we attach a fairly wide and durable ladder to the shower, and we choose a tank with a neck so that it can be poured into the water from a bucket quickly and without losses.
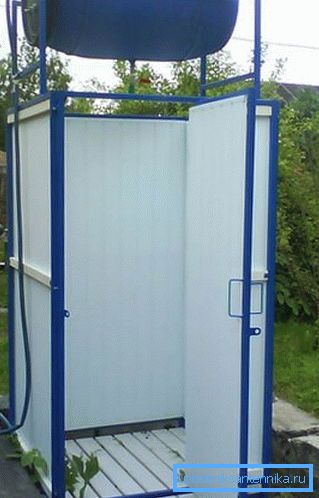
- If there is a water supply system at the site, then install a hose in the neck of the tank, which we lower down and fix it near the base of the shower room. To fill the tank, it will be enough for us to attach to this hose another one connected to the water supply system.
Tip! It is necessary to ensure that the upper end of the hose is attached to the neck, and does not fall into the container. Otherwise, all the water will pour out!
Conclusion
As you can see, the question of which tank to choose and how to fix the shower barrel on the roof has many answers. The technical tricks outlined in the text, as well as demonstrated on the video in this article, may well be useful, therefore, when designing a summer shower, it is worthwhile to use them (read also the article Barrel for the Summer Shower: Choice and Installation Features).