How to make a drill for a well with your own hands
Every year more and more people come to the conclusion that it is easiest to make a well in their backyard or summer cottage without the involvement of specialists. This saves a lot of money at work, but the equipment and accessories for drilling cost a lot. That is why the most rational decision is to make a frame, a lifting mechanism and a drill for the well with your own hands.
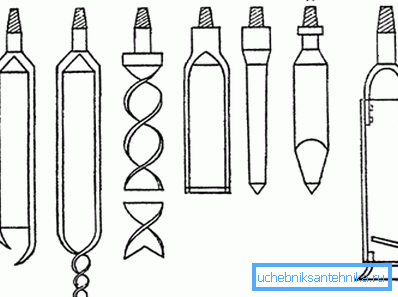
Undoubtedly, the most important part of the entire system is a drill - without it it is impossible to drill a well. A good adaptation makes work much easier, and this issue should be given the closest attention.
The main features of the manufacture of drills of various types
Before you start work, you need to decide which drill for drilling wells best suits your conditions. This can be clarified by consulting with specialists engaged in drilling services, or from those who independently made the source. Consider some of the most common, well-proven options.
Spiral drill
Such a tool is very often used by professional professionals, which indicates the effectiveness and reliability of this type of design. Despite the seeming complexity, it can be made at home, and let the homemade drill for the wells not be beautiful and neat, but it will cope with its main function perfectly.
The process of its manufacture is quite simple, for this you need a grinder, a welding machine and the necessary materials.
Instructions for making something like this:
- First, a steel circle or a strong thick-walled pipe is selected, which will be the main axis of the device. The workpiece must be sufficiently strong, since the load on the equipment during the drilling process is very high.
- Next, you need to make a guide tip, if you have a finished part, then you can skip this item. If it is not there, a strip of metal is taken, heated and bent into a spiral, after which one end is cut off to give a sharp shape to the tip, in the end something should turn out similar to that shown in the photo:
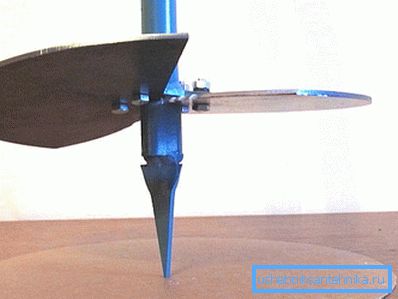
- Further, a slot of such width is made at the end of the pipe or circle, so that the tip is inserted into it, after which the parts are welded.
- The next step is the manufacture of the cutting helix. At home, it is difficult to bend a strip of metal, but you can get out of the situation quite simply: an already used disk is taken on wood or concrete and cut in half, after which the halves are welded opposite each other at an angle of 20 degrees. Usually enough 1-2 discs with a diameter of 180-200 mm.
- Then you should take care of fastening the drill to the handle and extension sections, because it will work at a considerable depth. It is best to use threaded connections, which are additionally fixed with cotter pin to ensure greater reliability. The number of extension cords depends on the estimated depth.
Tip! The handle is also an important detail due to the fact that the process is quite difficult. It should be convenient for the work of two people, it is better to make it in the form of two pipes, between which the coupling is welded, the internal thread of which corresponds to the thread on the extension cords. You can use a self-tightening clutch, then the handle will be mounted on any part of the drill.
Gas cylinder drill
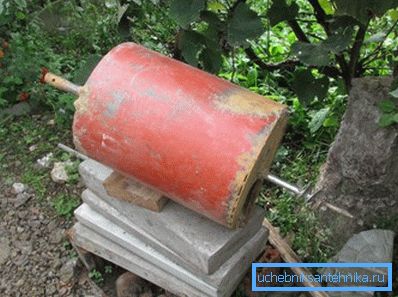
Frequently, a well with a diameter of about 300 mm is required for quality water intake; it is very problematic to buy such a device, since its price starts from 10,000.
But it can be made independently from a faulty gas cylinder:
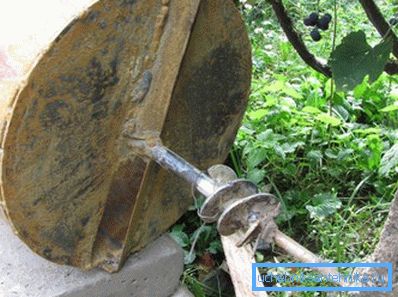
- An unnecessary or faulty 50-liter bottle is taken, which needs to be marked out and cut with the help of a grinder, you should get a piece of 70-80 cm.
- One of the ends is sealed with a metal sheet with a thickness of 3-5 mm.
- Next, the axis should be welded, a very important nuance - it should be shifted 1 cm from the center for better performance. It is best to use a stencil of cardboard, it is determined by the position of both the bottom and top, where it is fixed with struts.
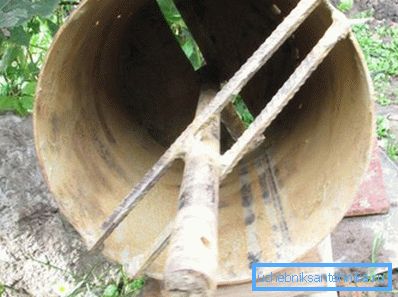
- A slit about 5 centimeters wide is made across the bottom, and on one side of which the cutting knives are welded at an angle of about 20 degrees. Also, do not forget about the guide tip - any small helix that can be made by yourself or adapted by a ready-made unit is suitable for it.
Spoon bur

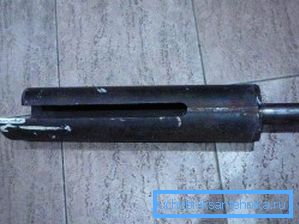
If the soil at the location of the well is crumbling and there is a lot of clay in the soil, it is better to work with a drill. You can make it yourself, for this you need a piece of pipe of the desired diameter.
The sequence of works is as follows:
- A piece of pipe with a length of 70-80 centimeters is taken, and a lengthwise incision of 6-8 centimeters is made on 2/3 of the length on it.
- In the lower part, one end is bent in the form of a spoon with a floor angle of about 20 degrees, and the second is parallel, this design allows you to cut the soil and pass it inside.
- Many make a slight displacement of the axis - up to 5 mm, then the device makes a hole 1-2 cm wider than its own diameter.
Note! Any large drill can serve as a guide, and some even do without it, making the end semicircular, as shown in the photo.
Frame drill
Very simple, but, according to user feedback, an effective system. The cost of a drill for frame type wells is very low, which makes it the most attractive option with a small amount of funds.

From the photo you can see that the construction is quite simple: an axis is taken, to which a frame is welded, one of the ends of which is made in the form of knives at an angle of 20 degrees. At the end a small tip is welded.
Other types of equipment and features of work
Many are interested in whether it is possible to use a motor drill for a well. It is worth noting that it is quite convenient to make a hole in the upper layers of the soil. But further it is difficult to keep it in an even position, moreover, work at a great depth greatly overloads the equipment.
And one more thing that should be foreseen: so that the problem does not arise in front of you, how to get the drill out of the well when it has gone deep enough, you should make a special frame to which a manual or electric windlass is attached. So you greatly facilitate your work.
Conclusion
By making a drilling tool yourself, you save considerable funds and get the tool you need to change (learn here how to make a drill for a well at home).
The video in this article will tell about some features of the manufacturing process.