How to make a house for the well - a guide to action
As a rule, after digging a well, the issues of water intake arrangement, such as the installation of a gate or pumping equipment, are solved first. But protecting the source from dirt, precipitation and the penetration of various animals and birds is no less important. That is why we will in the smallest detail consider the question of how to make a house for a well quickly and without assistance.

Immediately, we note that we will consider how to build a house for a well - a house, not a shed or visor. A roof without walls is a shed, but not a house, like any structures with at least one open wall. The lodge is a protected structure that provides the highest degree of protection of your source against any adverse effects.
Preparatory activities
In order for work to be carried out quickly and efficiently, it is necessary even before starting work to stock up on all the necessary materials and prepare the tool. This will greatly simplify and facilitate the task.
So, from what the construction will be carried out:
- Wooden bar, the size of which may vary, but in any case, it must ensure the reliability and durability of the frame, because it will carry the bearing function. Most often, pine material is taken, as long as it is dry, otherwise the structure may lead.
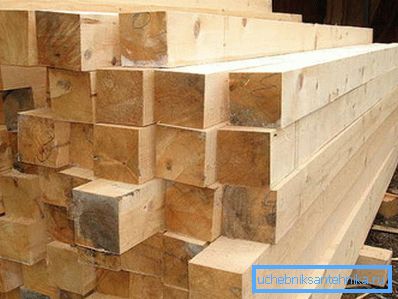
- Board for cladding frame. Its thickness may be different, it is important that the design after assembly is strong and resistant to deformation effects. Ideally, this is a cut polished board, but, in extreme cases, the surface can be sanded independently.
- Roofing material - this is what the house will be sheathed with. Metal profile, metal tile, soft roof, roofing felt, simple galvanized or painted tin and much more will do.
- Construction hardware - wood screws, corners for the assembly of the frame and other elements that are used to connect the structural elements.
- Elements for the device door - hinges, latch or bolt and handle for opening.
Work is impossible without a specific set of tools:
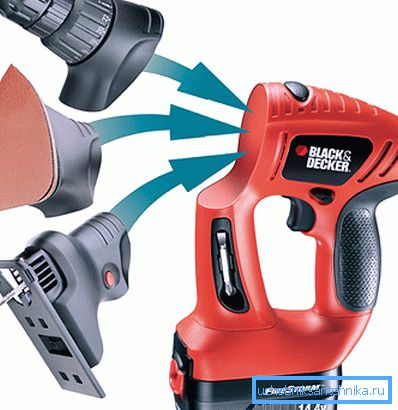
- Hacksaw, jigsaw or electric saw. Each of the devices is suitable for cutting, just a hacksaw to do it much longer.
- If you need sanding wood, it will come in handy with either an electric planer or a grinding machine. If you have a stationary woodworking machine, it can replace all of the above tools.
- The screwdriver will also have to be useful, since it is very difficult to tighten a lot of screws with a screwdriver.
- Measuring and marking tools: tape measure, building level, square and building pencil.
Stages of construction
To clearly understand how to make a house on the well with your own hands, you should make a sketch of the future structure. This will greatly simplify the construction process, as you will clearly represent the end result. The plan does not have to be made beautiful - it can be drawn by hand, the main thing is that it reflects the features of all the basic elements of the structure.
It is also necessary to remove all the necessary dimensions - the diameter of the well ring, its height above the ground (if you close it with a frame). The shape of the frame may be the most diverse, but we consider the quadrilateral option - the simplest in execution.
Tip! The easiest way to see the already erected structure is to make a sketch much easier. In addition, you will see what the end result should look like.
Well Ring Frame
We note immediately, this element is not always done, often the house is placed directly on the ring. But, as practice shows, full skin looks much better.
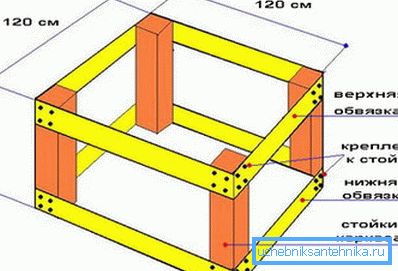
The sequence of works is as follows:
- The height at which the ring protrudes from the soil is measured, 4 racks of timber are cut out according to this size.
- Further, from boards with a thickness of 32 mm, or even better than 40 mm, strapping along the upper and lower edges is made.
- After that, you can completely sheathe the frame. Further, the structure should be treated with a protective compound (preferably in several layers).
Assembling the roof of the house
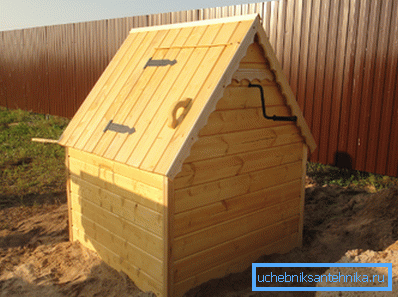
If the framework for the foundation you do not do, then this will be the main stage of construction. To understand how to make a house above the well, let us take as an example a photo of the initial stage, by which you can better understand each of the stages of work.
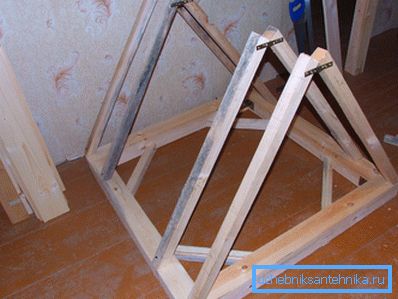
So, the work is carried out in the following sequence:
- The first stage - cutting the timber for the base. For this it is better to use a reliable material with a large cross section. Connections are easiest to produce with metal corners with stiffeners. They securely fasten the structure, making it very stable.
- Further, with the help of screws 4 bolts are fastened, they further strengthen the frame and increase the rigidity of the base.
- The next stage is rafters. If you have a door on one of the slopes - the easiest way is to make 4 rows of rafters, if the door is at the end (if water from the well pumps the pump and there is no gate, this option is preferable due to simplicity), then you can add another row.
- The design of the upper part can be done in two ways: either as in the photo with flat ends and the connection with metal plates, or with the cutting of the ends and connecting them closely. In the first case, the bar will be a skate, which will just rise into the recess from above, and when slaughtering with the ridge, there will be two boards stuffed with different sides.
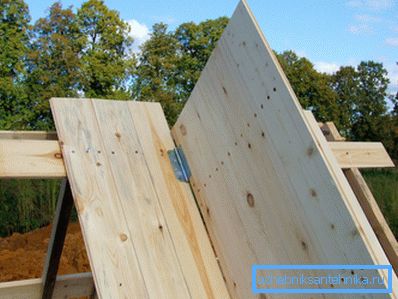
- Next you should put the frame on the well and start trim. If you use a board with grooves, then additional coating is not needed - it will reliably protect the space from water penetration. The main thing is that the board was dry and level.
- The doors will require separate attention, although in reality everything is quite simple - at first, a door is assembled in size, which should be strong enough, but not too heavy. Then you should try them on the well, after which you can fasten the curtains, the main thing is to correctly set the position of the door and not to move it during installation.
- Then, all the slopes of the structure are sheathed, after which boards for face trimming are cut out. At this stage, it is important to correctly mark the elements before cutting, so that everything fits as accurately as possible.
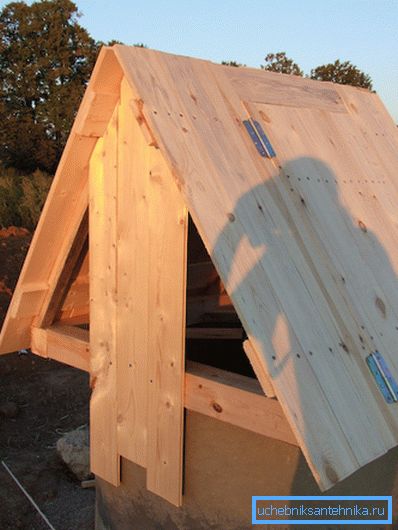
- After completion of the work, all protruding parts are cut off, and final refinement and adjustment of all elements is performed. Do not forget about the need to device skate. The easiest way is to bend it out of a piece of tin or to buy it ready - the price of these elements is small.
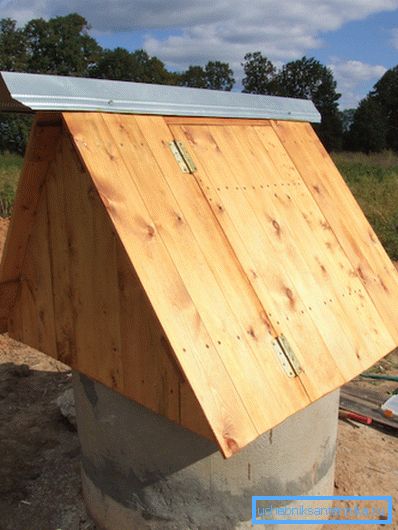
- The last stage is the processing of wood with protective compounds, they will make the structure much more resistant to moisture and pests. In addition, such coatings emphasize the structure of the tree and make the house on the well even more attractive.
This instruction will allow you to understand how to make a house for the well yourself, because there is nothing complicated here. All work on the strength of any person. And if you apply imagination, then you can create other designs, because our example is one of the simplest.
Tip! If you do not have a good board, but a lot of waste from construction, any trimming material will do - a continuous crate is made from it, on which a soft roof or sheeting is put.
Conclusion
In fact, to make a house for a well with your own hands is not so difficult, the design is quite simple, and you will cope with this task in a day. The video in this article will tell some more features of the construction of a protective structure.