How to make a summer shower: a scheme for arranging simple
Any owner of a country house sooner or later begins to wonder how to make a summer shower yourself. Even with a bathroom in the house in the summer heat, it is much more pleasant to take water procedures in nature, but you still want to do it with a certain comfort.
To date, there are many projects of various showers, and below we look at two of them, which, we think, are most suitable for self-implementation.
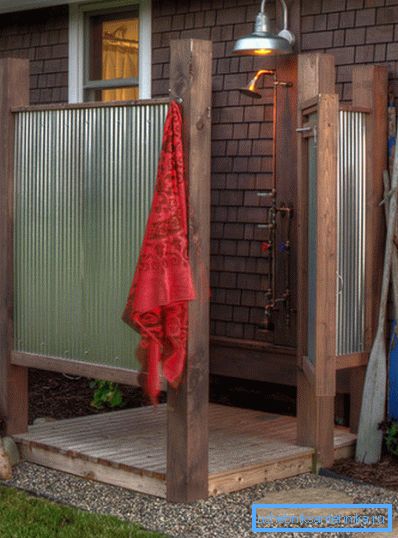
Temporary construction
Shower base
When developing a summer shower project, we first need to decide whether the construction will be done - temporary or permanent. In our article we will look at both, and begin with a simpler one.
Temporary shower usually settles where you can hang a container with water - near the house or between the trees. And in order to wash we could comfortably, it is necessary to prepare the site, otherwise the ground under our feet will quickly become sodden and turn into dirt.
Here the instruction assumes the following sequence of work:
- In the place where the shower room will be located, we dig a small pit under a depth of about 10 cm and an area up to 1 m.2.
- From the pit, we dig a shallow groove for drainage. The groove can be brought to the lawn, lawn, garden beds or vacant lot - the main thing is that plants sensitive to overmoistening do not grow there.
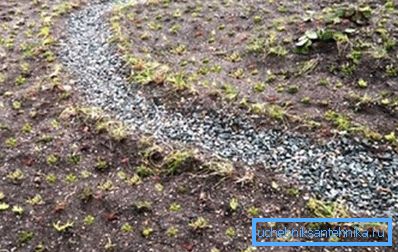
Note! If we use surface runoff, it is best to take a shower without detergents that will pollute the soil and groundwater. To drain the soapy water, it is worthwhile to equip a special container, the layout of which will be given in the next section.
- At the bottom of the recess we fall asleep a layer of sand, which we thoroughly ram.
- On top of an even layer lay flat pebbles, forming a platform. Along the perimeter of the pebbles we make a low rim that will prevent water from spilling out and direct the drain into the groove.

In principle, it is possible to equip a concrete base, but then practically all the water along the groove will go to the drain. In the case of sand and pebbles, a part of the drain will be absorbed right on the spot, and in the summer heat it will dry out quickly.
Water supply system

To equip the water system of such a shower is the most difficult.
Here you can go in two ways:
- First, on the tree, the wall of the house or a separate support, you can fix the container in which there will be water. It is most convenient to fill the container through a hose connected to the water supply.
- Secondly, the capacity can be installed on the ground (preferably - in the area illuminated by direct sunlight throughout the day). In the water we lower the hose with the pump attached, and above the shower we install only a watering can.

In principle, both options have both their poles and minuses, so when deciding what to make a summer shower, you need to think about them carefully.
Fencing
So that during the water procedures we are not disturbed by the wind, nor by outside views, it is worthwhile to equip the shower enclosure.
If we originally designed the shower area in the garden, then this task is not difficult:
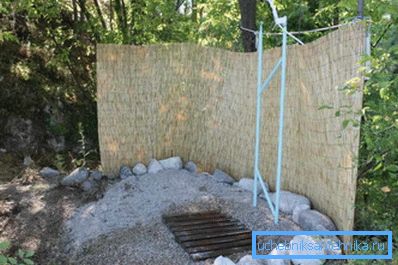
- Between the trees at a height of about 1.8 m stretch the wire.
- On a wire we have dense curtains from polyethylene or polymeric fabric. You can take almost any material, as long as it doesn't get wet.
- To make the structure more stable and less dependent on the wind, in the bottom of each curtain we place any weights. So the curtains will fluctuate less.
If the summer shower scheme assumes its construction in a relatively open area, then the easiest way is to install a screen on a wooden frame.
This design is easily and quickly done by hand:
- From 30x30 mm bars we assemble three frames with a width of about 60 cm and a height of 170 - 180 cm.
- Below to the supporting bars can attach the legs, which will be stuck in the ground.
- On the frame we stretch a thick oilcloth, opaque polyethylene or waterproof fabric.
- We connect the frames to each other with door hinges in such a way that the structure in the shape of the letter “P” is obtained.
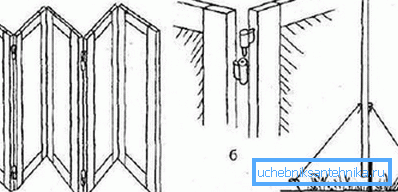
We will have an easy folding screen that can be quickly installed around the site and take a shower for your pleasure.
Capital shower
Organization of water discharge
No matter how simple and cheap temporary showers are, it is still much more convenient to use a full-fledged booth made of boards, plastic or even brick. Of course, the cost of its construction will be much more, but then it will serve at least ten years. And the level of comfort here is incomparable, so for a good host the choice is obvious.
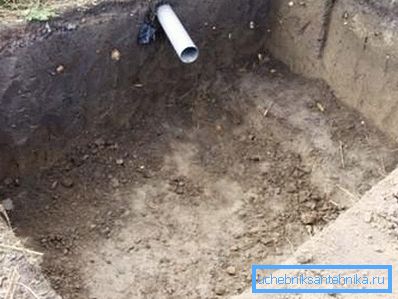
It is worth starting, of course, with preparing a place for drains. If there is a volumetric septic tank or cesspool, then it will be enough to lay a shower pipe.
If not, then you need to do the tank separately:
- Choose a place remote from the beds and points of water intake. The minimum distance should be 8 m, otherwise the wastewater will poison the ground or the water in the well / well.
- On the selected site we dig a hole with a depth of up to 1.5 m.
- We strengthen the walls of the pit by installing either a wooden blockhouse or a well with walls of brickwork. If you are not confused by the price, then you can purchase concrete rings for sewer manholes, but for their installation you will have to attract heavy construction equipment.
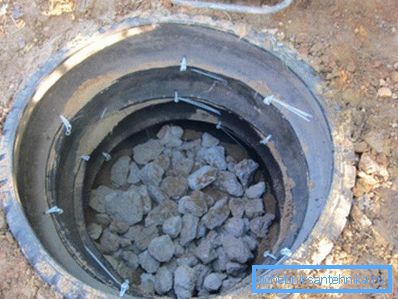
- To improve drainage in the bottom of the pit, we drill or dig out holes with holes (filled with a long handle), which we fill with gravel or rubble. Also, a layer of drainage material up to half a meter thick is laid on the bottom of the tank.
- From above we arrange overlapping on steel channels or thick wooden beams. The basis of the overlap is made of unedged boards, and on top we pour about 10 cm of mortar. On top of the dried fill lay the soil and turf, masking the drain hole.
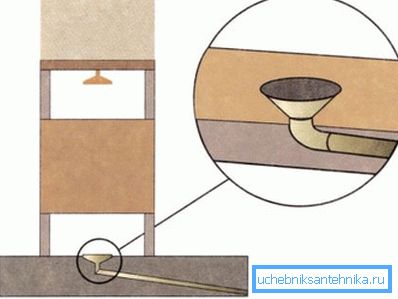
In the process of work it is necessary to remember that we need a pit to collect wastewater. Accordingly, in the ceiling we will definitely leave a hole for the entrance of the pipe from the shower (in the center, if we build the shower over the pit, and on the side, if the cabin is at a distance). We also embed a short pipe into the ceiling for ventilation.
Cabin building
If we have enough money, then you can buy a finished plastic booth and just install it over the drain well. However, most often the landlords prefer to build showers on their own.
Material for the summer shower should be chosen according to its features. Here the easiest way to navigate the table:
| Construction scheme | Benefits | disadvantages |
| Brickwork |
|
|
| Wooden frame with plating. |
|
|
| Metal frame with plating. |
|
|
As you can see, different solutions have their pros and cons, which is why the choice of a specific option is a purely individual matter.
In our article, we will give an example of the simplest stall made of wood with wooden lining.
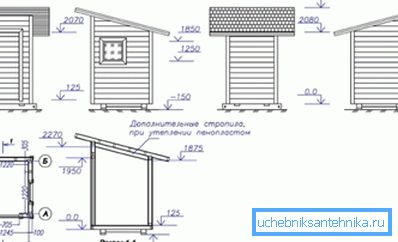
- At the first stage we create a drawing of a summer shower.. Here it is necessary to determine the size. The optimum height is about 2.2 m, and the base should occupy the area of not less than 0.7 x 0.7 m. However, you can make more spacious showers!
- Focusing on the drawing data, we apply markings on the ground.. By marking we set up the base - either we fill in the strip foundation, or we dig in concrete blocks at the corners of the frame.
Note! If the shower is raised above the drain hole, then the foundation must be made during its arrangement, in order to prevent collapse.
- On the foundation we lay the lower frame - a square or a rectangle of thick wooden timber. To prevent the timber from getting wet from the soil moisture, between it and the concrete we lay either roofing felt or several layers of polyethylene.
- We fasten vertical posts to the base, which are fastened from above by strapping. Large constructions are reinforced with cross-beams that add rigidity to the frame.
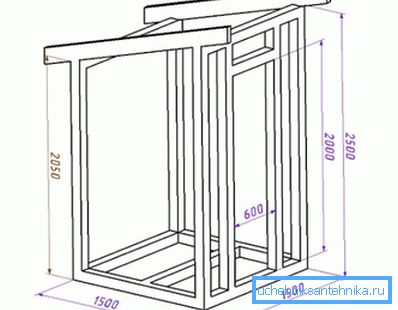
- How to make the floor in the summer shower, almost everyone knows. The easiest way to install logs attached to the bottom trim, and on top to lay the board floor with large (up to 5 mm) slots. Under the flooring we place a metal or concrete pan with a drain hole to collect waste water.
- Next we need to make the walls. The ideal material for a summer shower is a paneling made of wood impregnated with antiseptic, but you can use plastic, vinyl siding, and profiled metal sheets with polymer coating.
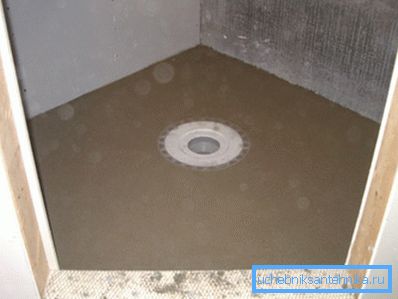
- But the question of how to trim a summer shower inside rises quite rarely. Most often, such a need arises when used in metal cladding. In this case, you should take care of your own comfort by installing plastic panels on the walls.
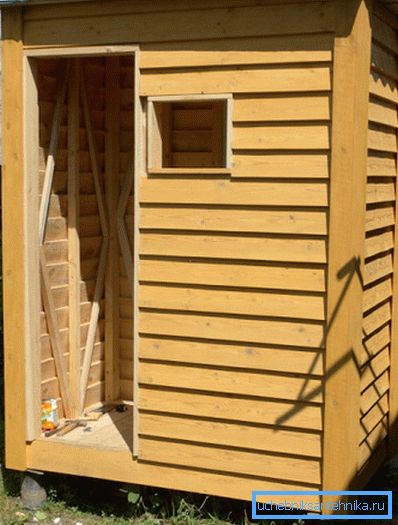
Water connection
So, the construction itself is ready for us, it remains only to take care of the presence of warm water.
There are also several typical solutions here:
- The easiest way to connect a summer shower to the hot water system of a country house. Of course, this possibility is not always, but if it works out, then problems with water procedures will not arise even on cool days.
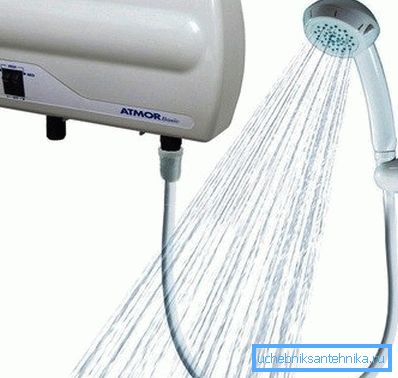
- The second most effective solution is to install a flow heater or a storage tank with heating. Such a system is also energy-intensive, because to connect the shower to the panel it is worth laying a separate cable, well protected from external influences.
Note! A prerequisite for the installation of such a system is the connection of a shower to the panel through an RCD or at least a separate automatic device.
- Finally, the traditional solution would be to place a water tank on the roof, which will be heated by sunlight. As such a container, you can use a special flat tank of large volume, a Eurocube, a tank, a barrel, etc.
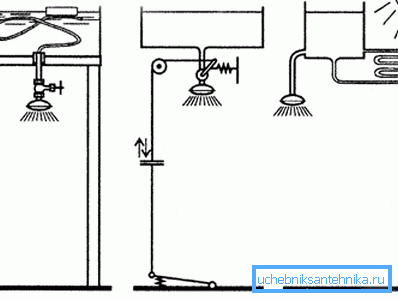
- We install the container either on the lags or on the roof itself and fasten securely. For fixing, we use either wire braces or anchor bolts that are fixed in the supporting structures. For more efficient heating capacity should paint in a dark color.
Inside, a ceiling-mounted faucet with a shower head is usually installed. Such a device can be purchased in finished form, and you can assemble yourself from plumbing parts.
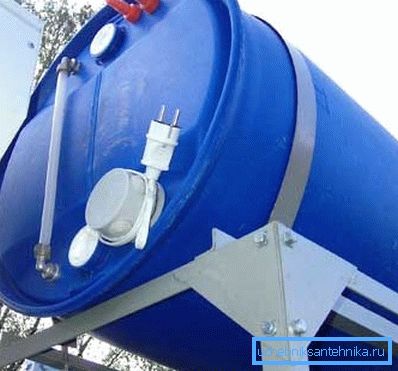
Actually, the construction of the shower is completed by connecting the crane. It remains for us to fill the tank with water, wait until it warms up - and we can take a shower.
Conclusion
The dimensions and patterns of the summer shower can be very different, but the general principle of construction outlined above remains unchanged. For a more detailed acquaintance with the methods and techniques used it is worth watching the video in this article.