How to make a tile shower: practical tips and tricks
In this article we will talk about how you can equip a shower room in a country house or apartment using available materials. It would seem that you can buy a special acrylic pan, which looks good and has an optimal tightness.
But a pallet made of polymeric materials is a design with dimensions of at least 80 * 80 cm. If the bathroom is cramped, a smaller pallet is required, and therefore it will have to be done independently. Another reason for arranging a shower with your own hands is not the lowest price of plastic pallets.
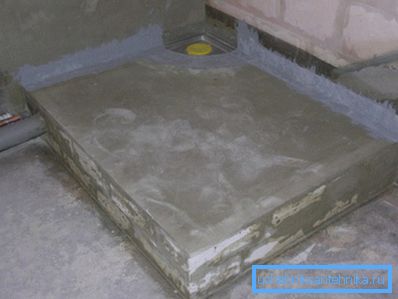
So, it was decided to build a shower corner with your own hands from the tile, which would be advantageous and practical. But, before proceeding to the description of finishing works, we will decide on the choice of a suitable material.
Choosing finishing materials
The tile for a shower in the domestic market of building materials is presented by the wide range of modifications.
The optimal finishing material for the shower room should have the following qualities:
- Low degree of water absorption, which will provide a long operational life of the finished coating;
- Resistance to aggressive chemical effects of detergents and cleaning products;
- Dense structure compared to conventional wall tiles used for cladding kitchens, hallways, etc .;
- Attractive design that will be combined with used plumbing;
- The possibility of laying on the usual type of glue, which can be found and purchased in the free market;
- Relatively affordable price that will be combined with the budget allotted for the finishing works.
The tile for the shower room can be the following types:
- Floor products with a denser structure and minimal porosity. This tile is characterized by a minimum level of water absorption. These materials are the best choice for self-construction of the pallet in the shower. Using this tile it is possible to lay out both a bowl bottom, and its sides.
Important: For optimum safety, the floor tile should be non-slip. The best option is to purchase facing materials with a matte surface.
- Wall tile has a less dense porous structure. A distinctive feature of this material is a smaller thickness in comparison with floor counterparts. As a result, the cladding layer weighs a little and keeps well on the vertical surface of the walls. In order for the wall cladding to be characterized by a lower degree of water absorption, it is necessary to choose products with a glossy glazed surface.
- Decorative elements, among which various borders, inserts (pencils), etc., are used exclusively to give the interior an attractive appearance.
Preparation of surfaces for facing works
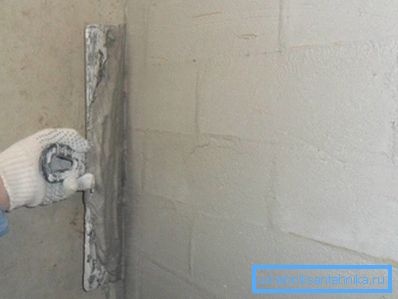
After the tile for the shower floor and for the walls is selected, it is necessary to assess the condition of the surfaces on which the lining will be carried out and, if necessary, to strengthen and level them. To this end, in the course of repair, old finishing materials are removed from the surface of the walls and the floor.
If the old plaster fray, it must be partially or completely knocked down. Next, a cement-sand mortar is prepared and leveled. The composition of the plaster mixture is used usual: 1 part of cement M300 to 3 parts of artificial sand.
Important: To level the floor, when mixing the solution, you can add "liquid glass" to the mass, which will provide the finished product with maximum strength and tightness of the shower stall.
To level surfaces in a room with limited space, a rule with a length of no more than 1 meter, a wide and small trowel, trowel and a water level will be required.
If the surface of the walls or the floor is significantly littered, you will have to knock down the plaster to the ground and apply a new layer of mortar at the beacons. Detailed information on plastering works using beacons can be found in the relevant articles on our portal.
After the base is aligned and the engineering communications are brought to the required level, you can proceed to the design of the shower room.
Pallet Construction
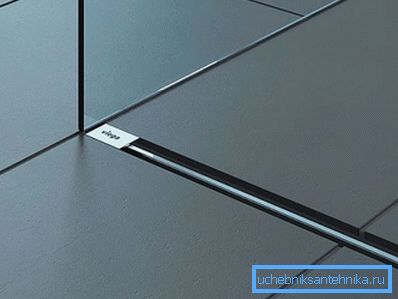
The most difficult part of the upcoming work is the formation of a pallet, during which you will have to install a shower drain under the tile. The gangway is a type of siphon with a grille at the top.
Important: The ladder and related communications are summarized at the initial stage of the shower room arrangement. The intensity and efficiency of water drainage depends on how correctly the ladder is selected and installed.
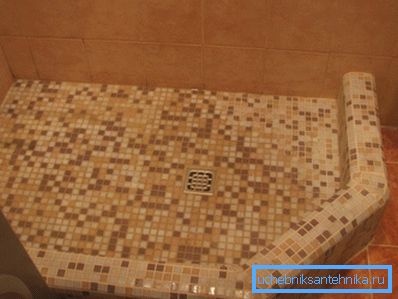
The following tools and materials are required for self-construction of the pallet:
- ceramic solid brick;
- ceramic floor tiles;
- all-purpose tile adhesive;
- waterproofing materials (bitumen mastic and silicone sealant);
- cement-sand mixture;
- water level;
- cord;
- Bulgarian;
- sledgehammer;
- rubber mallet;
- perforator with a nozzle for mixing;
- tank for mixing the solution;
- spatula large and small.
Instruction for construction work is as follows:
- At the base of the floor is a ditch under the sink.
- In the ditch cement mortar is attached drain pipe for the shower.
- At the end of the pipe is mounted a shower drain in the floor under the tile, which unfolds upwards, so that its surface is flush with the intended floor surface.
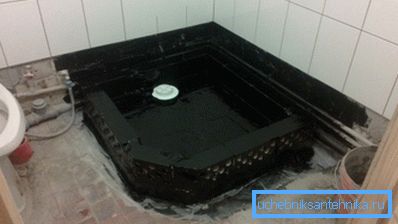
- Along the perimeter of the future pallet we process the walls and the adjacent floor with bitumen mastic. Apply mastic with a wide brush or roller.
- A rim is built from the brick along the perimeter of the future pallet. The masonry is made ordinary with a height of 2-3 bricks. At the corner joints, in addition to ordinary masonry bundles, you can apply a bundle of steel reinforcement of the appropriate diameter.
Important: Having laid a brick on a solution we apply on it exact blows with a sledge hammer to align concerning the horizon. After this, the brick is not shifted, otherwise the achieved strength will be lost.
- In the resulting space in the center of the pallet, a coupler is laid with the intention of forming a funnel with a recess in the center, as shown in the figure.
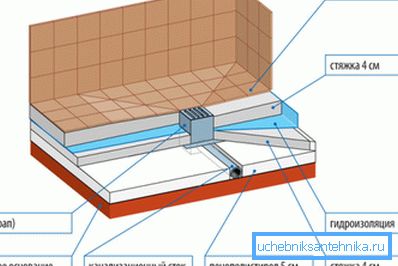
- Laying is performed on the resulting triangles forming the drain pan. The side lines of the aligned triangles must fit snugly together, thus forming a gap, the same as between the rows of tiles.
- After the pallet is built in accordance with the proposed scheme, you can begin to finish the walls.
Facing the walls in the shower
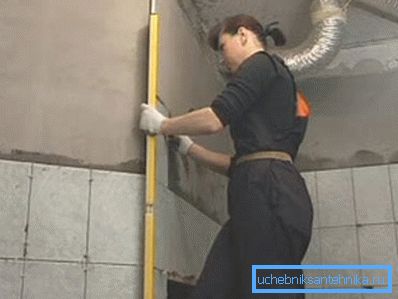
Before facing the walls in rooms with excessive humidity, the plaster should be coated with special priming compositions of deep penetration with a bactericidal effect. The use of such primers will prevent wet walls and mold.
There are no special requirements for this type of facing work, but the choice of glue should be the most responsible. It is preferable to buy glue for outdoor work, since such a composition will be able to withstand the dramatic temperature differences characteristic of showers and bathrooms.
Important: Upon completion of tiled work, all open joints should be filled with a special grout.
Conclusion
Now that we know how the shower is made up of tiles, we can apply this information in practice. More useful information can be found by watching the video in this article.