How to make a well with your own hands: the procedure
Currently, water in the summer cottage or in a private house is an urgent need, without it anywhere. The best option for providing water is your own well. Drilling, only at first glance sounds frightening, in reality, the instruction: how to make a well yourself is not complex, your main desire is. Next, we consider the simplest order of work.
What are the wells
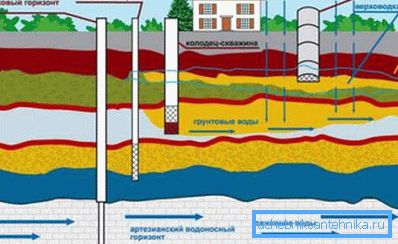
- The easiest option is to take it from the groundwater level. The depth here is minimal, the ground is soft and digs easily, however ... Groundwater is extremely unstable, plus the purity of this water leaves much to be desired, it is suitable only for irrigation.
- The opposite of the earth’s horizon is the limestone horizon, popularly known as the artesian level. Its depth ranges from 50 to 200m. The quality of the water here is very high, as a rule, additional surface filters are not needed.

- Artesian level can give up to 10m? at one o'clock. But to drill it with your own hands is unrealistic because of the great depth and the need to pass a solid limestone shell. Plus the price for the arrangement of such a trunk will be high.
- We are also interested in the question of how to make a well of high quality and for reasonable money. The only suitable option would be to extract water from a sandy aquifer.
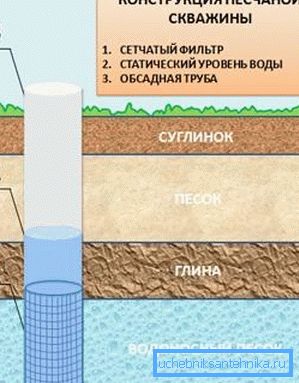
- It lies at depths from 10 to 50m, this depth is enough for the water to be well filtered its capacity will be from 0.5 to 1.5m? at one o'clock. To this, the reservoir, as a rule, rests on a stable clay sole, which speaks of its stability.
Important: although the water extracted from the sandy horizon is fairly clean, still it must be checked in the sanitary epidemiological station. In 50% of cases, the installation of additional external filters is necessary for eating it.
Getting Started
Determine the place
- When we make a well with our own hands, it is very important to choose the right place, since the layers do not lie everywhere. According to external signs, we can determine the proximity of groundwater, and once there is groundwater, it means that the sandy horizon is also close.
Unfortunately, the skill of water surveys at this time is almost lost, so we will focus on the following signs.
- Pay attention to the vegetation of your site, more precisely, where moisture-loving herbs grow.
- In a quiet, windless evening or early in the morning, look where a thick fog falls on your site.
- In early spring, during the thaw, the proximity of the aquifer is indicated by thawed patches on the snow.
- In a place close to water, a particularly heavy morning Rossa will fall on the grass.
- You should also consider the factors affecting the purely practical side of operation.
- If you plan to install plumbing, the closer the design to the house, the lower the costs.
- Naturally, after the completion of work, the construction will occupy a minimum of usable space, but it is better not to locate it in the area of movement, so as not to stumble.
- It is desirable that the soil was flat, so it will be more convenient to install a trip foot for drilling. Plus, think about how convenient it will be to export the sludge and where you will take it.
Important: according to SES standards, wells need to be drilled to extract water no closer than 20m from a potential source of pollution. On the plot it can be a toilet or a compost pit.
Start digging
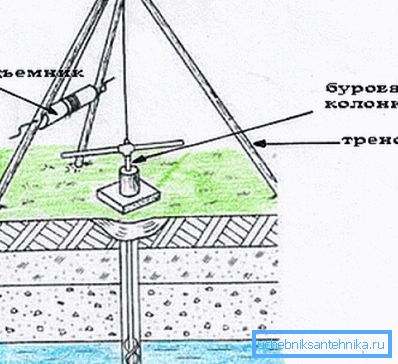
- Before you make a pit for a well, decide which tower you will use. If you plan to assemble your own hands on trinkets from pipes or logs, then you can immediately dig a pit. And if you managed to get a small, factory tripod or mini-drilling rig, then it is better to do the pit at the end, after installing casing.
- The standard size of the pit is 1.5x1.5 m, with a depth of up to 2 m. To begin with, the walls can simply be strengthened with wooden formwork.
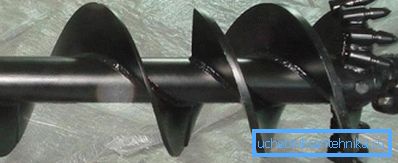
- Next you need the drill tool itself. We start to drill with a serpentine or auger, if a relatively small depth is planned, then an ice ax can be used for winter fishing. But it is better to take a wrought serpentine.
- The nozzle is attached with a threaded or pin joint to the drill rod. In our version, you can take the pipe section of 25 mm. Also prepare a few rods, so that was enough for the entire depth of drilling.
- If in the process of drilling stones will be encountered in the path of the trunk, then in order to break them a special bit is used.
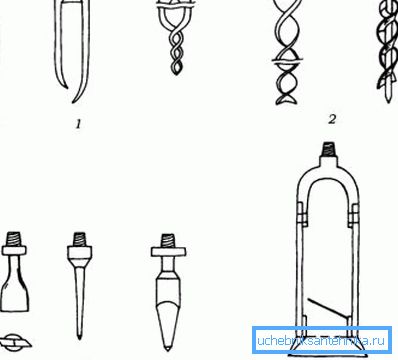
- Another mandatory nozzle is a small bowl. Without it, you will not be able to qualitatively complete drilling. It is a semblance of a pipe with sharpened edges and a check valve at the inlet. The principle of operation is simple: the shell sinks into the trunk, at the bottom of which wet sandy loam is located, submerges and seizes part of the wet ground, the ground is held by a check valve.
- In the process of drilling for 1 time you can pass a maximum of 0.5 m, after which the drill string gets and the sludge is cleaned. When you reach the sandy layer and open the roof, you will immediately feel. The drill will go lightly and gently.
- Further, in order to make a well with your own hands, you must change the nozzle on the drill string to the core and use it to draw out the entire soft layer of sand. When you get to the clay soles, it’s worth going deeper further by a maximum of 50 mm or you can stop at all.
Casing and filter column installation
- When the drilling work is finished, the well finish begins, the casing and filter columns are installed. The casing is designed to strengthen the walls of the barrel. It can be from metal, asbestos cement or PVC plastic. For trunks up to 50m in depth, having a stable soil, the use of low-cost PVC-U pipes will be the most reasonable.
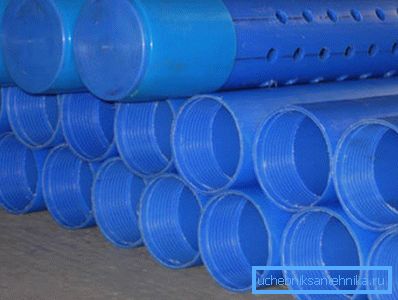
Important: if you had to go through a layer of drilling while drilling, then the only possible casing option would be steel pipes. Plastic or asbestos cement will not stand.
- At the bottom of the casing in the aquifer is mounted filter column. It has a slightly smaller diameter and represents a pipe with a solid bottom for sludge sludge, followed by a perforated filter part and a threaded connection with the casing. It is intended for mechanical water treatment.
- It is very important to make a reliable plug for the filter column below. The most affordable option is to stitch a round sack out of the fabric, equal in diameter to the column. A mixture of sand and cement 1: 1 kg is poured into it and it all sinks to the bottom, in a couple of days the plug is ready.
The video in this article shows the installation of the filter do it yourself.

Further arrangement

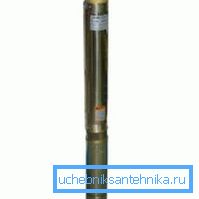
- To lift the water, you will need a pump, vibration pumps like “baby” or “trickle” are suitable only for occasional use. As a result of the vibration the sand will rise from the sump. As a result, the filter column will become clogged and the pump itself will quickly fail. The best option is a well pump or submersible pump.
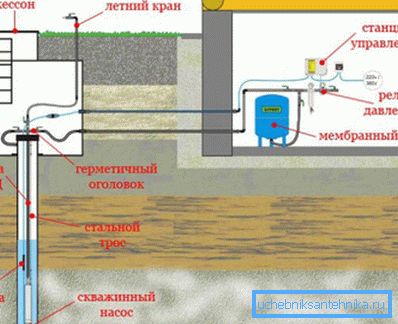
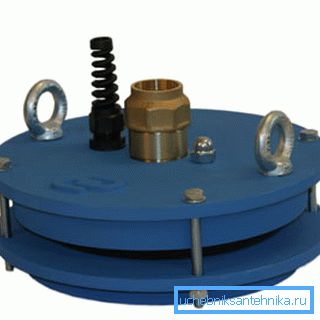
- A plastic or iron tip is necessarily mounted above. Which not only protects the trunk from debris, but also plays the role of support for the suspension of water supply. The plastic wellhead can withstand 200kg of weight, and the metal can withstand up to 500kg.
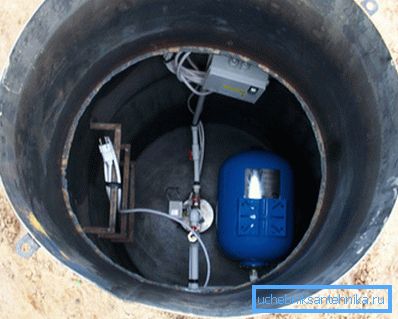
- Before you make a well, think about how you will close it. For year-round use it is better to install a caisson on top. It is a well, maybe made of plastic, iron or concrete rings. On stable ground, plastic is better; on metal or on close groundwater, metal is better. There you can also place related equipment for the well.

- After that, at a depth below the ground freezing point, pipes are laid into the house, piping and water-lifting equipment are mounted, this is in addition to the pump itself, the accumulator, pressure gauge and non-return valve for air release.
Conclusion
In this article, we told you about one of the simplest and most affordable methods for drilling and setting up wells with your own hands. As you can see, there is nothing difficult in this and with a reasonable approach, all this will be relatively inexpensive.