How to perform well drilling on the water with your own
Drilling water wells with your own hands is a topic that, sooner or later, begins to interest the owners of country houses or cottages, remote from the centralized water supply.
In principle, the construction of an autonomous water supply system can be entrusted to highly qualified specialists, but it will cost a lot of money. Therefore, we will try to do everything on our own.
What methods of water well drilling are relevant today? What materials and equipment are needed to carry out these works? What is the cost of the result? We will answer these and similar questions within this article.
Before drilling
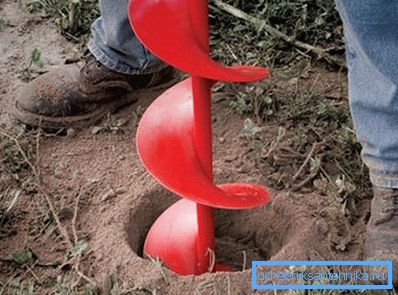
Before you start drilling a well for water yourself, you need to prepare a number of tools, the use of which is mandatory.
We will need:
- Spade;
- The drill (it is ideal to have several types of drills or to pick up the modification suitable for soil on a site);
- Tripod (simple design, which will have to be assembled on the site independently);
- Winch and / or system of blocks for raising of the drill.
Important: Considering the weight of the drill, you must invite one or two assistants who will assist in pulling the drill.
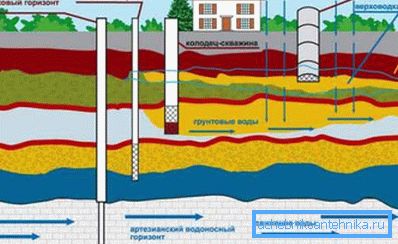
Drilling wells under the water with your hands begins with the collection of information about the depth of the sandy aquifer. You can learn about it from your nearest neighbors or in the district administration. Independent drilling is advisable if the aquifer lies not deeper than 20 m. If the depth is an order of magnitude more, you need professional equipment, the purchase of which for the sake of one well is unprofitable.
Another important point is the diameter of the water well. The diameter should be sufficient for a pipe with a cross section of 12 cm. On average, a drill with a diameter of 15 cm is used for such purposes.
Making tripods
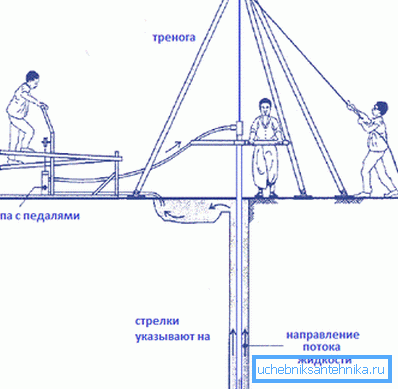
- If the depth of the aquifer is suitable for independent drilling, we determine the location of the lowest point on the site.
Important: The place where the well is supposed to be drilled should be located at maximum strangulation from objects that could provoke soil contamination (animal housing, outdoor toilets, drain holes, unauthorized and authorized landfills, etc.).
- Having decided on the place of drilling, we dig a hole with sides of 1.5–1.5 m and a depth of 1.5 m.
- Immediately strengthen the slopes of the hole in order to prevent the fall of the upper layer of soil. For reinforcement, you can apply boards, metal plates or nets welded from reinforcement bar.
- In the next stage, we prepare 3 wooden beams with a cross section of 200 * 200 mm and a length of at least 4 m for the construction of a tripod. For the assembly of such structures instead of a bar, you can use a metal corner or a pipe. If you have enough funds, you can assemble a tripod of metal-roll and thus ensure sufficient structural strength.
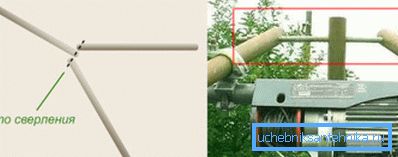
- The prepared bars are laid on the ground in the shape of a triangle so that an angle of 35-40 degrees is maintained between two adjacent supports.
- In the upper part and in the middle of the bars, we drill a through hole through which it will be possible to pass fixing bolts or metal pipes to fix the tripod in the finished form.
- In the prepared holes install fasteners and raise the ready tripod in the working position.

- At the top of the tripod, we mount the unit with a roller rotating around its axis. The block must be durable and must be securely fastened to the tripod, as this element will be the weight of the drill.
- Mechanical winch mounted directly on one of the bars in the design of the tripod. The electric winch is fastened in the upper part of the tripod, and thus we increase the cable length by an order of magnitude, which can be used to move the drill.
- At the final stage, the drill is fixed on the cable and proceed to drilling.
Features of drilling a well under water
Instructions for drilling water wells involves the use of auger drill. The use of such a working tool allows you to reduce the cost of the well and to achieve the desired result in a short time.
The drilling process involves the implementation of the following steps:
- The drill is lowered to the location of the future well and cranked around its axis. The drill is turned, holding the handle until full penetration into the ground.
Important: The screw blades of the drill have the same direction as the thread of a conventional screw. Therefore, turn the drill strictly clockwise.
- After this, the drill is pulled out with a winch and we clean off the adhered soil from it.
- Of course, the length of the drill is not enough to reach the aquifer. Therefore, we further insert a drill into the well and extend it as necessary with metal rods, which are most often included in the kit.
- We continue drilling until we reach the aquifer.
- After reaching the aquifer, the drill is carefully removed to the surface and cleaned from the well the smallest crumbling of the soil.
In order to do this work quickly and whenever possible with high quality, a special device is used.
The edges of this device align the well, and in addition, absorb crumbling soil through the piston. The process of alignment of the well by the chelary is performed by the percussion method.
Construction of a water well
Finally we got to the water! But it turns out, only half of the work is done. After all, it remains to equip the well and transform it, thus, from an inconspicuous recess in the ground into a source of autonomous water supply.
The construction of self-drilled wells is as follows:
- After the well has been cleaned to a solid bottom, we will fall asleep a small amount of fine crushed stone or gravel so that the backfill in the well is about 20 cm.
- Next, we select a polyethylene pipe, the diameter of which corresponds to the diameter of the well. Tuba taking into account the joints should correspond to the depth of the well.
- At the end of the pipe we install a fine mesh filter and lower the entire structure into the well. This should be done as carefully as possible so as not to bring down the ground.
Tip: In the absence of a factory-made mesh filter, the barrier for large debris can be made by yourself. To do this, we put a metal grid with a cell of 2 * 2 mm on the end of the pipe and fasten it with a clamp. Everything, the elementary filter of rough cleaning is ready!
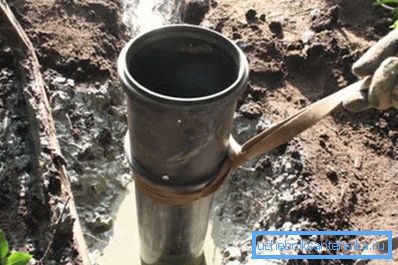
- Pipes are driven up to gravel backfill. If the pipe is tight, try to center it. If the alignment does not make it easier to move, we advance the pipes by gently tamping them with a sledgehammer. When we reach the gravel backfill, we don’t drive the pipe further so as not to block the water flow.
- After the casing is installed, wait an hour or two until the first water flows. Then we pump out the water with a pump and do this until it looks clean without odors.
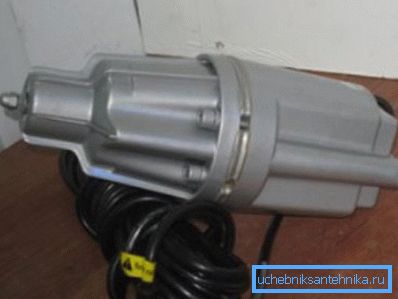
It would seem that the autonomous water supply system is ready. But this is not entirely true, since a lot of work is ahead of us on arranging the pipeline.
Filter selection and subsequent work
A sample of the resulting water is collected in a tightly closed vessel and carried to the laboratory. The laboratory will be able to determine the composition of the water and, based on the composition, select the appropriate filter system for the well.
Currently, there are many varieties of filtration systems, designed for the treatment of water with the content of certain impurities. Thanks to a well-chosen filtration system, you can achieve optimum water quality.
After selecting the filters, you will need to equip the casing with the tip, on which the submersible pump and a number of necessary communications will be attached. Comprehensive information on the selection of filters and pumps, as well as on the construction of the pipeline from the well to the house, you can find in the relevant articles on our portal.
Conclusion
As already mentioned, the price of a professional construction of a water well is high. But you can always save, if you take up the costly work on their own and do everything with your own hands. Working with a simple tool, you can achieve the desired result, but in order to cope with the task, it was easier to watch the video in this article.