How to refine a well independently using available materials
Is it necessary to improve the well? How to cope with this work independently without involvement of qualified specialists? What are the ways to design wells in the suburban areas and near country houses? What is the estimated cost of such works, and on what factors does it depend?
These and similar questions are of considerable interest from the point of view of the majority of summer residents. And this is not surprising, since a concrete ring equipped with a metal collar is not even perceived as a decoration of the suburban area.
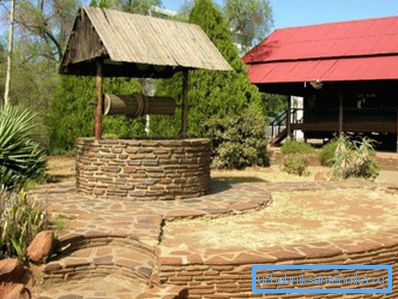
Meanwhile, to refine the well at the site is not as difficult as it may seem. There are several budgetary and effective methods that can be implemented with the use of materials presented in the free market. In this article we will look at how to refine the well, made of reinforced concrete rings.
The choice of building materials
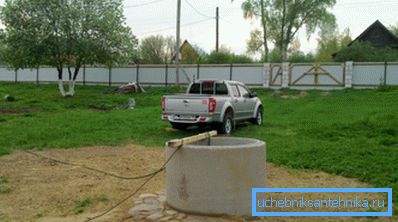
There are no special requirements for materials that can be used for the external finish of the tip. The main thing that these materials are sufficiently strong, waterproof and easy to install..
The optimal choice for these requirements is:
- solid brick;
- fake diamond;
- profiled bar;
- ceramic tile;
- decorative plaster.
Of course, this is an incomplete list of finishing materials, but we have brought the most relevant solutions to date.
Brick finish
A well made of reinforced concrete rings looks like a gray unsightly pipe, and our task is to finish this pipe with fine brickwork.
The work is carried out in stages.
Here are the main points:
- We make a formwork for pouring a concrete platform around a well ring. Before that, we choose the soil according to the shape of the future site to a depth of 10-15 cm. The shape of the site can be arbitrary.
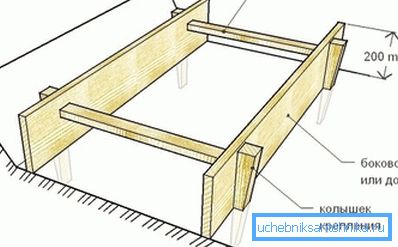
The easiest way is to make a rectangular perimeter, a wooden frame as a formwork. If you want something special, the perimeter of the site can be made in the shape of a hexagon. In this case, the formwork is also made of edged boards or from laminated plywood.
You can make the perimeter of the site round or oval. It is not difficult if from the previous repairs in the house remained unused plastic wall paneling. The paneling rolls up into a ring, the diameter of which is a meter larger than the external diameter of the water intake shaft.
- We prepare concrete from the calculation: cement brand M400 - 3 parts, river sand - 6 parts, crushed stone - 4 parts. Kneading can be done manually using an old metal trough and hoe. But it is physically tedious, and therefore it is advisable to rent or purchase a small concrete mixer.
- Prepare the reinforcement base and lay the solution. From the large-meshed mesh of the chain-link, we cut the strips, which are laid directly on the ground inside the formwork. Next, we wet the inner space of the formwork and fill the form with a pre-prepared solution. The solution should be above the ground by 15-20 cm. The surface should be carefully leveled. While the surface is still wet, sprinkle it with a uniform thin layer of pure cement. This improvised ironing of concrete will make the structure more durable.
Tip: So that the concrete poured into the formwork does not crack during the drying process, water it every 2 hours. This recommendation is particularly relevant in hot summers.
- We make brickwork. Taking into account the fact that the concrete ring of the mine is strong, brick masonry will have to perform a purely decorative function. Therefore, the brick can be put on the edge and thereby reduce the consumption of building materials. As a masonry mortar, we use a mixture of cement and seeding river sand, diluted with water to a viscous state. The consistency should be such that the solution collected on the trowel does not stick when turned over.

We install bricks with a certain displacement of the next row relative to the previous one. This is necessary in order to form a bundle and laying was strong. Try to keep the displacement of bricks is not chaotic, and exactly repeated every two rows.
That the design was aesthetically attractive, the brick can be applied multi-colored.
- We lined the area around the well. The concrete pad doesn’t look very attractive, so it needs to be painted and revived a little. In order to minimize costs, tiling can be applied to facing the site.

You can purchase this material in most hardware stores. The price of a fight is on average equal to a quarter of the cost of a whole tile, which is inexpensive.
To achieve the best effect, you can purchase a fight of several colors. Combining the ceramics of several colors, you can lay out patterns, shapes, etc.
The instruction of facing works is simple:
- We dilute tile adhesive in accordance with the instructions on the package;
- Apply a uniform layer of tile adhesive with a toothed roller on the surface of the site;
- We select pieces of tiles of suitable size and press them into the glue;
- We lay a small plywood sheet on the laid out surface and tap on it with a rubber mallet so that all the pieces of the battle take the same position in the horizontal plane;
- After that, we dampen a rag in water and wipe the coated surface, removing the glue flows.
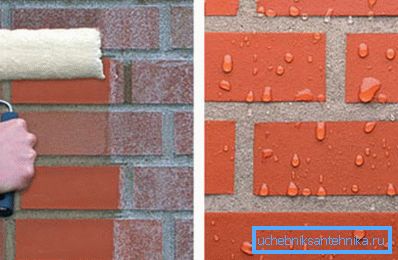
- The final stage is the protective finish of the whole structure. To bricklaying looked spectacular and lasted longer, it can be covered with stove varnish or penetrating waterproofing.
Finishing profiled bar
- We are making a concrete platform around the concrete well, as it was discussed earlier. The site is lined with ceramic non-slip tiles or tile combat.
- Around the reinforced concrete ring lay out of the timber lower strapping in the shape of a square. Two parallel bars are laid in one piece, while the other two bars are laid out in the half-wood.
Important: The underside of the bars is covered with bitumen mastic to ensure the optimum level of wood hydrophobicity.

- Angular connections on the bottom trim do "in the paw."
- The first row of timber is fastened with anchor bolts to the concrete site.
- The second and subsequent rows are made from solid timber. The bars are fixed with wooden dowels so that the fasteners of the previous and the next row are arranged with a certain displacement and are not encountered.
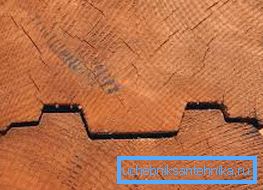
- After the timber has been raised to the top point of the concrete ring, from the thick trim board we collect a square platband that will cover the ring. If desired, a sealed hatch for the well can be provided in the casing.
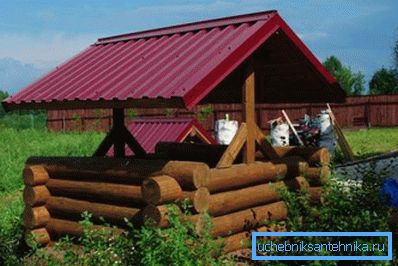
Important: If there is no profiled bar, but there is a rounded log, it can also be used as a finishing material.
Conclusion
To improve the appearance of the well at the summer cottage is not difficult and it is quite possible to cope with such a task with your own hands. As already mentioned, there are many methods of arranging the well and the surrounding area. But believe me, these methods can be much more, if you do not limit your imagination.
Interesting ideas and solutions you can find by watching the video in this article.