Independent repair of ball valve-mixer
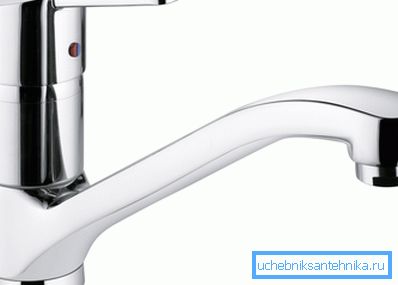
In appearance, single-lever mixer with ball valves is no different from the cartridge. But the repair of a ball valve with your own hands can be done exactly as replacement of the cartridge.
In fact, such a plumbing device can be found on sale infrequently and this is due to its higher cost, and users are not even aware of the advantages of such a shutter, therefore, they often stop at an average cost product. Below, we will tell you in detail about maintenance and demonstrate the video in this article.
Mixers
What they can be
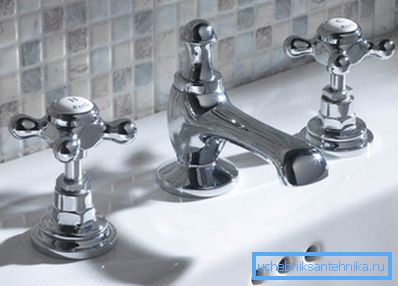
According to the control method (the price does not depend on it), all the mixers can be divided into two categories - those that are regulated by two valves for hot and cold water and those that are regulated by one lever (right-left, up-down).
But at the same time, valves can seriously differ in their device and the material from which it is made. For two-valve mixers, these are ceramic or worm crane boxes, and for single-lever models, these are plastic or ceramic cartridges or ball closures.
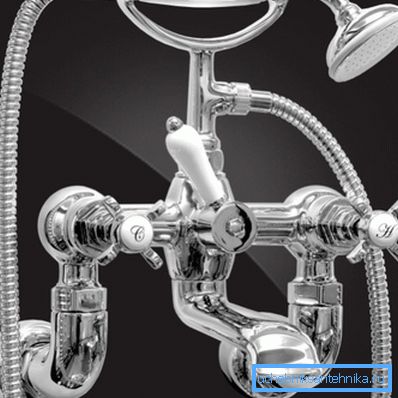
The crankcase axle can be half-turn, which indicates the presence of a ceramic pair there, where the flow of water is regulated by two ceramic plates with holes that coincide, but during rotation this passage either decreases or closes altogether.
In cases where the axle box has a worm gear shaft, the full cycle of revolutions can reach up to 10 turns, and the flow adjustment is carried out using a rubber valve, which is pressed against the bore hole with the help of the stem. It is noteworthy that the instruction allows you to repair the box itself, replacing small parts.
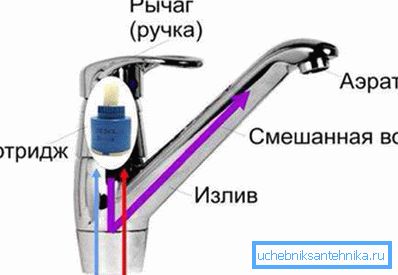
Pay attention to the top drawing of the sink mixer device, where a cartridge stands as a shut-off valve, the internal structure is also very similar to each other, as well as externally. Also, their similarity lies in the fact that repair of ball water taps for the kitchen or bathroom and cartridges cannot be made by replacing any parts of the shutter itself - it changes completely if necessary.
Maintenance
Attention! Before proceeding with the maintenance (repair) of the mixer, check whether you turned off the hot and cold water!
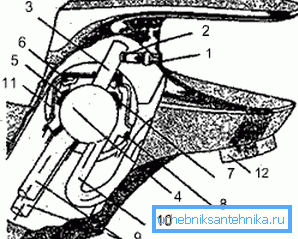
- Decorative cap;
- Screw under the plug;
- Stem to adjust the flow;
- Ball for shutter and mixing water;
- Rubber saddle;
- Adjustment ring;
- Steam cuff;
- Adjusting cuff;
- The entrance for hot and cold water;
- Mixed water outlet; ball sleeve;
- Aerator
First of all, get acquainted with the components of this device - they are painted on the upper image, and then we will understand what caused the problems, and how to repair the ball valve in the kitchen or in the bathroom. But there is one nuance.
As you have probably noticed from the drawing, there are no oil seals or gaskets, which, as a rule, most men successfully cope with, but this is not a problem.
Now, a little about the reasons - there can be three main problems for mixers of this type:
- Leakage from under the body or lever;
- The problem when adjusting (changing) the water temperature;
- Head weakening.
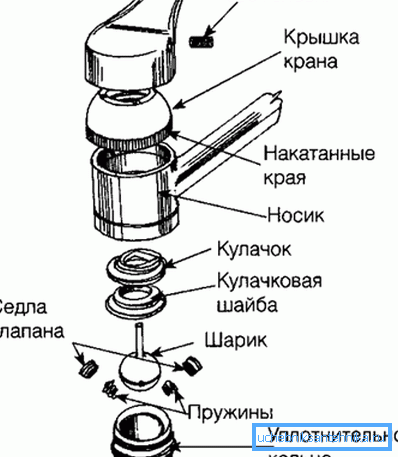
- First of all, we need to release (remove) the lever and for this we retract the decorative cap on the body (usually it is red-blue), prying it with a knife or a screwdriver with a narrow sting (you can also use a nail file). Under the plug we will see a screw, in which, most likely, not a slot, but a hexagon, therefore, we will have to pick up the appropriate key - usually the screw is unscrewed after three full turns of the screw to the left. Be careful - the screw is very small and can easily get lost.
Recommendation. If you can not find a suitable hex, then try to unscrew the screw with a flat screwdriver. For this, the sting must enter the hole without the possibility of turning inside it.
- When the screw is loosened, you can remove the handle and for this it should be pulled up, slightly swaying to the side - as a rule, it is removed quite easily. Under the bottom you will see something like a nut with notches, and it will have to be unscrewed, hooking it with a screwdriver over the notches, but be careful not to damage the hose while cranking the crane.
- Now remove the chrome dome, under which there is a plastic seal - it could wear out when the nose was rotated, which means it should be replaced with a new one.. Also, the seal may become dirty - it may contain rust, lime or salt deposits, which can be easily removed with household detergents. (See also article. How to choose a sink faucet: features.)
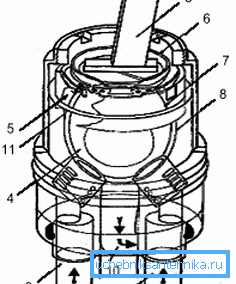
- -
- -
- Stem to adjust the flow;
- Hollow ball;
- Rubber saddle;
- Adjustment ring;
- Ball cuff;
- Adjusting cuff;
- Entrance for water;
- Water outlet;
- Sleeve ball.
In case of problems with water pressure or temperature control, you need to remove the ball, seat, spring, in general, disassemble the locking assembly and check all parts for wear.
Rubber elements are most often clogged or worn out, which makes it difficult for the rod to move or partially regulates the temperature (mixing) of water. In case of contamination, the parts should be cleaned with household chemicals, and in case of wear, they should be replaced with new ones.
Conclusion
As you can see, self-repair of a ball valve-mixer is possible, but there may be a serious problem - you will not find parts for the ball valve. Yes, the ball itself is quite difficult to find - the shops simply do not buy them because of the small demand. The easiest way to find such things in large shopping centers, purposefully engaged in plumbing.