Install a metal tank for the shower: description of work
In any country house, stainless steel shower tanks are of a certain value - a plumbing unit for washing is always a definite necessity, and there is always a way out. However, there can be any metal here - not only stainless steel, but also galvanized sheets.
The only question is that the tank stays as long as possible. Let's try together to figure out how to make them, how to install and how to use them, and also see the video in this article.
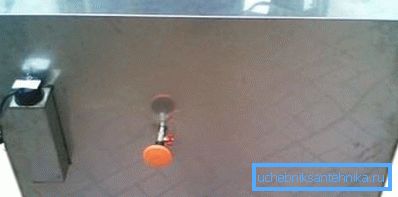
Country Shower
Heating element
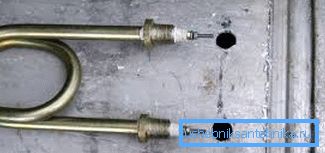
- Let's start with the fact that stainless steel shower tanks with heating will always be better than a simple container, you just need to equip the tank with heating elements - pick up the necessary power and install it correctly. Now let's see what this device is.
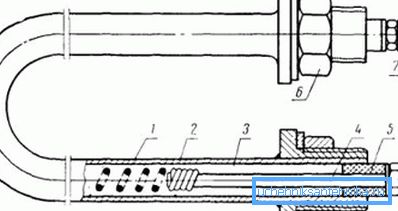
- The number 1 in the upper figure indicates the most important part of the heater - it is a nichrome spiral, on which the power depends. Number 2 denotes a tube, which can be made of copper, brass, steel and even titanium (their price is the highest), 3 is a filler from quartz sand or periclase, 4 is a lead stud. The sealing sealing sleeve is labeled 5, the fastening nut on the nozzle is 6 and 7 is the output.
- As you can see, the spiral is pressurized and insulated from the tube by filler, the best of which can be called periclase - this crystalline mixture of magnesium conducts heat well. In order for the conclusions not to touch the metal tube, they are inserted into the ceramic plugs and filled with silicone lacquer.
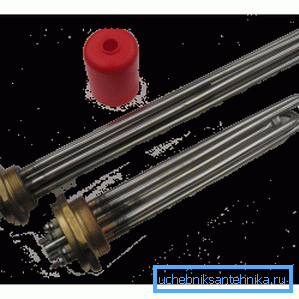
- In addition, if you want to regulate the temperature of the water in the tank, the instruction allows you to install a thermal switch - when a certain heating of the liquid is reached, it will turn off the power. But it is still possible to install the heating element on several spirals, such as what is put on electric stoves - in this case, the adjustment will be made by the thermostat, and the temperature will depend on the number of connected threads.
Recommendation. You will most likely not have a constant automatic water supply to your summer cottage, and if an electric heater is installed there, you need to take precautions so that it does not burn out when the tank is dry. For this, it is best to install the fitting from the shower head above the level of the heating element - this way it will always be in the water.
Installation
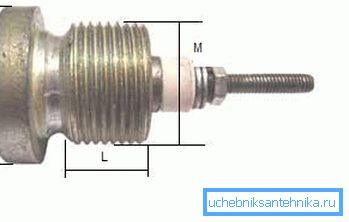
Recommendation. Stainless steel shower tanks with heating can be sold in the store and in this case, you have nothing to worry about - you have bought a new container and installed it on the building. But if you purchased such a tank that was in use, then you will not only need to check it for integrity and operability of the heating element, but also for the insulation of the conductive parts of the heater from the case.
First of all, while you haven’t lifted a stainless steel, galvanized or plastic shower tank onto the roof, you need to install a heating element in it. At the same time, the diameter of the nozzle will be decisive for you - in the upper photo this is the value of M. If the tank is plastic, then it will be much easier to make a hole in it - for this you will need an electric drill and a core drill of the desired section.
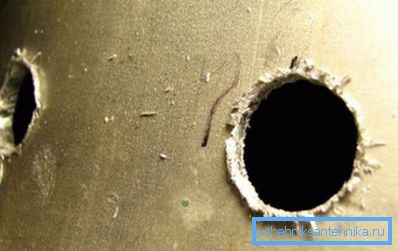
It is much more difficult to do this if you have a galvanized steel, aluminum or galvanized shower tank - instead of a milling cutter here you will need to use a thin, 2–3 mm drill bit for metal. That is, the diameter of the heater nipple on the wall of the tank in its lower part draws a circle and drill holes at the shortest possible distance.
The partitions between them can be cut with an oval file, in order to remove the center, and then the hole can be cut with a semicircular file so that there are no sharp ends left on the edge.
Your goal is to start the fitting so that there is no leakage at the junction points and for this there are metal washers and rubber seals - the gasket is usually not needed on the plastic tank, as the nut strongly presses the washer against the wall, slightly pushing the latter, and the connection is tight.
Rubber or paronitovye gaskets will definitely be needed if you have a stainless steel shower tank to the cottage, especially if the holes for the heater are not quite even - the washer with the sealant will block them, just tighten the nuts.
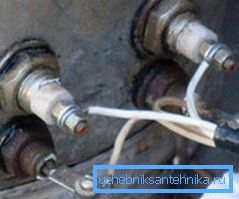
In the case of multi-coil heaters and installing a thermal relay, you will need not two holes, but three or even four, as in the photo above, and all of them need to be done at the right distance from each other. Above, you can see how the electric heater is connected on three spirals - one wire goes common there (most often it is the phase with the international designation L), and the others with a zero (international designation N).
Note. Sometimes the ends can be confused, and then you will have a phase applied to the thermostat, and zero on the common contact - for ordinary tanks this does not matter much.
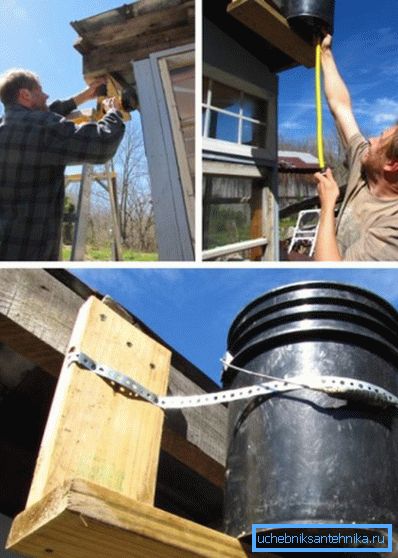
A metal barrel for 100 or 200 liters, a fuel tank (steamed) tank of a car can serve you as a metal tank, and some even manage to get somewhere for fuel aircraft tanks for this purpose. However, such a capacity can be purchased in a shop in a certain displacement, only there, most likely, you will find it made of plastic, and not of any metal.
Although the author of this article does not see anything wrong in this - a plastic tank for a shower, if it is not mechanically damaged, it will serve you no less than its counterpart in stainless steel.
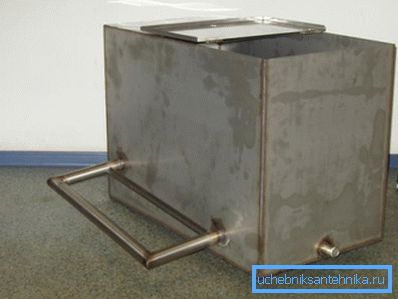
Of course, if you have gas or electric welding, or even better - a semi-automatic, then you can always weld such a tank yourself, only for this you need some experience not to burn the sheets, since you are unlikely to need a thicker steel for such a tank. -1.5 mm.
Some use for this argon welding, working with metal butt or overlap, but here also need some experience - the gun is not so accurate and the danger of burning metal is large enough.
Conclusion
In that case, if you will be cooking the tank for a country shower with your own hands, then perhaps it will be much more convenient for you to weld the holes for both the electric heater and the watering can connection - experienced welders do this quite well. The upper part can be made deaf, with a small hole, like a gas tank, and you can make it open to cover with a lid - it does not matter.