Making a summer shower out of wood with your own hands: the
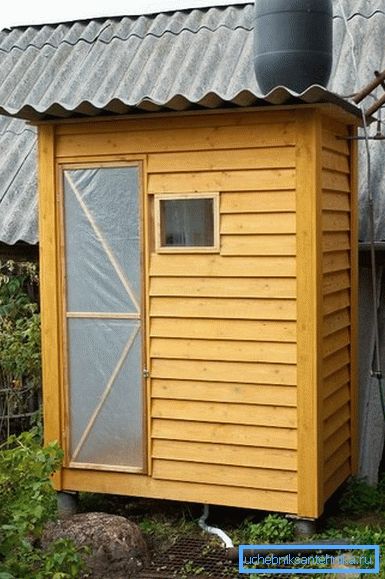
If you spend the warm season in the country or in a country plot, then before the season starts it is worth spending some time and build a wooden summer shower with your own hands. Even if you have a shower cabin in your house, such a structure will not be superfluous: in the summer heat it is really very pleasant to shower yourself with cool water slightly heated under the sun.
Moreover, such a structure is mounted quite simply, so that even the most experienced master can cope with the task.
Tools and materials
Before we get to work, we need to stock up with all the necessary.
The instruction recommends using the following for building:
- Wooden bars section 50x50 mm and a length of 2.5 m. Such parts for the manufacture of vertical supports we will need from 4 to 6 pieces.
- Bars or thick boards for the upper and lower trim, as well as to strengthen the frame.
- Wooden slats for flooring.
- Wall paneling for shower cubicle walls.
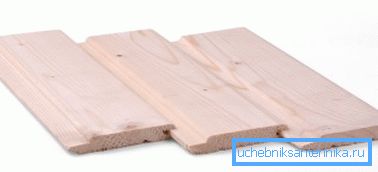
Tip! The best option would be to buy blanks of larch. Maple, pine and ash also bear loads well, but they do worse with moisture. In principle, oak can also be used, but for this purpose it is unnecessarily expensive.
- Water tank on the roof. It is advisable to purchase a special container with a wide neck and a lower pipe, to which the tap and shower head join.
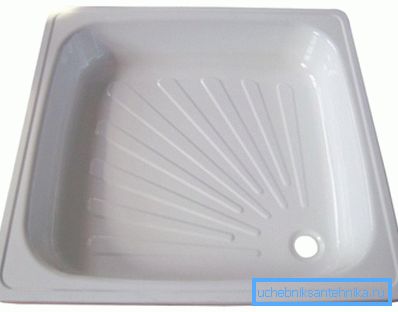
- If necessary - a shower tray (you can do without it).
- Various accessories - towel racks, shelves, curtains, etc.
In addition, we will need supplies:
- Fasteners - screws or nails.
- Concrete for installation of supports in the ground.
- Materials for arranging the drainage well or ditch to the sewer septic tank.
- Means for impregnating wood and protecting it from moisture and microorganisms.
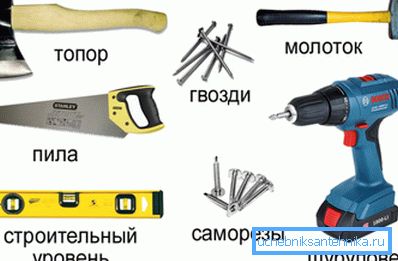
As for the tools, here you can get by with the standard set:
- Shantsevy tool for earthwork.
- Concrete Mixing Tools (Mixer or Conventional Trough)
- Wood saw (disc, reciprocating or hacksaw).
- Drill or screwdriver.
- Building level.
- Hand tool.
- Brush or spray for applying a waterproof impregnation.
When everything is ready, you can begin work.
Drainage options
Drain hole
Before you start building a shower, you need to understand where all the waste water will go. The easiest way is to drain it onto the ground, but this is only possible if the shower is at a distance from the site, and even on well-drained soil. Otherwise, contamination of the water to the beds or to the sources of water intake cannot be avoided.
Most often for shower equip a separate drainage well:
- On the selected site we dig a hole to a depth of one and a half meters.
- The walls of the pit are protected from wetting and collapse by installing wooden formwork, ceramic brickwork or old car tires.
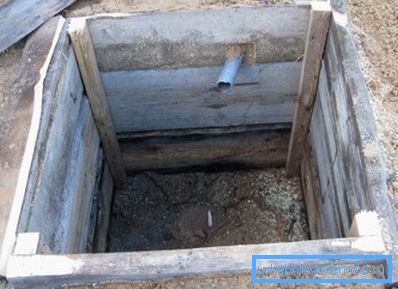
Tip! The price of high-quality brick is very high, because for the arrangement of drain pits most often use the fight, or else they take the stones that were in use but still retain their shape.
- At the bottom of the well lay the drainage material. For this purpose, either pebbles or large crushed stone is used.
- From above we do sides on which the framework of a shower booth will lean.
Septic tank or cesspool
If there is a cesspool or septic tank on the site, and we plan to install a shower no further than 10 meters from these structures, you can simply arrange the gutter:
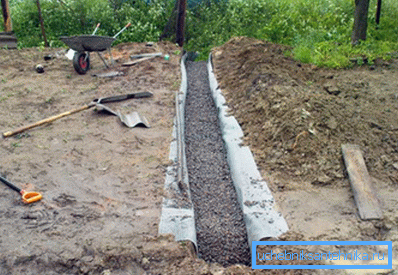
- In the place of installation of the shower we dig out a shallow (up to 30 cm) pit. It will be placed pallet country shower.
- From the pit to the septic tank, we dig a trench up to 20 cm wide. The optimal slope to the side of the drainage tank is about 3-5 cm by 1 m.
- Then you can do in two ways: either concreted the bottom of the trench and cut it off from above, leaving several revision grids, or lay a sewer pipe for outdoor use. The second option is more preferable, and in terms of costs it will be approximately equivalent to the first.
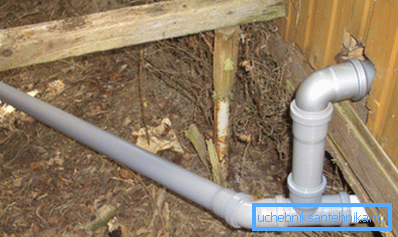
At the same time, all wastewater generated under the shower will be quickly transported to a septic tank, where it will be involved in the process of decomposition of waste and infiltration of the purified liquid into the soil.
Note! If the design of your septic tank provides for regular pumping, then with the addition of a shower, the amount of wastewater will approximately double. This fact should be taken into account when planning preventive measures.
Building a shower
Frame and trim

If we take as a basis the drawings of a summer shower made of wood given in the article, anyone will be able to build such a design with their own hands.
However, beginners should carefully study the algorithm of work in order to prevent annoying errors.
- The shower stall usually has a small area at a considerable height.. This makes the construction unstable, because most often it is installed on the supports buried in the ground.
Note! This does not apply to lightweight portable showers on a rack frame - they are usually simply tied with wire to reinforcing bars driven into the ground.
- To install the supports we make in the soil nests up to half a meter deep.. At the bottom of each nest we fall asleep gravel - it will not allow the stand to sink under its own weight.
- We saturate the lower parts of the pillars with an antiseptic, wrap with roofing felt and concrete in the ground. After pouring the concrete, adjust the position of the supports to the level and fix them in a strictly vertical position.
- After that, you need to give concrete time to build strength.. Since the load on the supports will not be very large, the expected 28 days are rarely waiting: there is enough of a week.
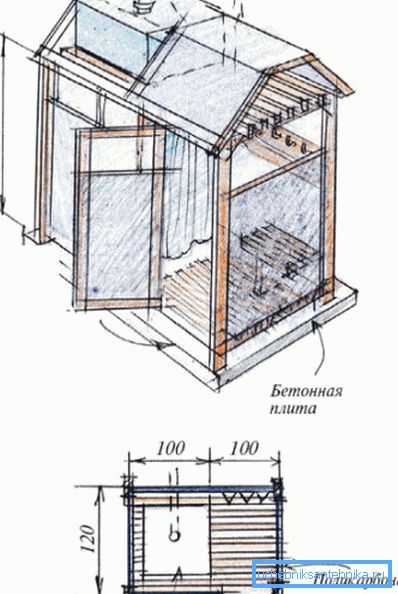
Next, proceed to the formation and trim of the frame:
- Bottom fasten harness from the bars. We install on them either a shower tray purchased in advance, or a grating of rails connected to gaps of 0.5-1 cm for water flow.
Tip! The grate must be thoroughly oshkurit, otherwise the risk of getting a splinter in the bare foot will be very noticeable.
- In the middle part we mount crossmembers and we strengthen them with braces. We combine all the details with the help of nails or self-tapping screws, pre-saturated with a moisture-proof compound.
- From the bars do the top trim. We also install the transverse lags on which the water tank will hold.
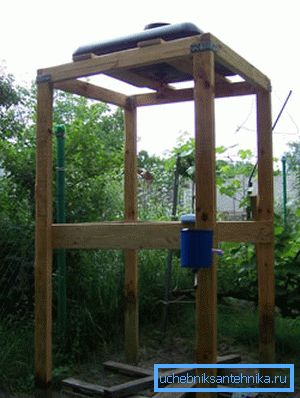
- Outside we sheathe a shower stall with boards (lining is best suited). Most often, the trim is not brought to the floor by about 25 - 35 cm - this ensures optimal air circulation.
- Front install a wooden door with external and internal latches. Instead of the door, sometimes they just hang a plastic curtain: this design is simpler to manufacture, but less convenient to use.
Tip! On the outer wall next to the door is to attach a few hooks. We will hang clothes and towels on them: they will not get wet during water procedures.
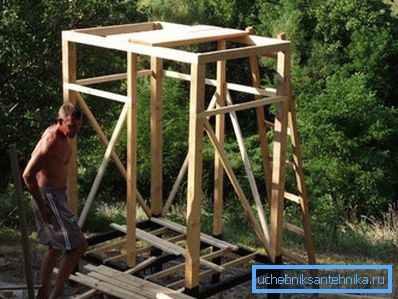
Equipment and decor
We can only equip the water supply system.
And here it is best to implement classic solutions:
- At the top of the shower set the water tank. Perfect fit industrial container of dark plastic, with a neck located at the top, and a nozzle for the shower head below.
Note! Instead of the factory capacity, it is quite possible to use both metal barrels and polymeric containers. The main thing is that the design was sealed and does not emit toxic substances upon contact with water.
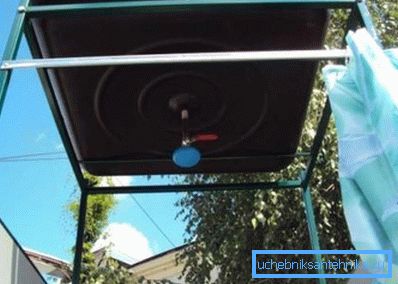
- In areas where the only source of water is a well without a pump, it is necessary to fill the tank manually with buckets. To do this, we attach a fairly solid ladder from behind or from the side.
- If the site has a water supply (whether central or autonomous), then it is much easier to connect a hose to the tank on the roof. Connecting it to the water supply system, we can quickly and effortlessly collect the required amount of water in the tank.
- In summer, the water in the tank heats up quickly. But in the spring and autumn to take a cold shower is not very pleasant. To ensure more efficient heating, we build a rack frame around the tank, which is covered with a transparent film or glass. Such an improvised greenhouse will ensure a comfortable water temperature even on an overcast day.
- Inside the booth, fasten the watering can with a tap, checking the tightness of the pipe.
- On one of the walls we attach a shelf for soap and a washcloth hook.
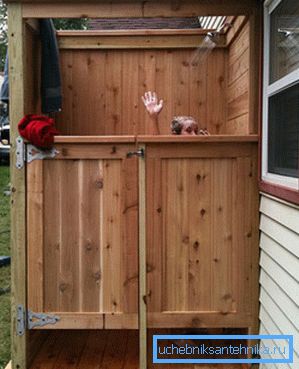
After that, the shower can be used. And so that he serves as long as possible, before starting each summer season, the booth should be sanded and treated with an antiseptic, and then either coated with varnish for outdoor work, or put paint on the wood.
Conclusion
Summer wood shower, made according to the above algorithm, is quite simple, reliable and convenient. However, you can always make adjustments to the design, introducing either your own ideas or technical solutions, gleaned from the educational video in this article.