Making a well head for the well with your own hands
A well with no tip is subject to pollution from precipitation, which in most cases (especially recently) cannot simply be called clean. Of course, the inlet is closed with a lid, but such a precautionary measure only protects from falling leaves, but not from dust, rain and snow. Below we will look at one example of how to get out of this situation, and even better, the thematic video in this article will help us.
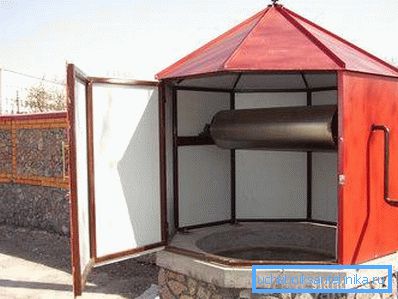
We make a house with a dual roof
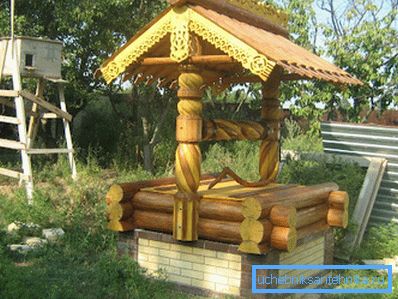
Note. Such an architectural element as a roof over a well can be a subject of creativity, because it has long roots. In most cases, this is embodied in wood, but metal or plastic can also be used. Nevertheless, both the simplest and the most complex versions have the same principle of assembly, although the price will, of course, be different.
Materials and tools

- So, what tool is needed for our work - yes, exactly the same as for other joinery crafts, but let's agree in advance that we will use wood. Therefore, first of all, we need a saw and there are options here. This may be a regular hacksaw, but for ease and speed in the processing of lumber, you can use a circular saw (electric circular saw), a chainsaw and an electric jigsaw.
- Also here you can not do without a curly (cross-shaped) screwdriver, but you can replace it with a screwdriver or an electric drill with a corresponding nozzle. Well, and, naturally, we will definitely need tools such as a hammer, a nail puller, a level, a metric tape measure and a pencil. Also, it will not be superfluous to have a carpentry stouslo for cutting lumber under the required degree and a building corner of 90?
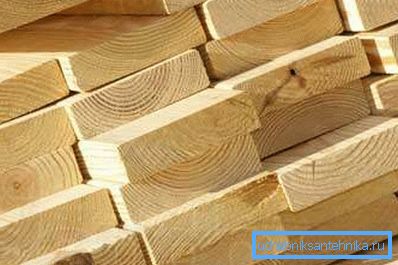
- For construction, we will need a trim board, a bar, and also a rounded bar, if we do not only the head, but start the structure from the ground, in the form of a wooden log house. As the roofing material, you can use roofing felt, slate, shingles or corrugated flooring. In addition, we will need hinges (canopies), a handle for the door, a latch and fixing material (nails and screws).
Note. Before you make the top for the well, all the parts made of wood must be processed to increase their service life. That is, they are not only precisely adjusted in size, but also sanded, impregnated with antiseptics and coated with varnish.
Frame
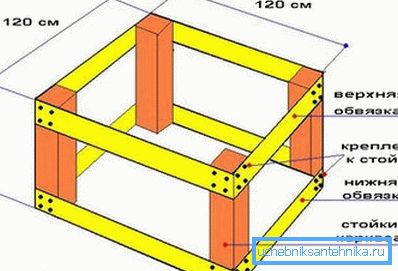
The sizes of materials (timber and edged boards) can be different. But following the logic, we can assume that the structure of their thin lumber will be fragile, and from thick lumber it will be cumbersome. Therefore, let us dwell on the thickness of the edged board 40 mm and on the cross-section of the bar 10080 mm.
So, we begin to make the well head with our own hands, and first of all we will assemble the frame. To do this, we need four racks of pre-prepared timber and eight boards 12 mm wide. All parts should be pre-cut to size and need to be assembled with nails or screws, 90-100 mm long, so that the base is strong and does not fall apart.
Recommendation. For convenience, the assembly can be performed as follows. Two boards are nailed (screwed) on the boards from the top and bottom, and then the same operation is performed with the remaining bars. So we get two walls of the frame, which remains to connect the boards among themselves and our design will be ready.
Now, on the existing frame we need to install two truss trusses, which can be made from the same boards that we used before, but if they run out, then you need to select a material no thinner than 30 mm. Choose the length of the boards yourself, but do not forget that the height and angle of the gable roof depends on this parameter (presumably you can take 1,800 mm). For crossbars and stitches, it is not necessary to use thick lumber - a thickness of 25 mm is sufficient.
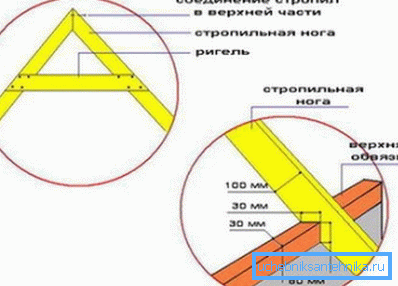
In order to assemble a truss truss we need to cut each truss leg from one (upper) end at an angle in order to connect them with each other with self-tapping screws. To create the desired angle, you can use the carpentry miter box, but there may not be a suitable template, so the markup in such cases should be made by overlaying one board on another. For rigidity, the legs are fastened to each other with bolts, lowering them about 30 cm below the top point, and such work is best done on the ground (on the screed).
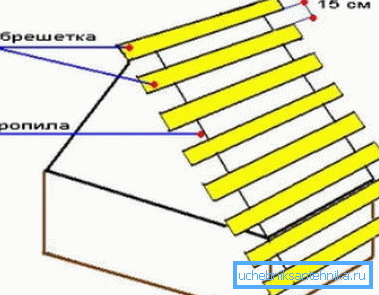
Now you need to make a cut on each truss leg according to the shape of the board (beam) of the upper trim and fasten the structure with nails or screws (it is better to use long, at least 120 mm). In order to give additional rigidity, trusses are reinforced with stubs, and are interconnected by two planks on both sides, which will serve instead of the ridge. Now we need to sew a crate of the same thin boards, fixing them with an interval of 1130-150 mm and making 100 mm protrusions at the front and back sides.
After that, the wellhead for the well is covered with roofing paper, on top of which the roofing material is attached (slate, shingles, corrugated flooring of a different profile). At the corner joints, be sure to install wind boards.
Doors
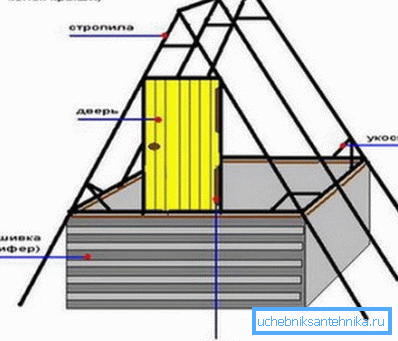
To make a door into a house that has learned, you need to build a doorframe out of a timber into it, and then assemble the door itself, which, in fact, is the most common wooden shield. To this end, tightly fitted boards are sewn with self-tapping screws onto two bars with a thickness of 25-30 mm. To prevent such a construction from being twisted, we apply the principle of the most rigid geometric figure - a triangle, and fasten one more bar diagonally.
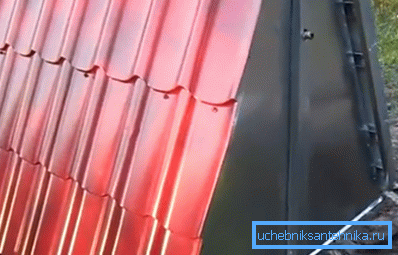
Note. Exactly the same construction as wood, can be made of metal (see photo above), only here instead of a bar metal profiles and fittings will be used, and instead of boards for plating - galvanized tin. For fixing elements applied welding.
Log house
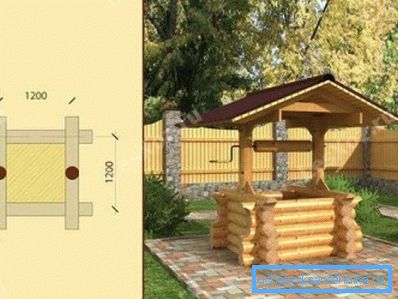
In addition, you can equip not only the tip, but also close the above-ground part of the well, and this can be done in a rustic style (country), but much stronger. As we have already mentioned, you may need a laminated round log, so, it will be useful in this case. Only it will be much better if you lay the adjacent area with paving slabs, or at least fill it with concrete.
Speech about a glued profile has come not without reason, all the same it is the street, and all being here is subject to influence of an atmospheric precipitation. And lumber of such quality is practically not afraid of moisture and can decorate your yard as much as this well will stand. In addition, you can sheathe a log not only the above-ground part of the well, but also embed such elements in the head-board - you’ll have a real Russian Middle Ages.
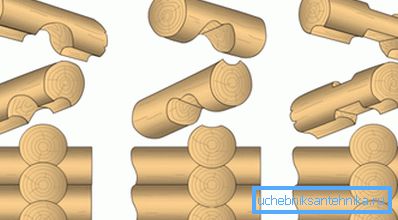
You can order a rounded log, giving the size of your well, more precisely, its above-ground parts, then you will just have to assemble the decoration, as a designer - all the grooves will be made in advance. But, perhaps, to reduce the cost of lumber, you simply purchase the blanks, and cut the grooves yourself. Then you can use three types of compounds, which are indicated in the upper figure, these are a) a half-tree ohlop, b) a crest littered with a crest and c) okhryap.
In fact, such a decorative finish, it is a mini copy of the rustic log house and all production requirements remain unchanged. Considering the not very large diameter of the well, it is not necessary to hammer the shkants into the logs, but if you use solid wood rather than a glued profile, then it is better to make such a connection in the middle of each wall.
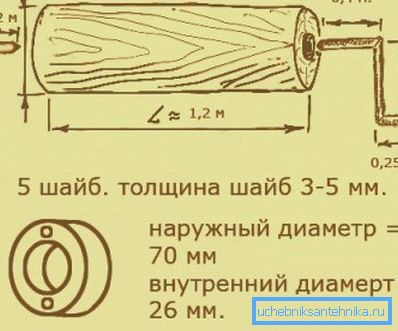
To install the well gates, you will need a solid foundation, and such a foundation will be the skeleton head, but wood is soft enough material to withstand such loads for a long time. Therefore, it is best for the central shaft to make supports from a metal profile.
Conclusion
In principle, the wellheads for wells provide protection against precipitation and they do not perform any technical function. Therefore, the main task is to make the roof, and everything else is a decoration.