Manual drilling of water wells: an economical version of the
Manual drilling of wells for water can be an excellent way out in a situation where financial opportunities do not allow to turn to professionals, and there are simply no other ways to organize water supply.
Of course, this method can be used to drill wells far from everywhere, but in some cases it is worth trying at least.
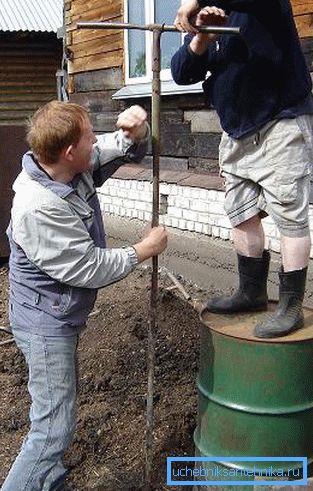
Recommended use of manual technique
The manual method loses to mechanical technology in almost all respects. And yet in some cases you have to do it yourself..
The most common situations in this list include the following:
- There is no need for a deep burial, for example, when preparing a source for watering a summer house.
- There is no possibility of entering the drilling machinery - buildings, flowerbeds, boundaries of neighboring areas, etc., interfere.
Note! Access roads may also be a limitation: if the width of the walkway to the cottage is less than 3 m, you will have to drill by yourself.
- Works need to be carried out indoors - a bath, a cellar, etc.
- There is a need for radical cost savings.
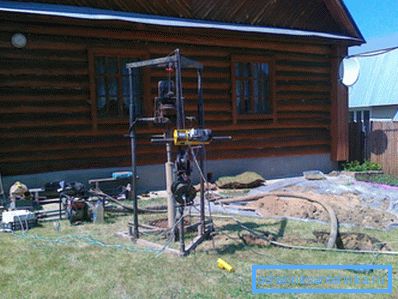
But even in these situations, before starting work it is worthwhile to find out if there is water on the site at all. If one of the neighbors has an already functioning well installed, the task is facilitated many times - you can simply go and ask them. Otherwise, you will have to seek the advice of professionals.
Manual drilling techniques
Screw
Under the manual drilling is usually meant to perform all the work with the use of small-sized equipment.
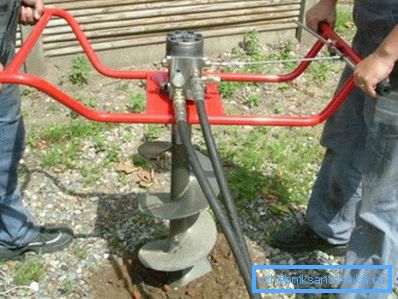
Most often for the arrangement of shallow wells a screw mechanism is used:
- The penetration of the drill is carried out by rotational movements.
- In this case, the blades of the screw cut through the soil and remove it to the surface.
Note! The amount of soil, clay and sand entering the cavity after drilling depends on the angle of attachment of the blades. The most convenient way to use screws with blades at an angle of from 30 to 700.
- If a small unit is used, then a flushing fluid is supplied to the auger.
- When working with a hand drill, most often the work is done “dry”, however, there are techniques that make it possible to facilitate the passage of dense layers of soil due to wetting with a hose.
Columnar
Unlike screw, core drilling is carried out using a special tool:
- The device is a solid steel pipe, at the end of which the core bit is fixed with cutting elements.
- When rotating, the chisel destroys the soil mass, which flows into the inside of the pipe.
- Driving is carried out gradually, with periodic extraction of the drilling part and removal of the soil.
- For immersion to a considerable depth, the pipe is equipped with extension rods.
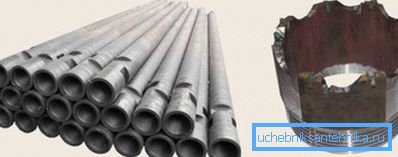
Note! The pipe and core part is periodically washed with water. Also, water (pure or with the addition of a clay suspension) is fed into the well to strengthen its walls.
Shock cable
This technique can also be implemented in a small area. The main thing is to have where to raise the shock part:
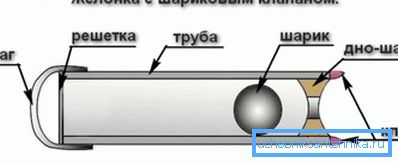
- Massive drilling tool (zhelonka) rises and is dropped on the ground.
- By penetrating under the action of gravity, the edges of the tool cut through the rock, which flows into the cavity.
Note! The shape of the edges and technological openings zhelonka depends on the type of soil.
- Drilling is done gradually, with periodic cleansing of the internal cavity from the substrate.
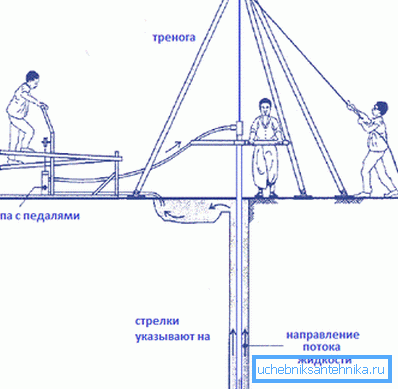
- It is also possible to combine shock and rotational action - for this purpose, special manual winches are used.
- To facilitate the work, experts recommend erecting a tripod up to 2 meters high, but shallow (up to 10 m) wells can be made without it.
Self drilling
Training
And yet most of these techniques require the use of equipment, the price of which is quite high. If we need an extremely low-cost well, we can use the cheapest tool - auger ice drill.
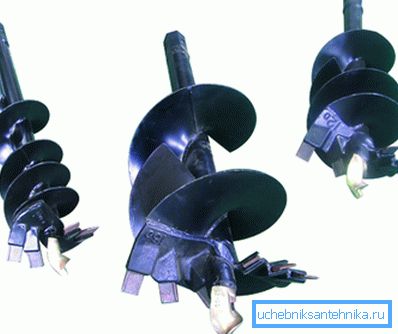
The instruction in this case has the following form:
- First, we make a guide hole - we dig a hole about half a meter deep. It will be useful to us, by the way, when we will form a caisson or a pit.
- We cut the drill's incisors, but not as well as for working with ice. Anyway, in three or four turns, there will be no trace of our efforts.
- To improve performance, several additional hardened steel cutters can be welded to the blades of the drill.
Note! You need to use only the old tool, because after drilling a well you can hardly go fishing with it.
Manual well formation
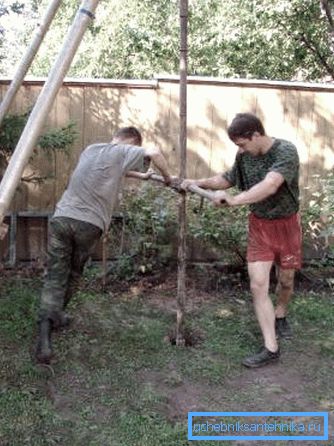
The work is done as follows:
- The drill is installed in the pit and begin to dig it into the ground. To facilitate the work, it is worth modifying, welding the handle of two strong rods to the central part.
- Every three or four full turns, take out the instrument and clean it. If you can rinse - very good!
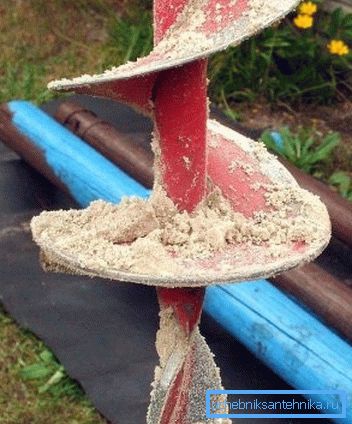
- After deepening per meter, take out the drill and install the first casing. Its diameter, of course, should be slightly larger than the diameter of the cutting part.
- We continue to work, gradually increasing the drill handle with rods with a diameter of 25 mm. For mounting rods use thread or extension with the use of steel "finger".
- We also increase the casing. When using plastic parts it is very convenient to make welded joints. It is most convenient to build up when only 10-20 cm of pipe remain above the ground
We finish the work after water appears in the lower part in sufficient quantities. After that, take out the screw, carefully align the casing and fill the gap between the walls of the well and the gravel pipe.
Note! Pipes can be inserted into the well after drilling is completed. But this will have to flush the source from the sludge, which will inevitably accumulate in the lower part.
Conclusion
Manual drilling of water wells is extremely time-consuming. But even without the use of special expensive equipment, it is possible to equip the source of autonomous water supply. And although we will spend a lot of strength, financial investments will be very modest. So if you want to save money - carefully read the video in this article, prepare everything you need and get to work.