Repair of borehole pumps - the work that can be done
In recent years, the number of wells in household and suburban areas has increased tenfold. And it's not just that the price of drilling has dropped significantly, and thanks to the Internet, drawings of home-made drilling rigs have become available. Many people are attracted by the fact that there will always be water in the house, regardless of the problems in the water supply network, but it is worth remembering that from time to time you will have to repair well pumps, because the equipment life is not endless.

The main ways to prevent malfunctions
As you know, any damage is much easier to prevent than to fix. That is why the ideal option would be routine inspection and maintenance at least once a year, but it is better to do it twice - in spring and autumn.
This type of work is quite simple:
- The pump must be removed from the well, even this work can be quite difficult, especially if the well is deep and the equipment has considerable weight. In this case, it is better to call an assistant.
- After removing the unit, inspect the suspension cable and electrical cable. Next, you should check the case for damage, dirt and corrosion.
- It is better to start the pump for a while and listen to it - any other sound will indicate a malfunction.
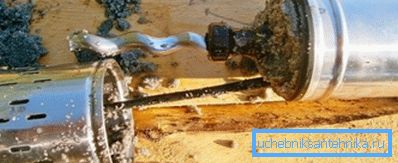
Periodic inspection and cleaning significantly reduces the likelihood of malfunctions. In addition, if sand and silt are present on the pump, this is direct evidence that it is necessary to rock the well, otherwise silting will cause the pump to break, which is unlikely to be fixed.
Types and causes of breakdowns
In order to better understand how to repair a well pump with your own hands, it is worth finding out the causes of certain faults and understanding the most common problems. Of course, in the process of using anything can break, but there is a certain set of so-called "diseases" that occur most often.
Note! No matter how much the seller convinces you that some pump is no worse than a model whose cost is 2 times higher, more often more expensive models are much safer and more durable.

The main causes of failure of pumps
We note immediately that the unit most often fails due to the owners own negligence. Many of them, buying a pump, do not even read the instructions, which spelled out the rules of use and basic safety measures.
Moreover, the overwhelming majority of users have their equipment going down the well and not getting there until it breaks, and this could have been avoided by removing it for inspection at least once a year.
But even with a responsible attitude malfunctions can occur, consider the most common ones:
- The operation of the equipment is “dry”; this happens if the pump is suspended too high or during the water supply process the level in the well drops very much. The mechanism should work with water - it serves as a coolant and lubricant, without it, overheating and seizure, and sometimes the melting of plastic parts.
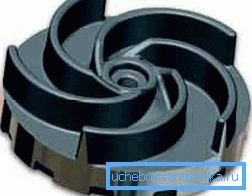
- The use of too powerful a pump, in this case, the fence is too intense, and sand is sucked from the bottom, which can severely damage the main pumping part - the pump impeller.

- Power fluctuations and surges can cause a capacitor and other electrical parts to become unusable. Voltage stabilizers should be used.
- And finally, the cause of breakdowns can serve as a banal wear of nodes.
The most common damage
The most common causes of faults are:
- Faulty accumulator and check valve - these nodes are not included in the system, but if they do not work properly, the pump is not protected from pressure drops and is most likely to receive a hydraulic shock.
- Erosion and damage to impellers, shafts and other moving parts.
- Faults winding and capacitor.
- Sand and silt clogging of the system.

Troubleshooting Tips
If you do not have any abilities and have never seen even the simplest devices in a disassembled form, you should contact the experts. It is also worth doing in the absence of at least a minimum set of plumbing tools. But, if you have at least elementary knowledge and a set of keys and screwdrivers, you can try doing some work yourself.

Here is the simplest instruction for diagnosing and repairing a submersible pump:
- Before starting any work it is worthwhile to turn on the pump to the network and listen, if there are any sounds - clicks, buzz and so on, work can be continued, if there is complete silence, then most likely the magnet burned, which repair is not gives in Such equipment is recycled.
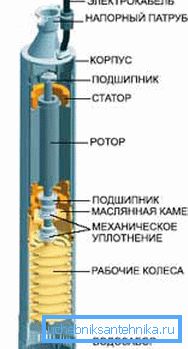
- Next, remove the lower part of the body. In this type of pump the motor is single-phase, it has two windings - starting and working. A capacitor is mounted in the start-up circuit; its capacitance can be up to 40 μF. But first of all, the shaft and blades or impellers are checked - everything should rotate freely and be free from damage.
- The jammed shaft indicates the combustion of the stator winding. It is replaced entirely, although in some models this will not be possible and the pump will have to be thrown away. If everything rotates and is not damaged - the lower part is going back.

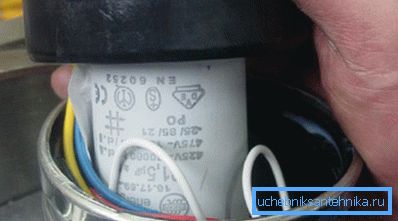
- Before disassembling the upper part, the case should be placed vertically and secured, otherwise oil will flow out of the engine. Under the cover you will see several wires and a capacitor.

- First, with the help of a tester or an ohmmeter, the resistance of the starting and working windings is measured (usually at a working value of 15-20 Ohms, at the starting one - 30-40) - if the device shows infinity on one of them, it means there is a break in it. Small resistance values are evidence that the winding wires close together.
- And finally, if all the data is normal, the capacitor is checked. If the reason is in it, then it should be replaced by the same.
In the overwhelming majority of cases, carrying out all of the above activities allows you to repair the equipment yourself, avoiding significant expenses. As you can see, the work is quite simple, for their conduct does not need electrical engineering education - it is important to carry out all the work carefully and scrupulously.
In addition, you can find out if the pump can be repaired, and you will not spend money on diagnostics in the workshop, because even if the pump is not suitable for restoration, they will take money from you.
Tip! Remember that the pump casing is always located in the water, so when assembling, check the correct position of the gaskets and their condition.
Conclusion
Do not be afraid to disassemble the pump, adopt our recommendations, and you can easily cope with this task. The video in this article will vividly show some of the steps in the process.