Repair of faucets: practical tips and tricks
In this article we will discuss how to repair a water faucet yourself using available tools and materials. The topic of the article is relevant and relevant, as any sanitary device, regardless of the brand, cost and quality of assembly, sooner or later fails and needs repair.
Of course, to solve this problem, you can call a professional plumber, but, unfortunately, the price of the service will be high, and therefore we will try to cope with the task yourself.
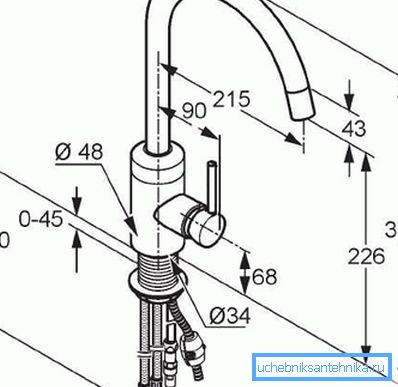
Basic information about the valve device
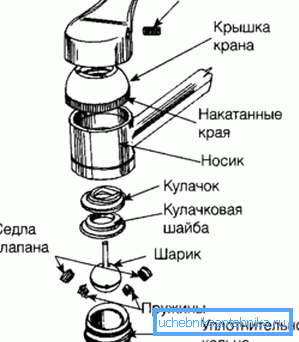
In order to quickly and effectively resolve the problem, you need to have an assembly drawing of a water tap at hand. With such a scheme, you can get a general idea of the design of the sanitary device and understand what the problem is and how it can be solved.
So, let's try to determine what constitutes a water faucet.
Among the main elements we note the following:
- Housing - as a rule, it is made of brass, copper, bronze, stainless steel, less often of silumin. The body is equipped with fasteners and elements for the installation of a spout. In some models, infrared sensors are incorporated into the body to automate the water supply process.
- Shutter (valve) is a device regulating water pressure. Thanks to the closure, in the mixers you can adjust not only the pressure, but also the water temperature. The shutter, depending on the modification of the sanitary device, can be made in the form of a polished metal ball with holes, in the form of a cylinder or a cone. Regardless of the type of valve, the regulation of the water supply depends on the position of the through hole and on how much it coincides with the hole in the housing. If the holes are aligned, the water passes without any restrictions. If the shutter rotates 45 degrees from the open position, the pressure drops by about half. If the shutter rotates about 90 degrees relative to the hole in the body, the flow is blocked.
Important: In addition to the described scheme, there are other solutions, such as three-way valves. But, despite some design features, the function of the shutter is to limit the throughput of the plumbing fixture.
- Spindle (stock) with a flywheel - These are the elements that allow you to manually adjust the operation of valves. The spindle is firmly attached to the gate, while at the other end of the spindle a flywheel is fastened - the same spinner, which we rotate, opening and closing the water. However, in addition to valve modifications, there are lever devices, the repair of which is more complicated.
- Spout, without which the scheme of the tap would be incomplete, is a section of pipe through which water flows directly into the sink. Spouts can vary in configuration and size, which largely determines the comfort of using sanitary equipment.
Now that we know what the drawing of the body of the faucet is, it’s time to consider the most common failures and how to fix them.
Elimination of leaks on traditional valve taps
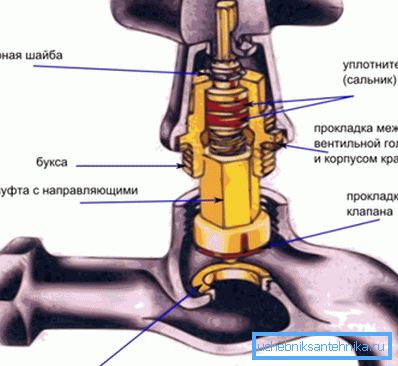
Water leaks from the spout of the mixer - this is the most common type of malfunction, with the elimination of which you can cope on their own. A common cause of such a malfunction on a traditional valve tap is the chipping or thinning of the rubber gasket.
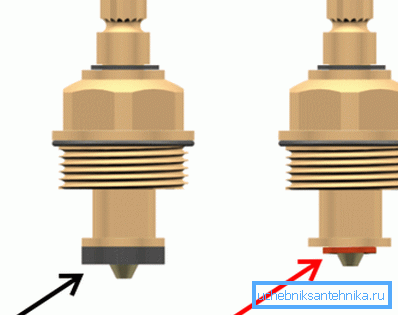
The troubleshooting instructions are as follows:
- Shut off the water supply in order to proceed with the repair.
- With a wrench or wrench, unscrew the core (head).
Important: If the core body is made of chrome-plated material, turn the aluminum strips under the key or simply wrap the body with masking tape. Thus, you can avoid scratches and scuffs.
- After the core is turned out, we turn it upside down. On the reverse side of the flywheel, there is a valve and a gasket fixed on it. Over time, due to frequent openings and chainings, the gasket becomes thinner and needs to be replaced. The old gasket is tipped off with a screwdriver or a knife, and in its place a new gasket is put on, which can be purchased at most specialty stores.
- Before you twist the core to its original place, you can also replace the sealing ring made of flexible plastic, which ensures the tightness of the abutment of the core to the valve body.
- After the core is set to its original position, turn on the water supply and check for leaks. If there are none, the repair was completed successfully. (See also the article How to choose a sink faucet: features.)
How to make a replacement gasket
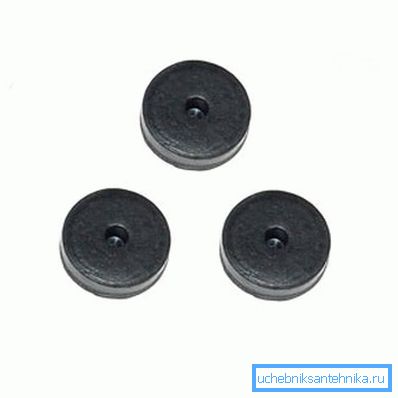
The price of gaskets in the plumbing shop is not high, but sometimes products of the right size may not be available, and why run anywhere, if the gasket can be made with your own hands without leaving your home.
For the manufacture of a replacement gasket on the crankcase, you will need rubber thickness, which will be 1-1.5 mm greater than the thickness of the old gasket. Ideally, use a special food rubber, which does not affect the quality of water and at the same time during the long-term operation practically does not crumble.
The distinguishing quality of a properly selected rubber is its hardness. Laying material must be firm and tight. If the rubber is porous, then in all likelihood it is not suitable for repairing a crane.
Semi-solid technical rubber is characterized by optimum qualities (GOST 7338-90). Given that such a material in the household is not easy to find, for the manufacture of gaskets, you can use the sole of the old unnecessary shoes.
A piece of cut material will need to grind to the desired thickness, using sandpaper. Next, the old transfer rests against a piece of rubber and encircles it.
Then cut with a knife a layer of rubber so that the result is the most consistent with the applied contour. In the center of the rubber disk, drill the hole in the hole that was made in the old gasket.
Important: For the tightness of the new gasket, do not pierce the hole with a knife, namely, drill, so that it turns out even.
We fix the noisy mixer
If, as a result of opening the valve head of the mixer, a characteristic vibrating noise is heard, it is time to check the condition of the rubber gasket.
The instructions for fixing the problem are as follows:
- As in the former case, unscrew the valve head.
- Inspect the rubber gasket, namely its edges
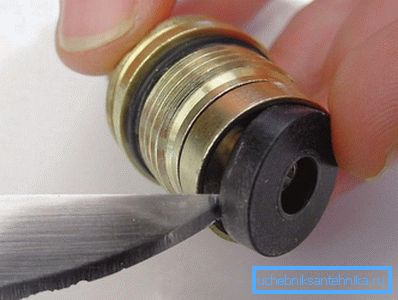
- If from long use, the edges of the gum are worn, cut off the gasket at an angle of 45 degrees and thus eliminate the worn spots. If the gasket is badly worn out, we change it to a new one.
- Set the head to its original position. If the rubber is tightly attached to the valve, there will be no vibrating noise.
So, we looked at how to carry out the simplest repair of a water tap with our own hands. Now we will decide on how to repair plumbing fixtures based on a ceramic cartridge.
Replacing Ceramic Crane Box
Most modern faucets are made using a ceramic faucet box. How does this type of core differ from a traditional rubber-coated head?
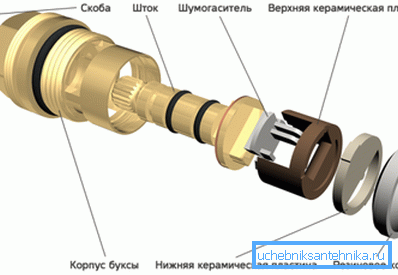
The core with a ceramic shutter is an order of magnitude more durable than an analog with a rubber band. Moreover, the core with a ceramic shutter is easy to repair, since it cannot be repaired, but can only be replaced.
Considering that the price of a ceramic cartridge is low and such a detail can be found in virtually every market, the prospect of such a repair seems more than attractive.
Replacing the ceramic core may be necessary if water is constantly leaking or dripping from the mixer spout.
Important: There are several modifications of the ceramic crane box on the market, so when purchasing a new core for the mixer, make sure that this part fits in length. In order to eliminate the possibility of an error, go for a new core with an old part.
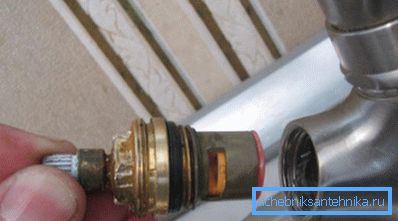
The replacement instruction is as follows:
- Shut off the water supply to the mixer.
- At the top of the flywheel with a flat screwdriver, hook a plastic plug under which we find a screw.
- We unscrew the screw and remove the flywheel from the spindle;
Important: If the screw, screwed into the spindle, does not give in the first time, do not try to unscrew it by force, as the screwdriver will “lick” the notch. Try to lubricate the gap between the spindle and the screw with a liquid such as WD-40 and try to unscrew after a few minutes. If this method did not help, we insert a metal drill of the appropriate diameter into the electric drill and drill the screw head.
- Manually unscrew and remove the plastic "skirt";
- Use the spanner wrench to unscrew the core.
- We wipe the threads cleanly in the valve so that inside there are no pieces of the seal left of the old core.
- Screw in the new part until it stops but without exerting excessive force in order not to damage the thread.
Conclusion
So we looked at examples of drawings of water taps, and in addition we figured out how to fix the most frequent problems with plumbing equipment. To make these recommendations and tips easier to put into practice, watch the video in this article.