Repair of water taps: restoring the operability of valves
Each one of us must know how to fix a water faucet. Moreover, in most cases, the malfunction can be resolved fairly quickly and at no extra cost, but you need to wait for the wizard’s call for more than one hour, and it will take a lot of money for the work.
In our article we will talk about the most common failures of water taps, after which we present repair algorithms for most models.

Main malfunctions
Before repairing the faucet, you should take the time to analyze the situation. So we will be able to understand exactly what actions are worth taking, thereby saving a lot of time.

The list of breakdowns includes the following items:
| Breakdown | Description |
| When the valve is closed, water drops flow out of the tap. | The locking mechanism becomes unusable. To eliminate the problem, you must either replace the element responsible for the overlap of the tubular gap, or install new sealing gaskets. |
| Water drips at the point of attachment of a spout, hose, or valve. | The tightness of the connection is broken. You can restore it either by replacing the gasket or by installing a sanitary winding on the threads. |
| Flywheel | The flywheel housing has come off the stock or the stock has failed. In the first case, it is enough to install the part in place, in the second - it is necessary to perform replacement of the locking element. |
| During operation, the crane emits a buzz. | The gasket is worn out and its edges begin to vibrate under the pressure of water. Usually, to eliminate extraneous sounds enough to replace the gasket. |
| Leak on body or spout | The integrity of the product is violated. Temporarily can be sealed with the help of "cold welding", but at the first opportunity it is worth replacing the faucet. |
| Splashes fly out of the aerator, the flow of water is difficult. | The aerator grate is clogged and needs cleaning. |
In principle, this table describes the main faults. Other situations that may arise during the operation of the crane, are derived from the already analyzed, and therefore need to be repaired by a similar algorithm.
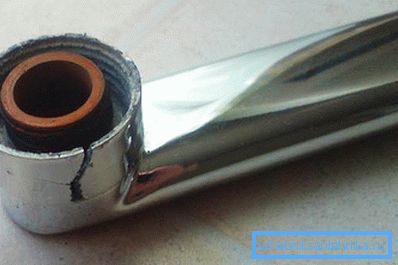
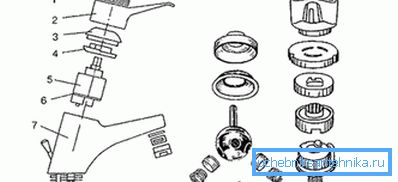
Also, before starting work, you should carefully familiarize yourself with the design features of the model you have installed. As a rule, the assembly drawing of a water tap comes with the product itself, so this document should be retained when installing a new mixer.
Note! If you didn’t find the scheme, you should enter the search query “assembly drawing method for specifying a water tap” in the search engine and choose your model. Most manufacturers put technical documentation online, so the chance to find what you need is very high.
Now we will try to figure out what to do in each case. And let's start with the most common situation, namely, by eliminating the causes of the leakage of the locking element.
Box models
Box replacement
Cranes, in which the bush acts as a stop valve, are amenable to repair the easiest.
The algorithm of action here is as follows:
- Before you disassemble the faucet always shut off the water on the riser.
- Remove the cover from the flywheel, under which the fixing screw is located.
- Unscrew the screw Using a screwdriver, then remove the flywheel from the guide.
- Dismantling decorative cones, closing fixing box.
- Using the adjustable wrench, we unscrew the outdated bush from the socket. We clean the cavity of sediment and soak it with a rag, removing the remaining water.
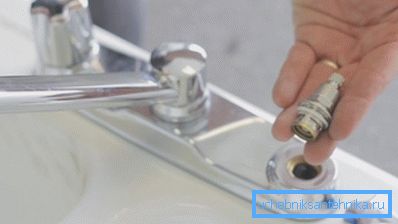
- We put in place a new bush, screwing it along the thread. At the same time it is not necessary to apply excessive efforts in order not to damage the structure.
- Next we need to check the valve for leaks. Turn on the water on the riser and inspect the installation location of the axle box.
- Capturing stock pliers, cranking it several times. The flow of water must be switched on and off quickly and clearly.
- Reassemble in the reverse order., installing decorative cones and securing the flywheel on the crane.
Repair of axle box
In some cases, the crane box can be repaired. It all depends on their design.
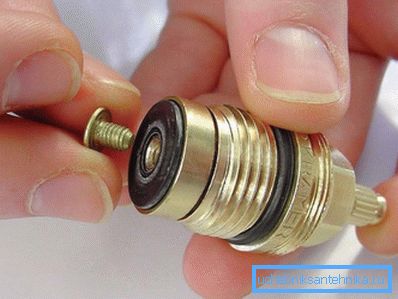
Products with rubber gasket are more maintainable:
- With a screwdriver, unscrew the screw that secures the gasket on the end.
- We dismantle the sealing element and install a new one of appropriate size in its place.
- Fasten the gasket with a screw, clamping it tightly enough, but without deformation.
Ceramic boxes will be somewhat more difficult:
- Remove from the end of the rubber sealing gasket, then remove the end cap.
- We dismantle the ceramic plates, unscrewing their fixing element if necessary.
- We clean the internal cavity of the axle box, removing contaminants that can lead to leaks.
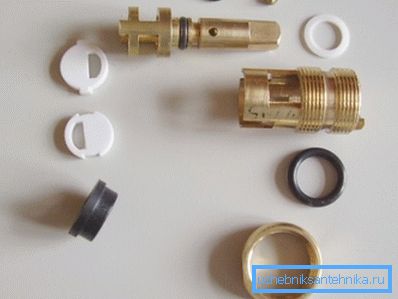
- We return the plates in place, observing the correct position: when turning the stem, they must completely block the hole, interrupting the flow of water.
- We complete the assembly by installing the dismantled elements in place.
Note! Often the cause of a leak is the wear of the ceramic plates themselves, so you may need to replace them completely. And to find these parts is quite difficult, and the price of the repair kit will be not much less than the cost of the new axle box.
Ball and cartridge models
Dismantling crane
The device of the tap and the mixer, which is controlled by one lever, differs from the axle box design.
Accordingly, the dismantling of such a product for repair must be carried out according to another scheme:

- First, raise the red and blue pad on the front panel.
- Under the cover is usually located a screw under the cross screwdriver or hexagon - unscrew it.
- Next, remove the handle, gently disconnecting it from the rod ball or cartridge locking mechanism.
- The next stage is to provide access to the valve itself. To do this, unscrew one or two nuts.
Note! Very often, manufacturers make an internal, locking nut with grooves for a special tool. You can either buy a similar wrench, or try to unscrew the part with your own hands, using the tools at hand.
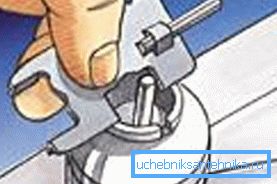
Removing the nut, we get access to either the cartridge or the ball valve. They are dismantled quite simply, and replacement will not cause difficulties.
Replacing locking and sealing elements
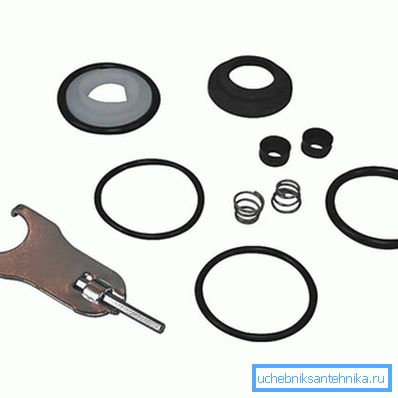
To restore the performance of the single-lever mixer, most often you need to completely change the functional element.
The instruction recommends to act as follows:
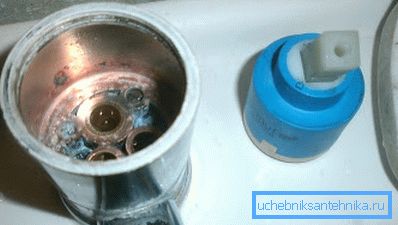
- Remove the cartridge from the socket, pulling it vertically up along the guides. If the part is skewed, you can correct its position with a gentle side impact.
- We clean the cavity under the cartridge from rust and debris, which can cause a leakage hazard.
- Install a new cartridge, fix it with one nut and check how well it covers the water. If there are no leaks, and the adjustment is working properly, we perform the assembly of the mixer.
Ball valves have their own characteristics. Their main advantage lies in the fact that the ball itself breaks extremely rarely, because repair is usually the replacement of gaskets. We act like this:
- Holding the rod, remove the ball from the socket.
- Using tweezers or small pliers, we remove spring-loaded gaskets, which press the ball to the body.
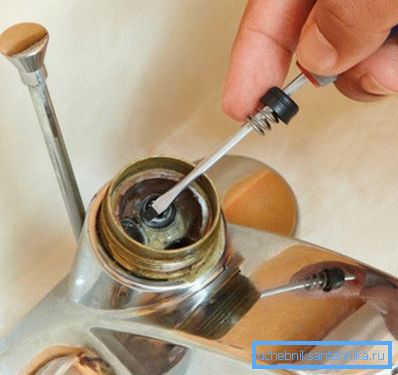
- We perform the replacement of gaskets, after which we install the ball in place.
- From above we lay a new sealing ring and clamp the valve with a nut for the mixer.
- As in the previous cases, it is better to check the tightness of the structure until complete assembly.
Other repairs
Minor troubleshooting
In addition to fixing the locking mechanism itself, it is sometimes necessary to carry out other measures to restore the working capacity of the crane.
For example, if there are problems with the aerator, we act as follows:
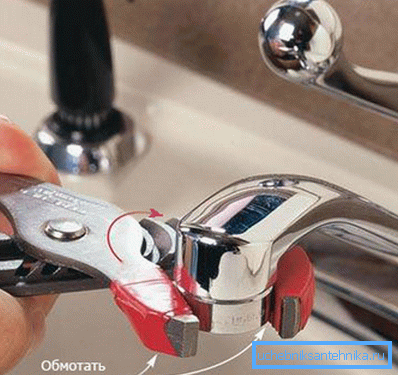
- Using a wrench with plastic lining, gently grab the aerator and unscrew it from the spout.
- We take out the installed mesh and carefully wash it, removing all contaminants.
- At the same time, we clean the mixer spout with a flexible brush, trying to remove the layers from the inner walls as much as possible.
- Screw the aerator on the spout, making sure that the thread is not twisted.
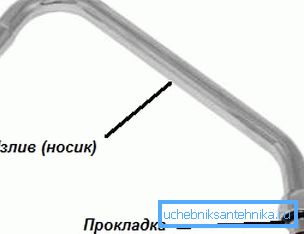
If the leakage occurred in the place of fixation of the swivel outflow, we act as follows:
- Carefully twist the flare nut using an adjustable wrench. Remove the "gander".
- Remove from the nest rubber gasket.
- In its place we install a new one. The diameter and thickness of both elements must match.
- We return the spout to the place, fixing it with a cap nut.
Coverage Recovery
Some problems do not affect the operation of the mixer, but significantly impair its appearance. As a rule, these include scratches, chipped coatings, abrasions, etc. And although the full restoration of chrome plating or nickel plating is quite expensive, throwing a faucet and buying a new one is not necessary at all.
You can return an attractive look to the product by painting:
- We dismantle the mixer, completely disassembling it and removing all non-metallic parts.
- Metal surfaces are polished, removing scratches, and then thoroughly degreased.
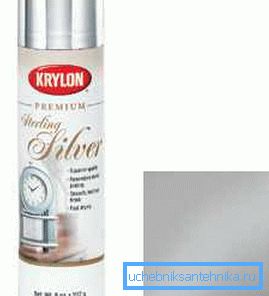
- Apply metallic paint to the skimmed mixer. For application it can be used either an aerosol can (cheap, but not very high-quality), or an airbrush (quite expensive and difficult, but the coating is more even).
- When the paint is dry, we treat the surface with a special protective polish for metallic. You can buy it at any automotive chemistry store.
Note! If the scratches are minor, then such polishing can be applied without painting: it restores the factory chrome / nickel plating well.
- After polishing is completed, we assemble the crane and install it in place.
Conclusion
Repair of the faucet and mixer can be carried out according to different schemes. It all depends on how well we analyze the damage and what decision we take at the planning stage. You can explore the troubleshooting steps yourself by viewing the video in this article.