Roof for a well - species and construction
A well on a plot of a country house or summer house is not only a source of clean fresh water for cooking or watering, but at the same time it is part of the decoration. That is why it is important not only to properly equip it to perform its immediate functions, but also to decorate it decoratively, so that it simultaneously stands out as a separate structure, being a highlight of the site, and complements the main residential structure.
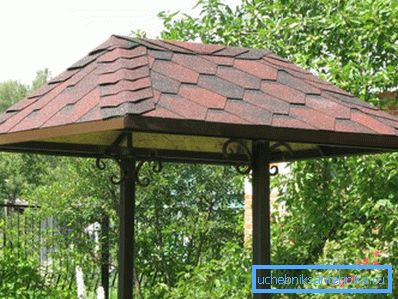
In order to protect the source from rainfall and surface debris, a roof is needed on the well, which at the same time closes the source shaft and decorates it. For the construction of floors it is not necessary to have special theoretical and practical skills, it is enough to purchase the necessary material, to prepare a tool. Consider the option of building a conventional dual-pitch roof on the bearing pillars.
Material used
Before you make a roof over a well, you will need to purchase the necessary material (find out here how to dig a well).
For construction you will need:
- timber 50x100 mm for racks and the base of the roof;
- bar 50x50 for rafters;
- flat board for roof plating;
- antiseptic solution for wood impregnation;
- bitumen mortar for coating support columns;
- paint or stain for decoration and additional protection of wood;
- self-tapping screws;

- metal corners and plates for bond strength;
- cement for concreting support bars;
- crushed stone or crushed brick.
Roof for roof
Next, consider the base of the roof - the roof (see also the article Muddy water in the well - one, but very many-sided reason).
As a roof in order to sheathe the roof of the well are used such materials as:
- tile;
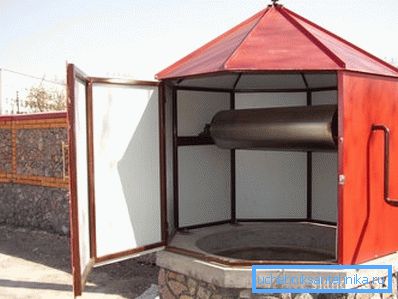
- metal profile (photo);
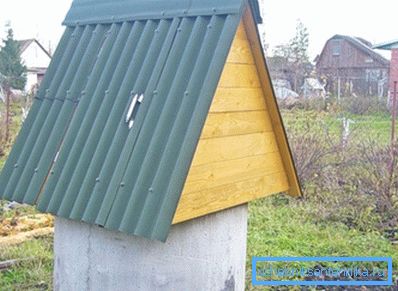
- slate (photo).
So, consider in more detail:
- Tiling - Perhaps the oldest existing roofing materials. This tile is ceramic, it has an amazing appearance, durability and resistance to the hardships of the external environment. If you want your well to be a real decoration of the site, then the tile is definitely your choice.
Of the unpleasant moments, of course, it is impossible not to note such a factor as the price of this type of coverage. Therefore, it makes no sense to use tile if your well will be located on the outskirts of the site and will perform a purely utilitarian function.
However, the modern market presents numerous compromise options, such as metal tiles, shingles, etc. These types of coatings have a good appearance for a very reasonable price, but you should not count on the durability and durability of a real tile.
- Metal profile (professional sheet, professional flooring) - is a sheet of metal, which by rolling is given the curvature of a certain profile in order to create the necessary rigidity. It has anti-corrosion paint coating. The material is easy to handle and has an attractive appearance.
The main disadvantage is the sensitivity of the material to physical impact, which is very likely in the process of opening the well door, handling metal containers, buckets. Having lost the coating, the material is unlikely to withstand the aggressive environment of permanently high humidity.
- Slate - traditional among roofing materials, the average price is slightly higher than that of the metal profile, but in general their cost is comparable. Often complain about the unattractive appearance of this type of coating, but the modern market offers a wide selection of colored slate, whose aesthetic characteristics are quite high.
The material is less technologically advanced than the professional sheet (does not bend, breaks, is less amenable to cutting), but it has much greater chemical resistance, which is important for the structural element of the well.
How to make a roof of a well, we will tell below.
Construction process
Before the construction of the roof of the well with your own hands, all the wood used must be soaked in an antiseptic solution, which prevents decay and increases resistance to the effects of destructive environmental factors.
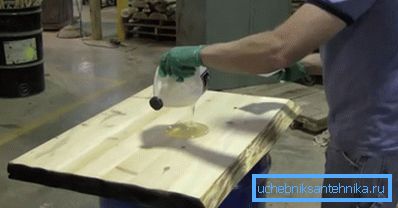
Tip! As an antiseptic it is possible to use liquid glass diluted with water 1: 1.
- First of all, on the opposite edges of the well, it is necessary to dig holes for the installation and concreting of the supporting bars, on which the roof will be installed. The pit is dug to a depth of 40-50 centimeters, it is necessary to lay a layer of crushed stone 5-10 cm thick at the bottom and tamp it down.
- Supporting bars before installation must be fluffed with bitumen at the bottom, which will be immersed in the ground. Bars are lowered into the pit, we set exactly on the level, we fill the free space with large gravel or crushed brick, we fill it with liquid cement mortar.
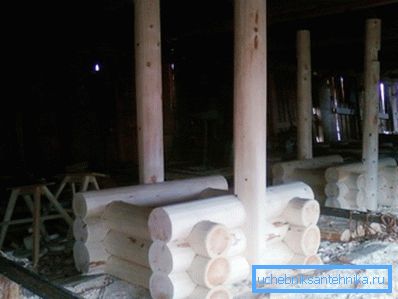
- Roofs for wells in such cases are collected separately and installed on the supporting bars in the ready state. In our case, while the cement freezes, you can begin to create a frame for the roof.
- The base is assembled on the ground in the form of a square or log of 50x100 mm. It is important to remember that the sides of the base should be slightly larger than the outside diameter of the well ring. Two of the sides will be attached to the support bars and the outer distance between these sides of the base should not exceed the outer distance between the support bars.
Tip! If you need a wider base, then in such cases an additional transverse beam is fixed between the supporting sides of the base, which will be installed on the supporting columns.
- In the center of the two sides of the base, which will be attached to the support bars, two racks are installed strictly vertically. These racks are connected to the corners of the base with the help of 50x50 boards, which will serve as rafters.
- Vertical racks are fastened to the base with screws using special metal angles, which provide additional strength of the connection. If the roof of the well is made very massive, then instead of screws it is better to use bolts.
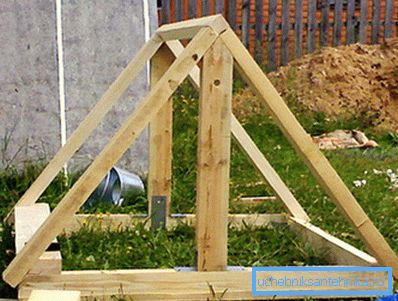
- The angle of the roof can be adjusted due to the height of the uprights. For a stronger connection rafters with racks and base, it is recommended to make angular sections on the rack corresponding to the angle of the roof. Also with the help of a chisel, on the basis you can cut a seat for rafters with your own hands.
After the cement of the support bars has hardened enough and you have the skeleton of the future roof ready, you can install it in its place and securely fasten using metal corners and screws.
Roof installation
To install any kind of roofing, you need to install a solid base on the frame. For this, flat boards or wood panels are used. If you use slate or metal profiles, it is enough to fill several boards with a distance of 30-50 centimeters between them, since these roofing materials do not have flexibility and boards are needed only for its secure fixing.
If you use a soft tile or ruberoid coating, then its foundation requires a continuous surface, since the material has a soft base and exactly repeats the relief of the base.
Conclusion
This instruction, as well as the video in this article will be useful to you when building a roof for a well, because it allows you to plan your actions correctly, prepare all the necessary tools and materials in advance, and also take into account all the nuances that may arise at all stages of construction (learn also how independently make a clay castle for a well).
The roof of the well, created with his own hands, may have some constructive innovations or unusual design solutions that were invented by you personally in the process of work, which will make your creation unique.